
If you own a Scrambler, make sure you hit my page before you go!
My Other Scrambler pages: Page 1, Page 2, Page 3, Page 4, Page 5, Page 6
The "Grape-8" Frame-up of 2006/2007/2008!
Last Update: 01/09/10
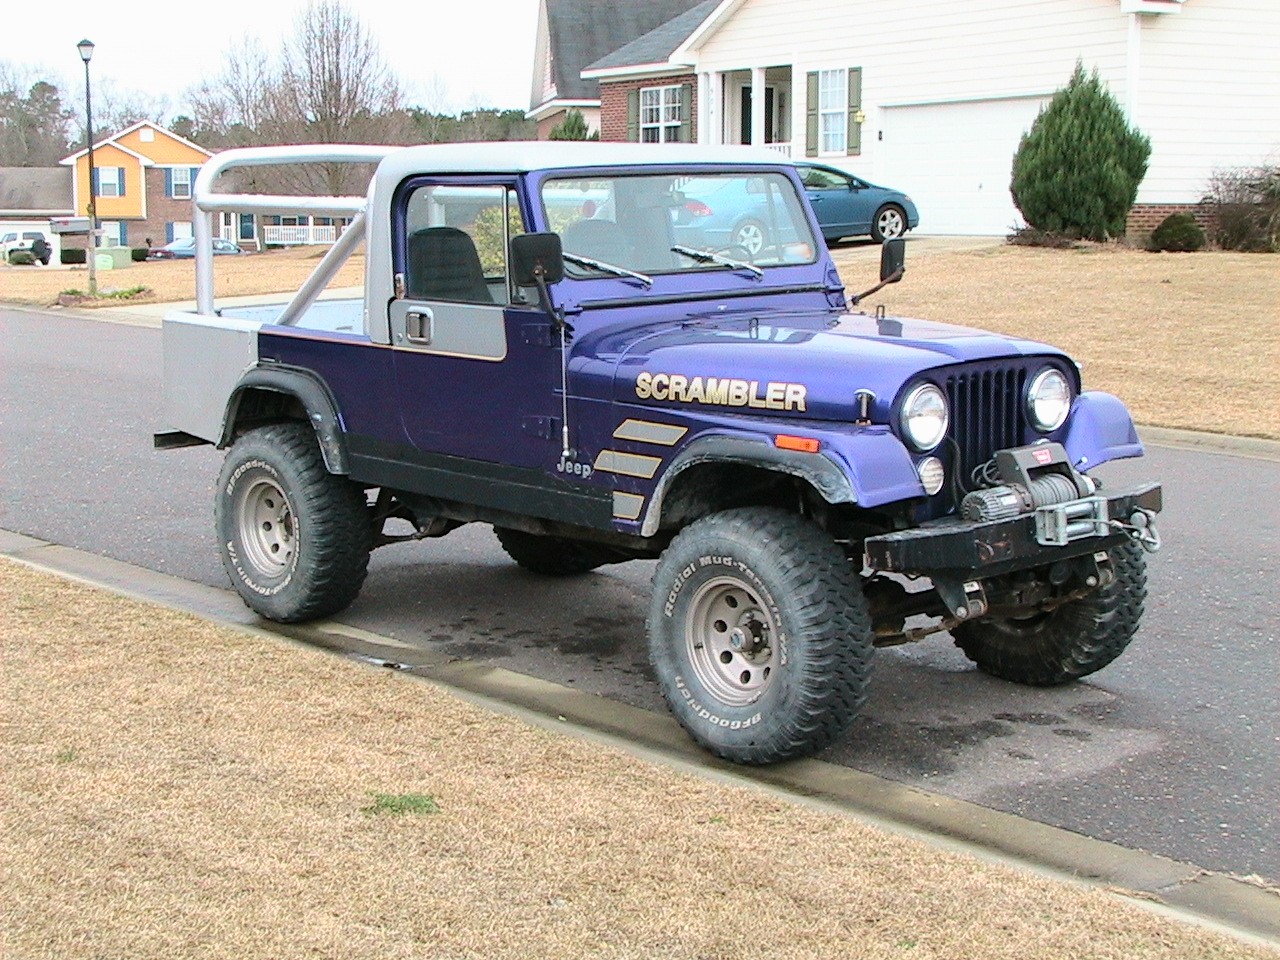
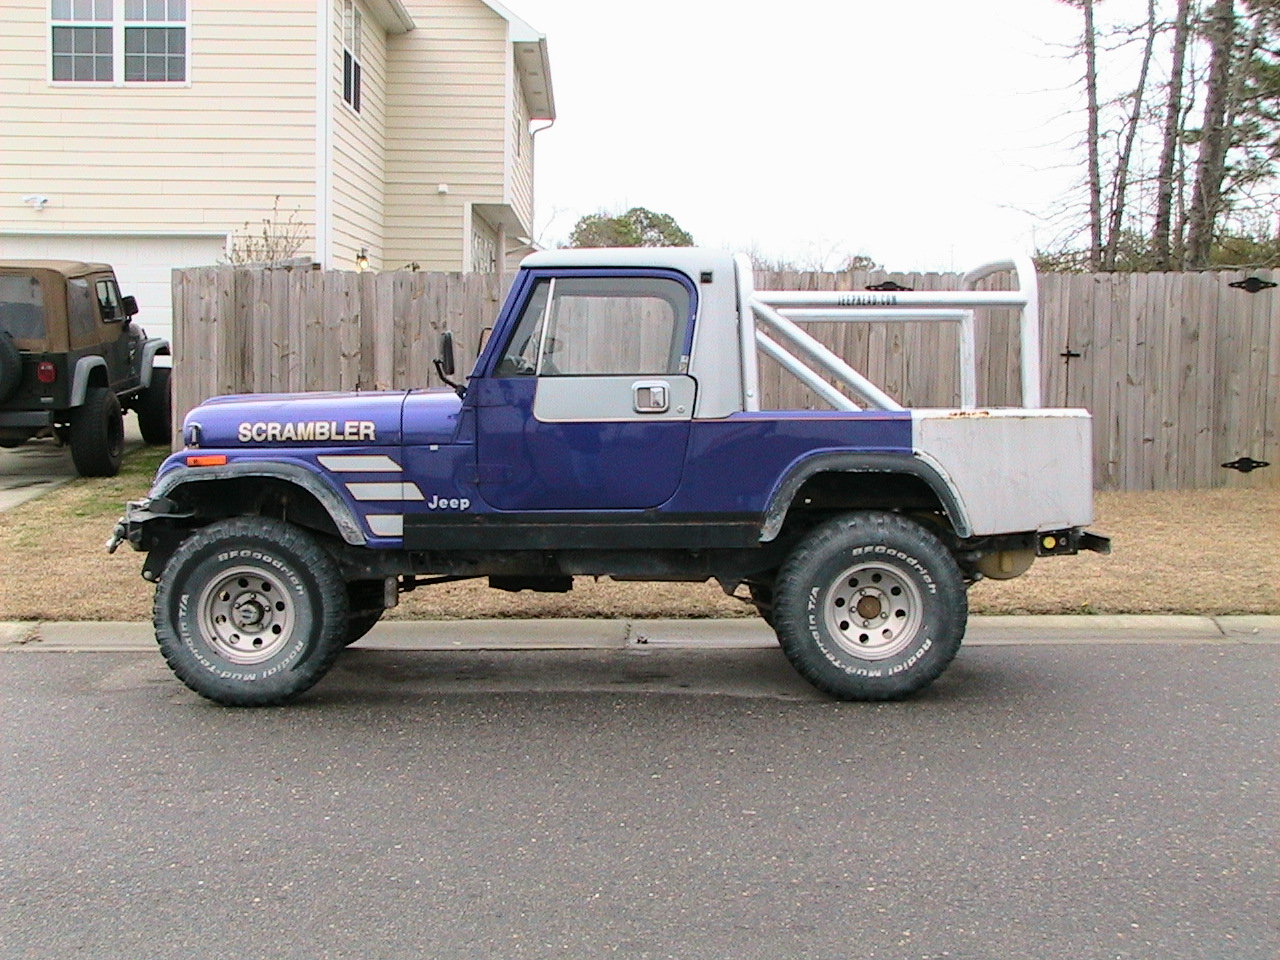
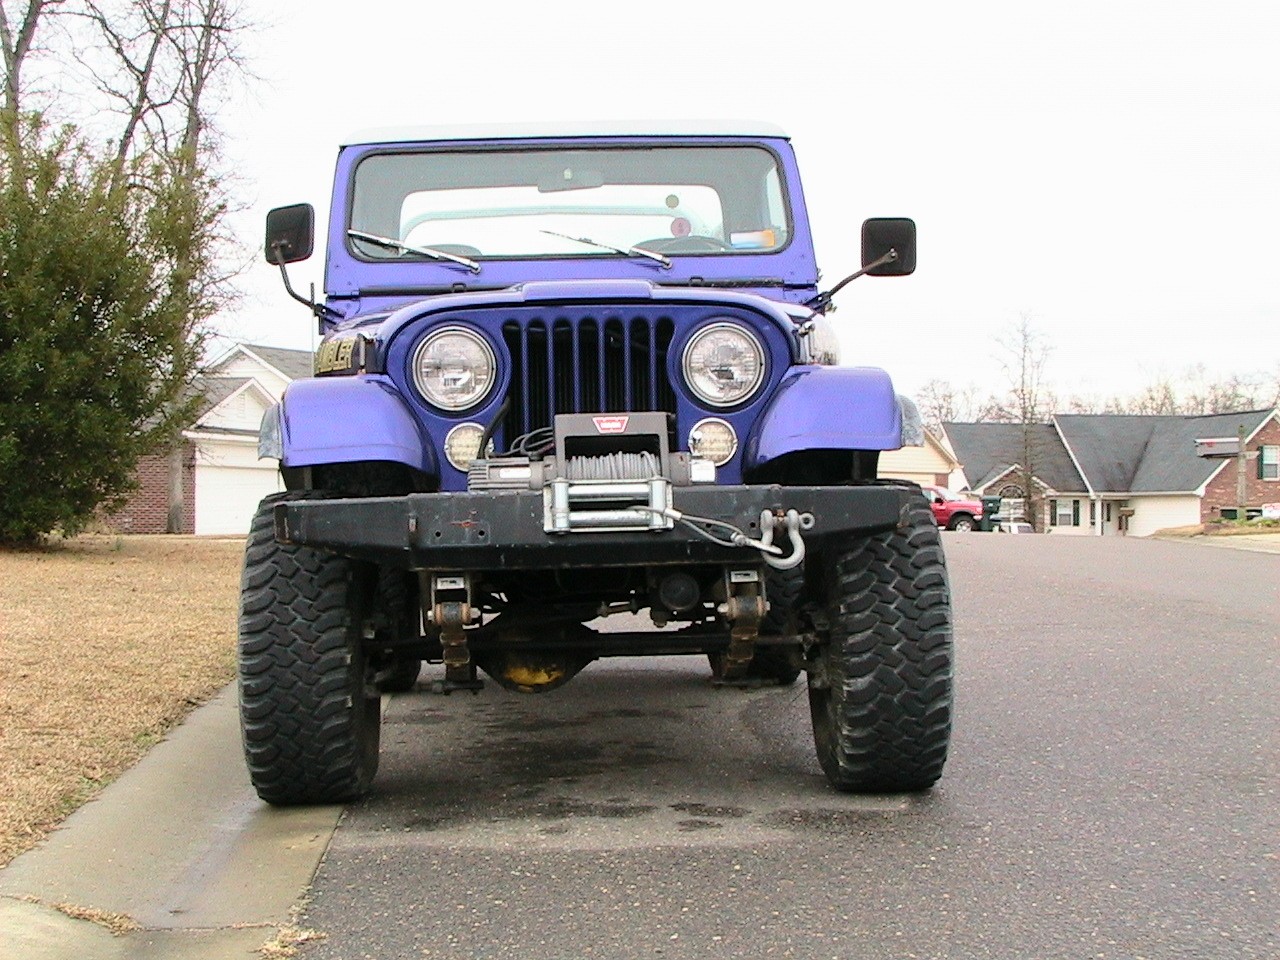
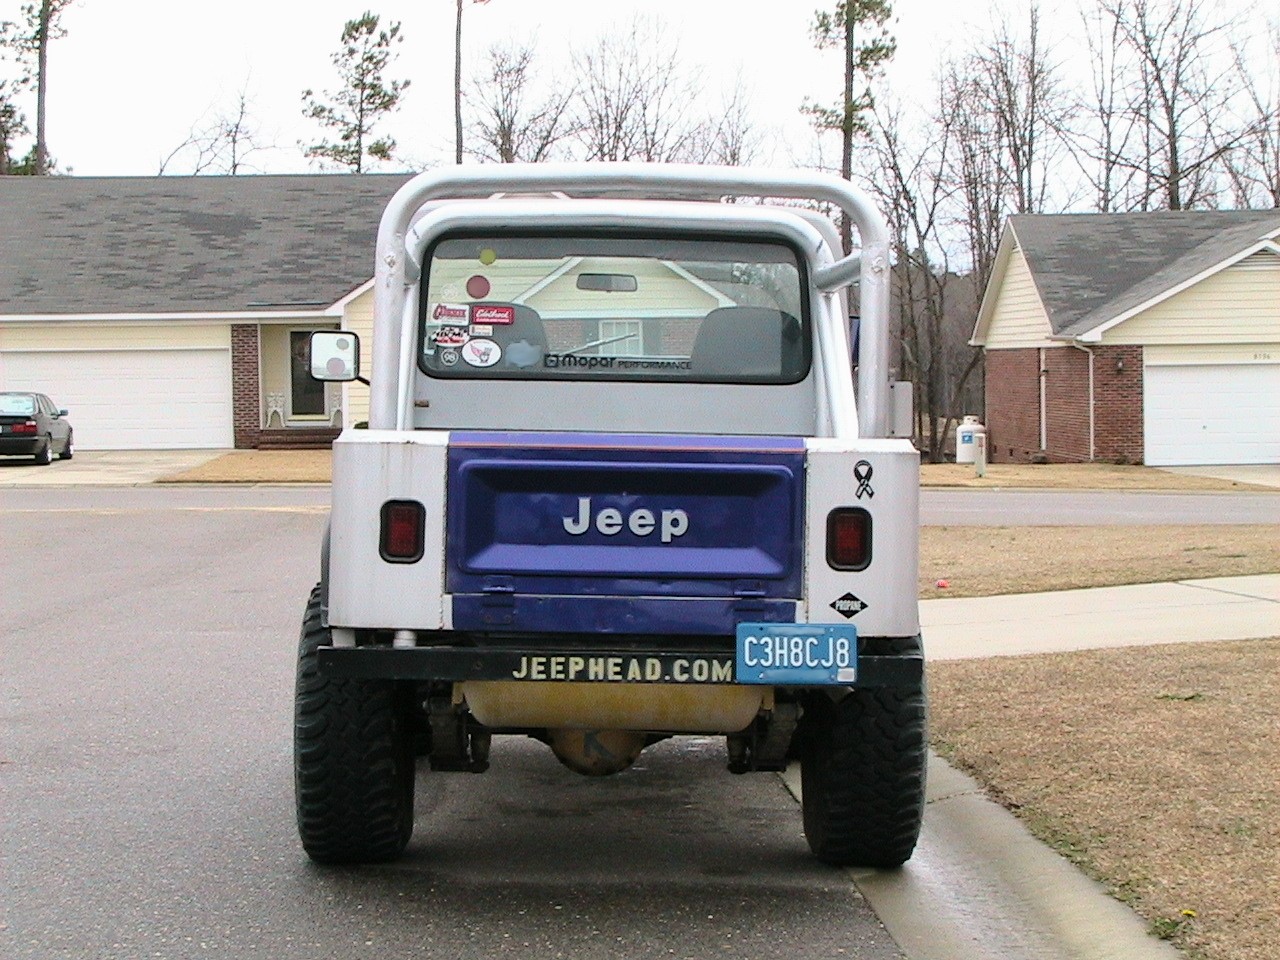
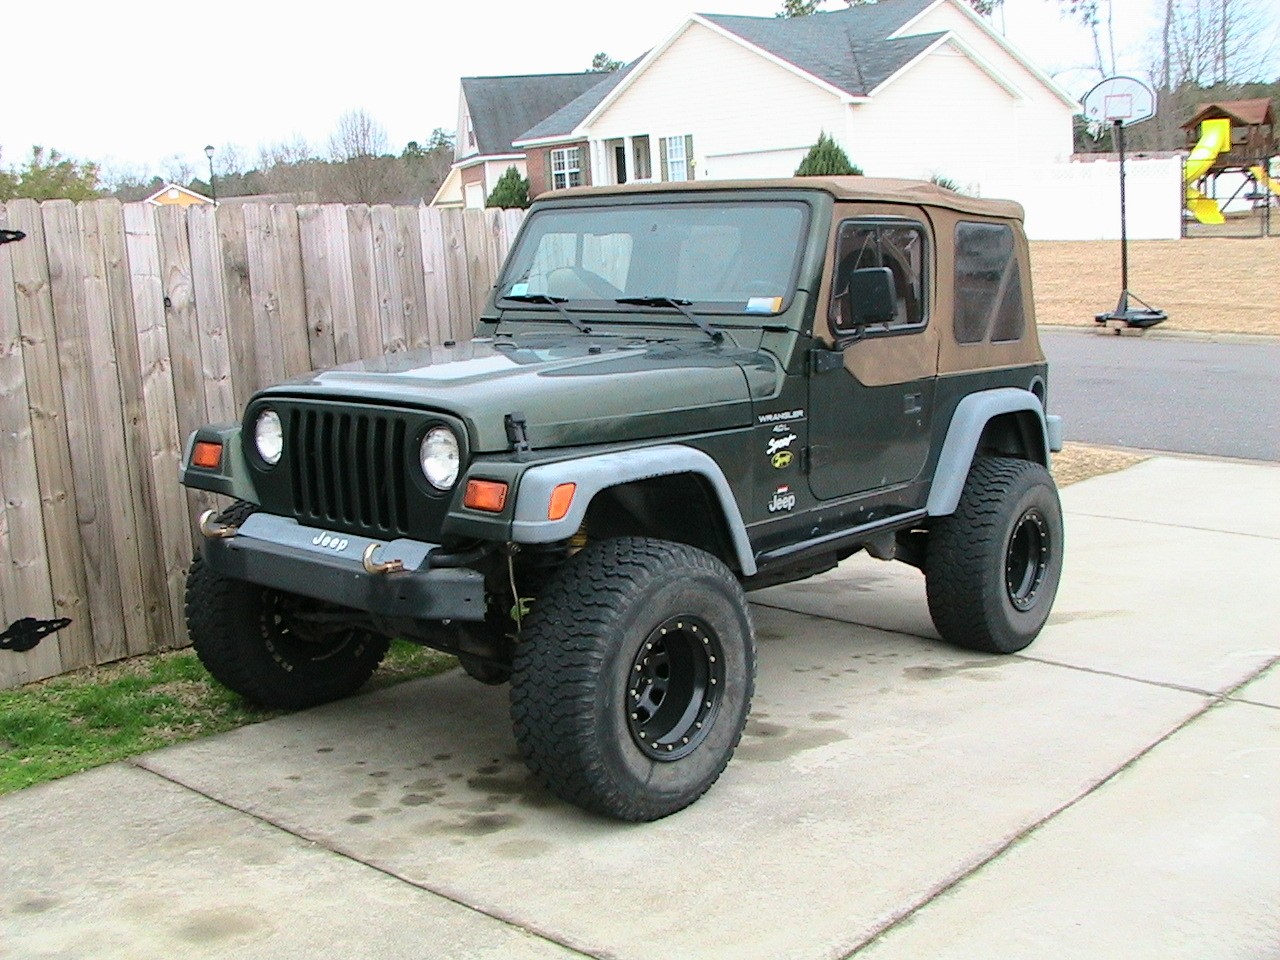
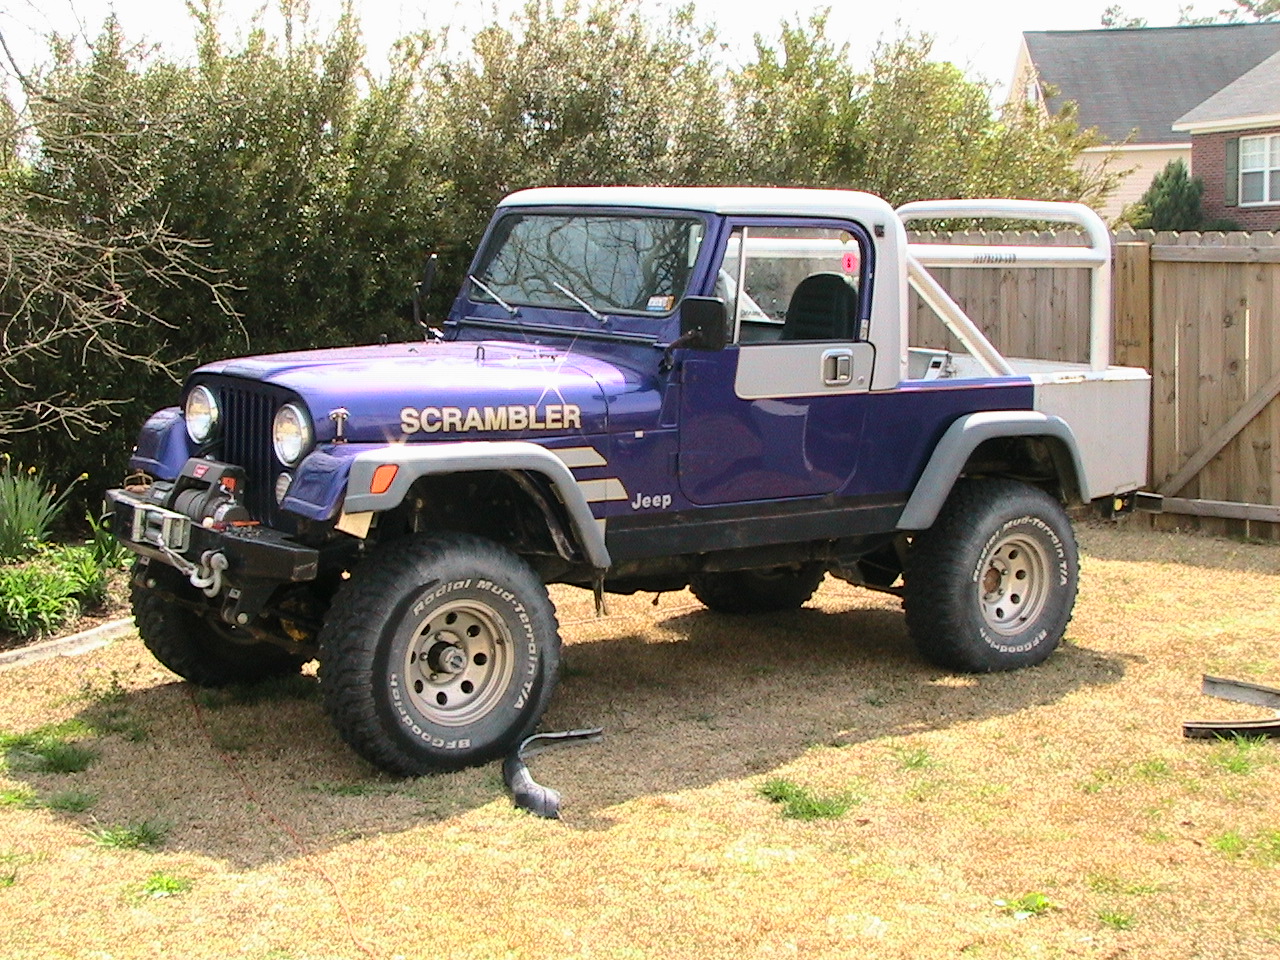
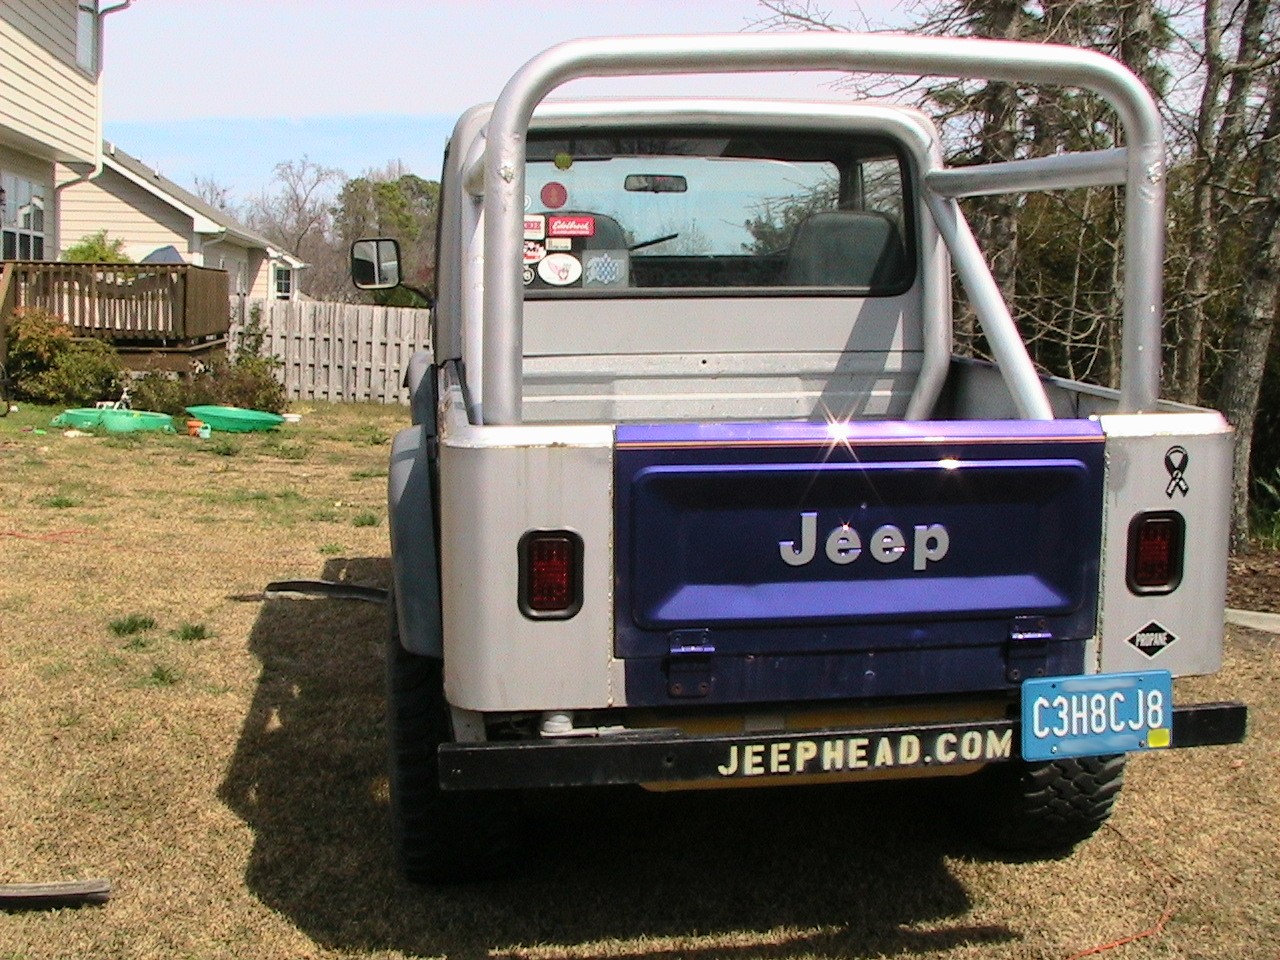
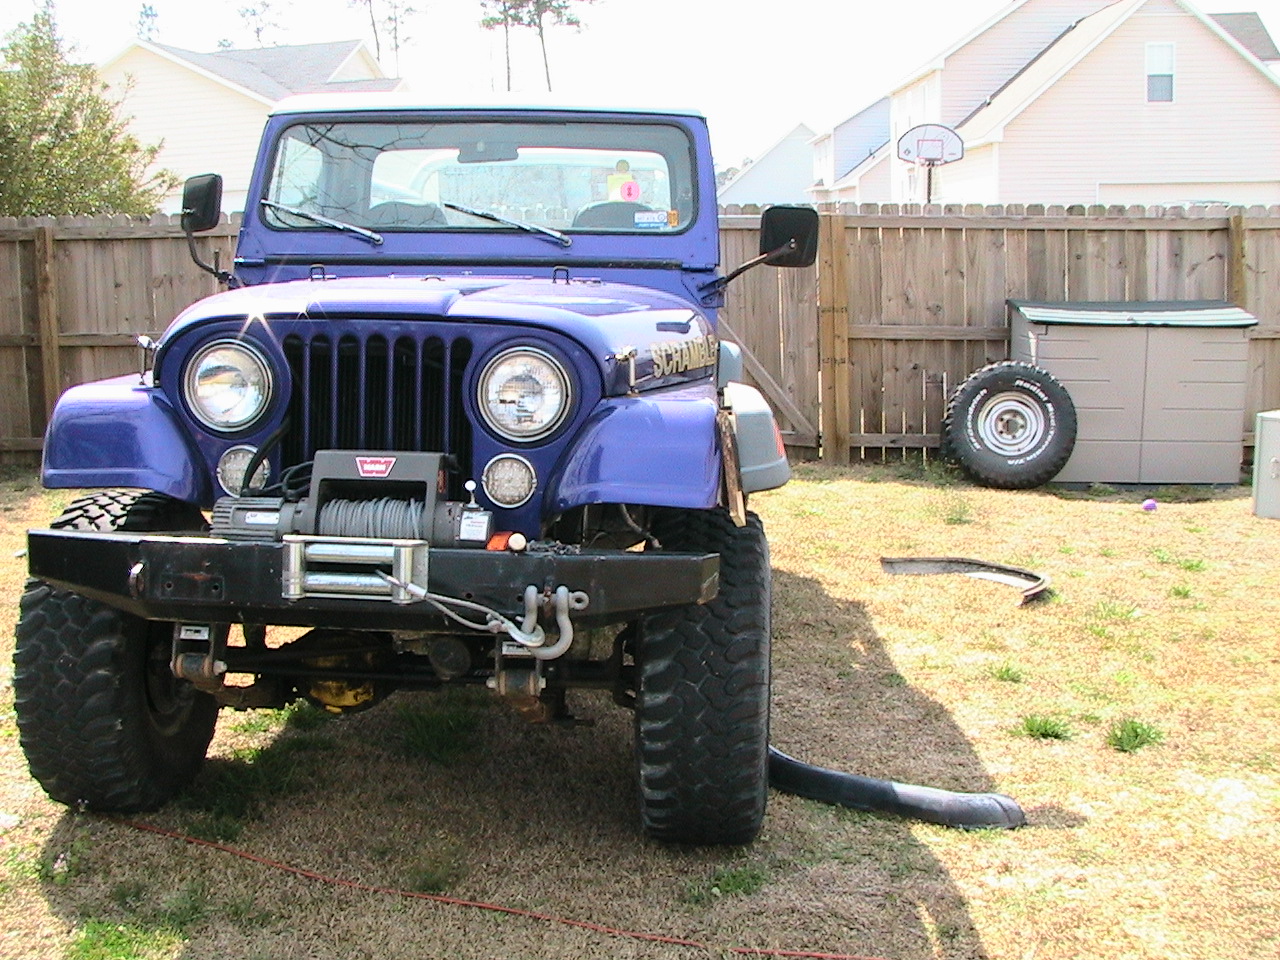
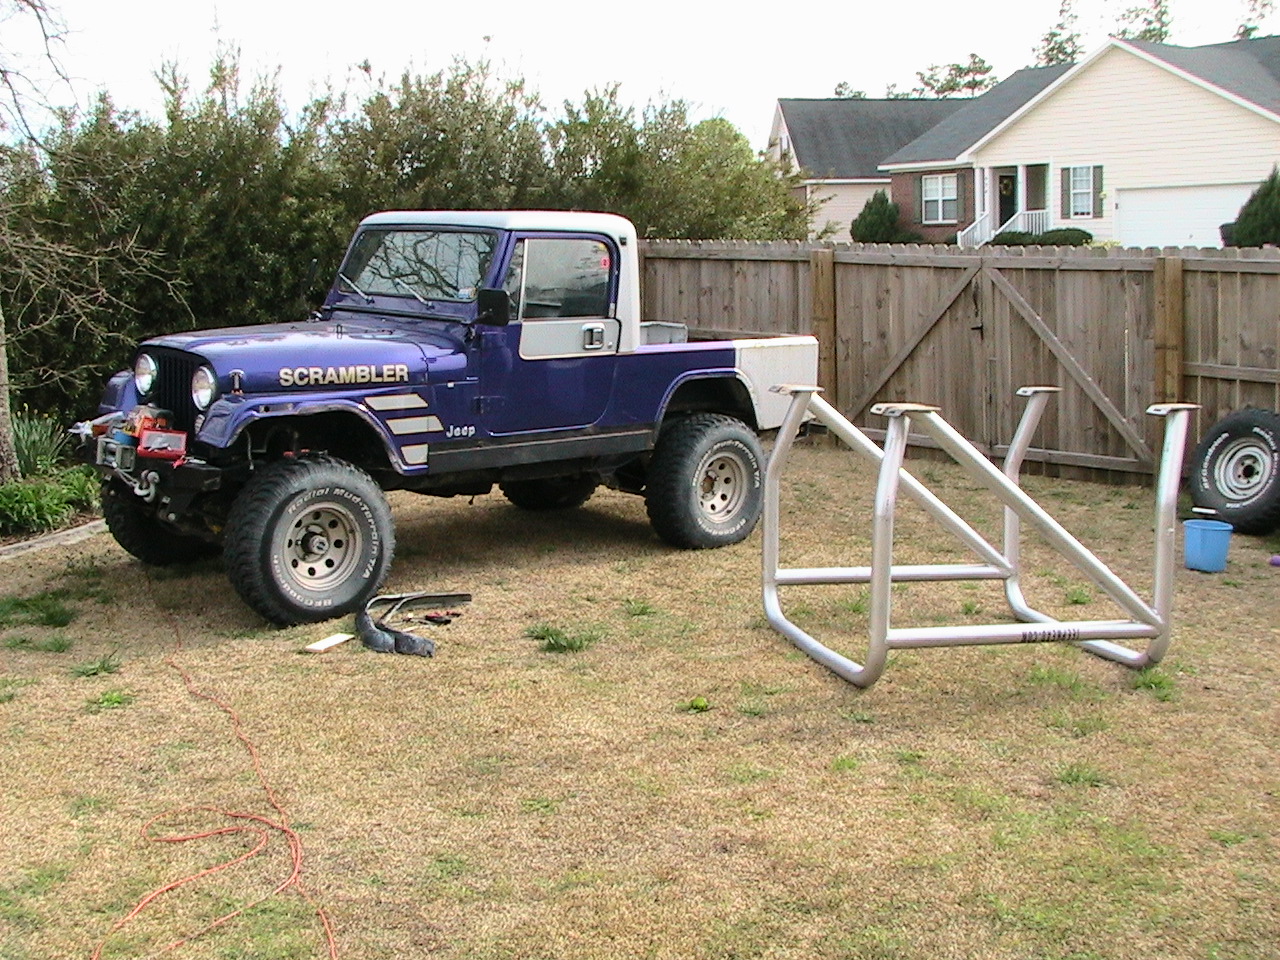
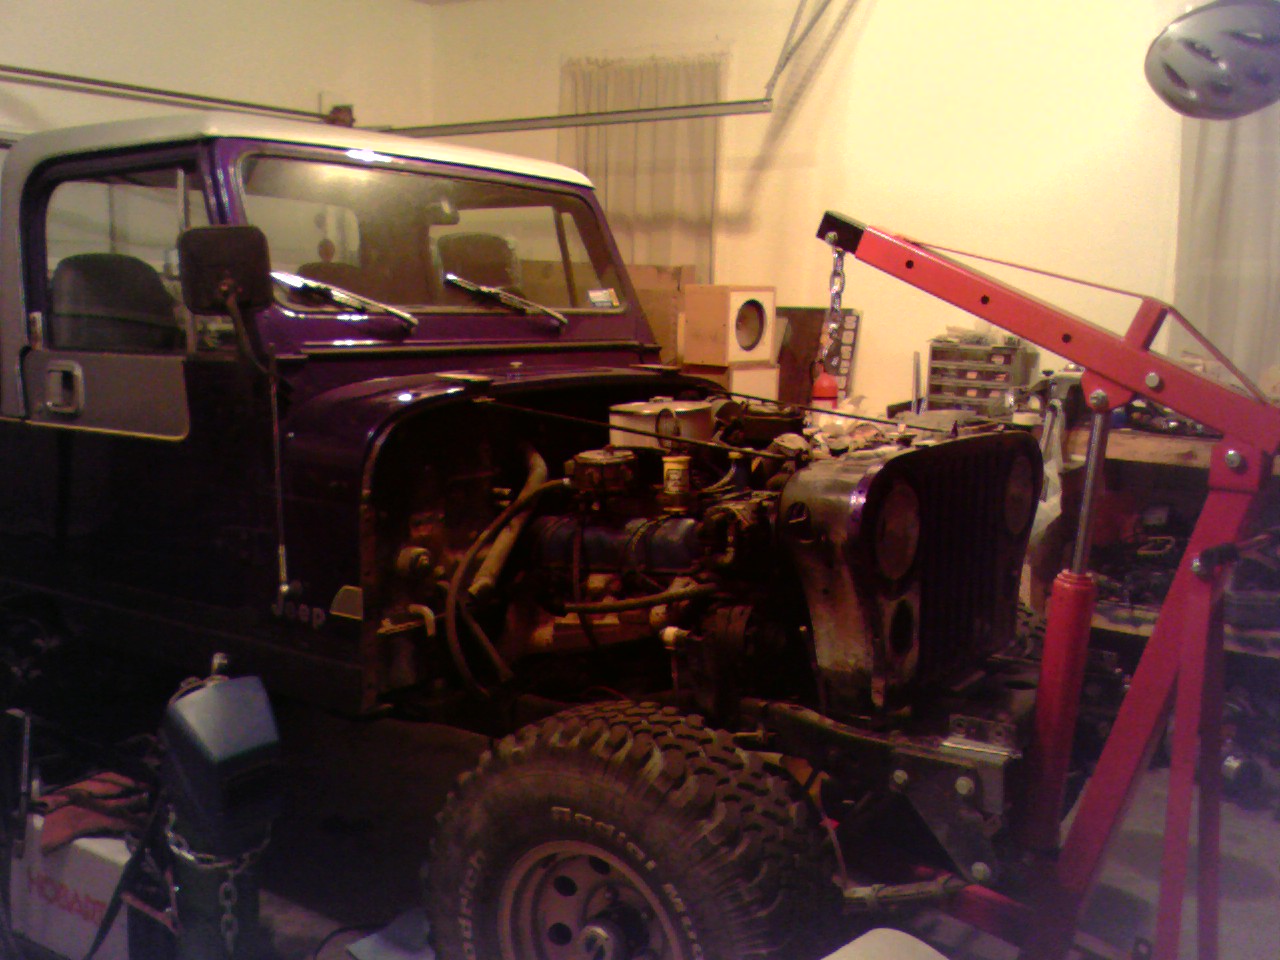
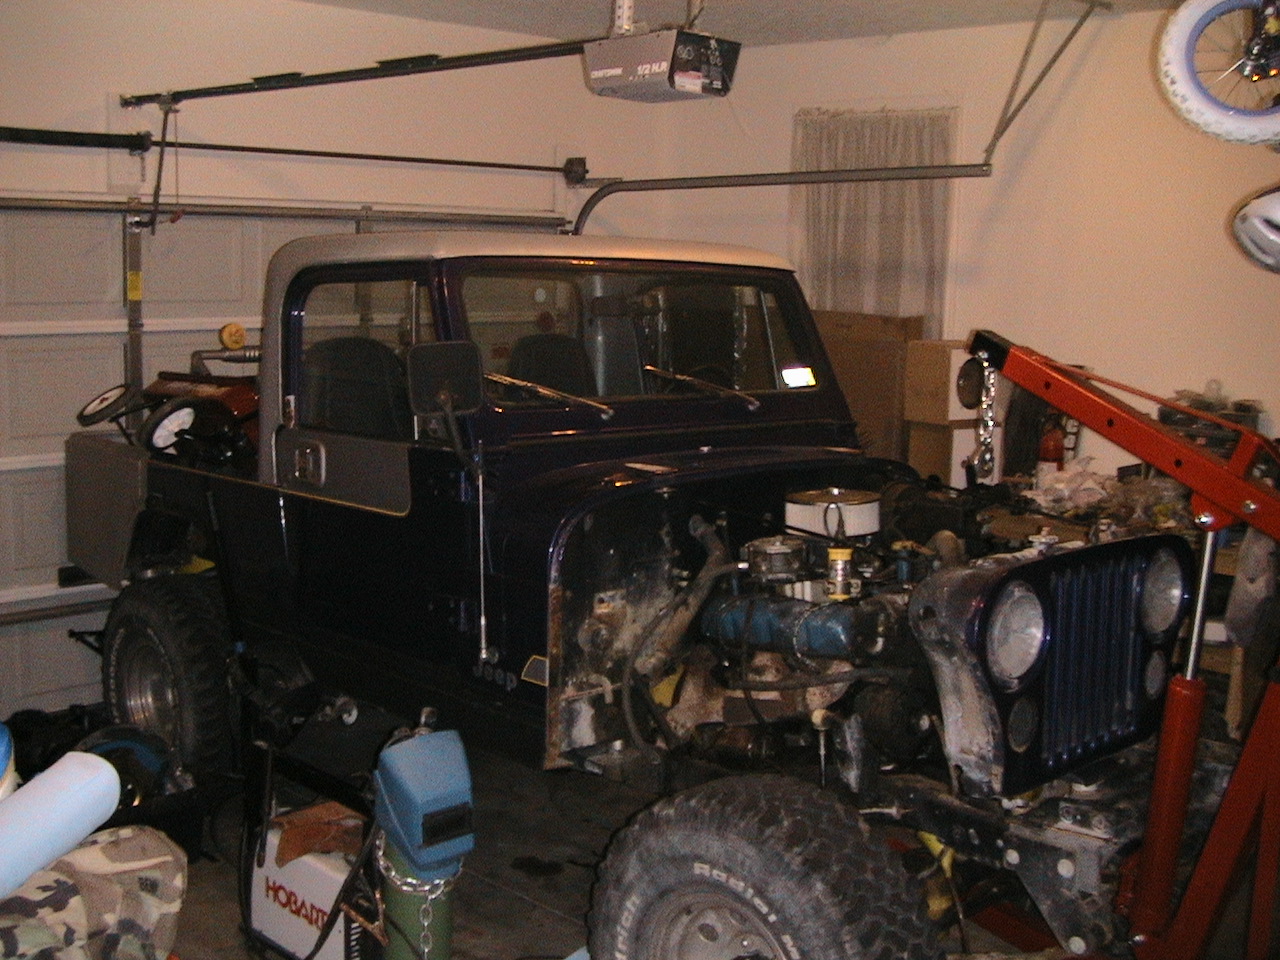
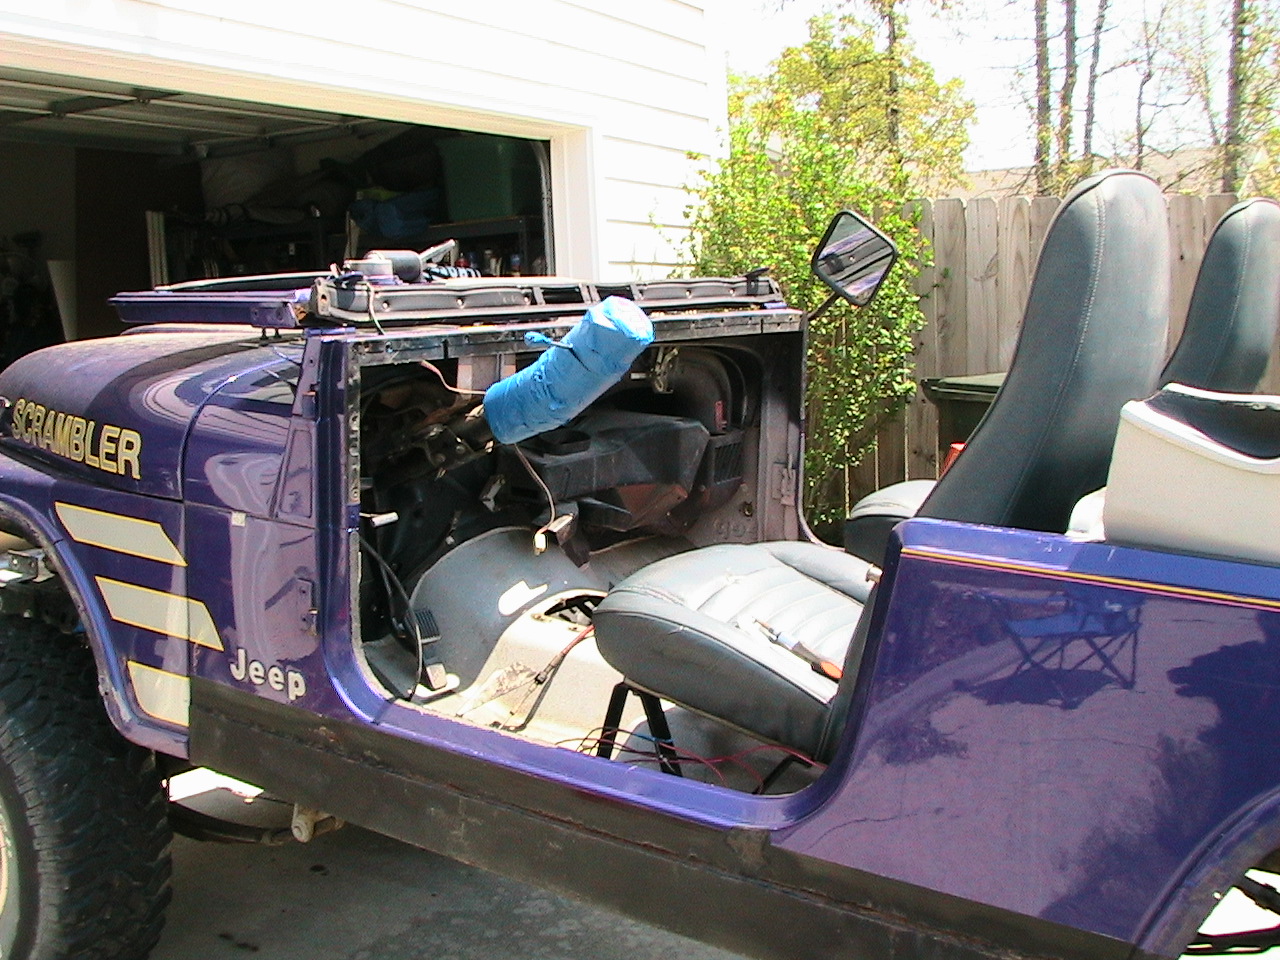
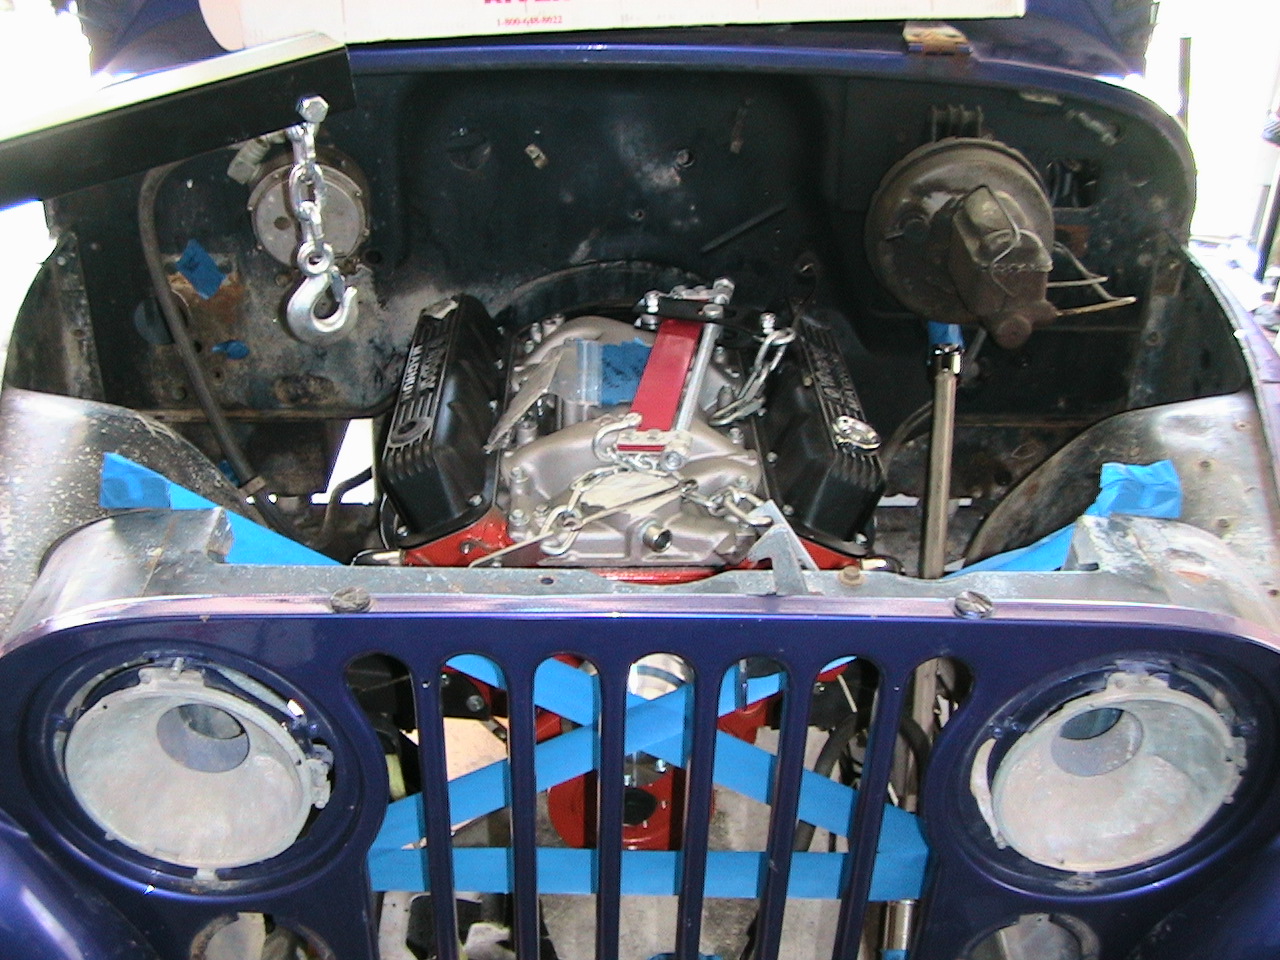
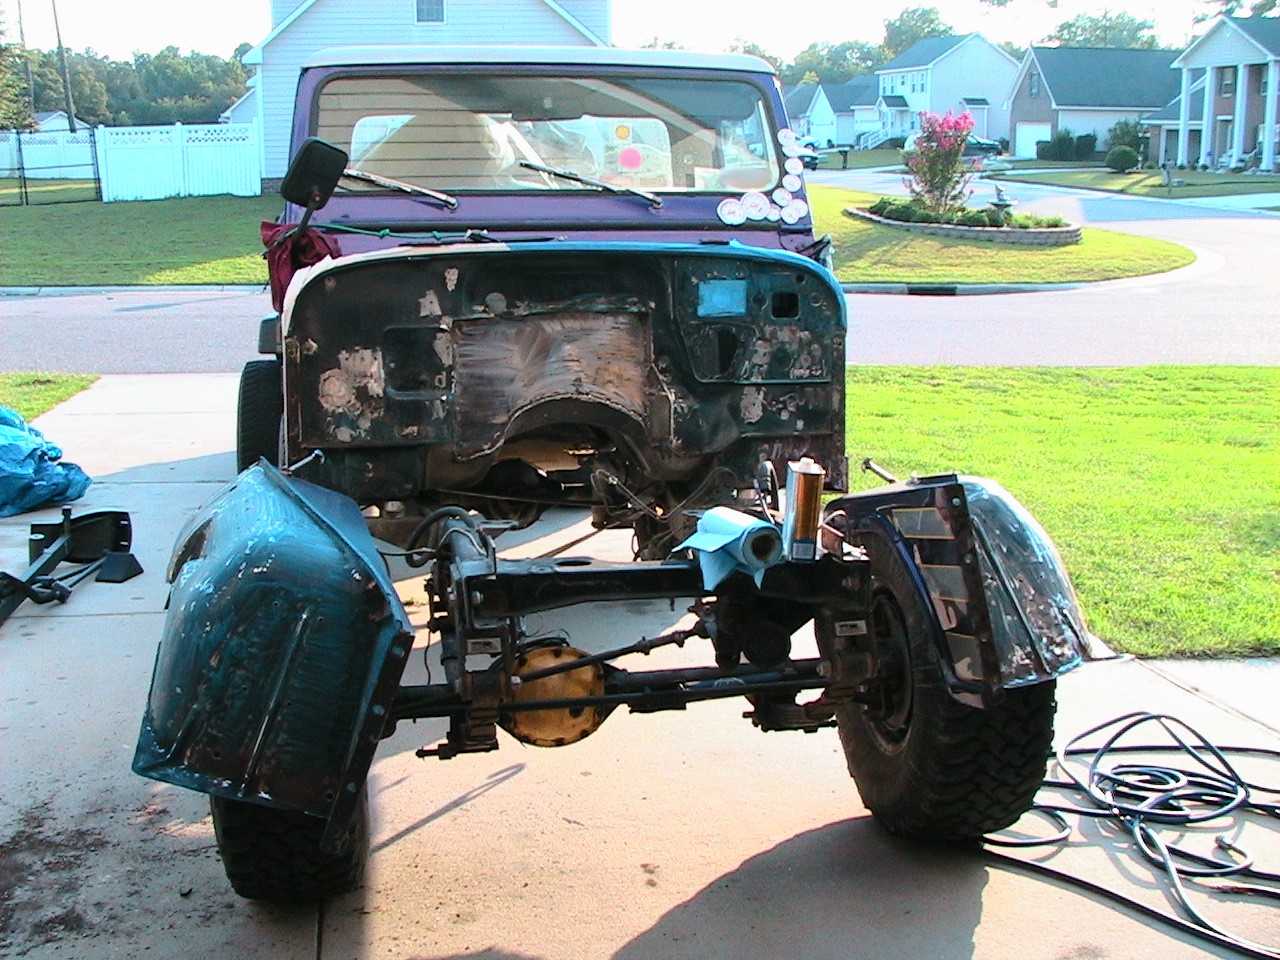
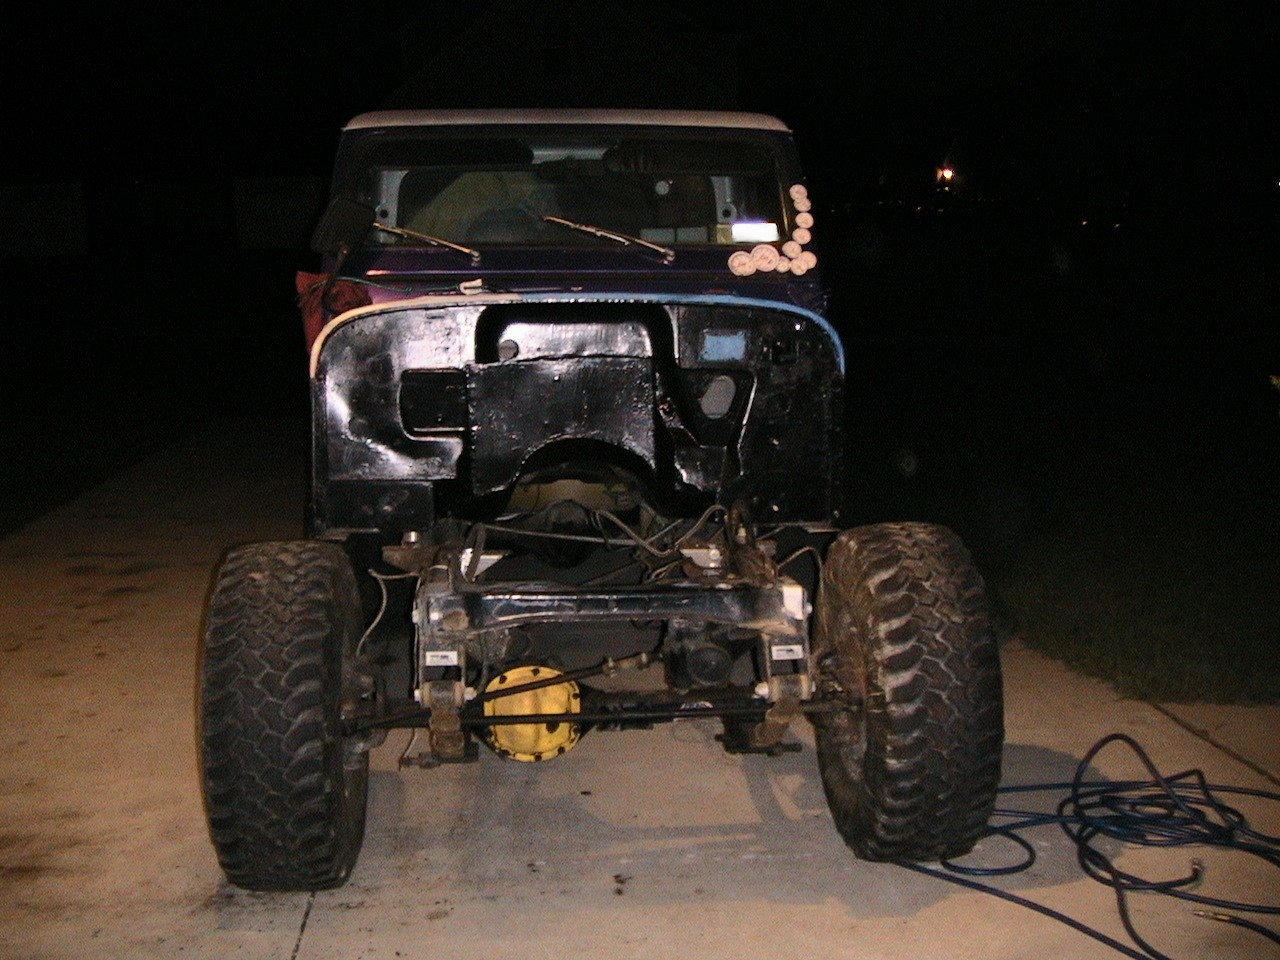
First of all, the Scrambler will be a daily-driven rock crawler, still powered by a V-8 and automatic transmission, as well as my favorite combustible material, propane. Above are the "before" pictures. A word of warning here: I pulled the trigger on this February 2006. It hasn't been off-road since. Don't kid yourself that you'll have this knocked out in a couple of months. I had no expectations of getting this done quickly and a good thing. Had I completely ignored my family for the last year, it'd be done, but it's just not worth it. It looks like it's going to be 2008, but that's fine.
Click here to forego reading through the Planning Phases and check out the Execution
|
|
|
Phase I: Determining your goal (what capability to you want to have? Mine are listed above) and your constraints (how much time, money, tools and skills do you have and what will you have to outsource?) I had a decent line of credit to play with, a few months, a pretty good selection of tools and I tend to know my way around a Jeep.
Figure out how much you can spend, and how to fund it. Don't spend every last dime on your initial list of parts - bolts, belts, hoses and connectors will nickel & dime you, as well as the special tools you need but don't know it yet. Because you just can't buy a Jeep like this, I decided to build it myself. So I got a credit card with a good APR and a limit high enough to let me do this. Consider that payment your car payment. Don't forget that you have to pay at least 2% of the balance by law, so if you max out a $20,000 card, your payment is $400/mo.
I've spent quite a bit of time deciding on parts and sources. I've been at this too long to enjoy parts that don't fit (like my Patriot Headers), poor quality parts or tools (like my engine hoist), and having delays due to shipping the wrong part and getting the new one (from Quadratec).
I spent a lot of time considering the powertrain. If I went Chevy, there were a lot of adapters and the engine parts were cheaper but when I added in getting a new transfer (or adding adpaters) it turned out to be cheaper to use a Magnum. Besides, they put the 5.9 Magnum in the 98 Grand Cherokee (or was it 99), so technically, I'm still Keeping it Jeep. Additionally, my buddy who introduced me to off-roading put one in his CJ-7 and it turned out great, so the learning curve was just a touch shorter. Murphy's still there but, for example, I know I need a spacer between the tranny and transfer. That lesson cost him a few pennies getting the tranny flange rewelded. But he's still the man. You've probably seen his jeep as it falls out of the pages of your JP Magazine on one of those annoying subscription inserts!
Here's the short list and potential sources. I've decided to go with these vendors due to a number of factors to include 1) customer service & knowledge of their products 2) quality of their products 3) diversity of selection 4) price. I am willing to pay a little more for a good part and somebody who knows the difference between a connecting rod and a tie rod. As an interesting experiment, I decided to see how much of this I can do online vs having to call a customer service rep. Not that I don't like to talk to people, but it is 2006, and the internet seems to be a bit more than a fad ... so let's get with it, shall we?

Lessons Learned: If you're going to attempt any portion of this, read these warnings first. Learn from my mistakes. Please!
The Magnum engine's exhaust bolts go through to the water jacket. DO NOT use the Breslin Locking header bolts. I used part number 550-10, and they leaked like a sieve. I bought them through Summit, and they said this is the right application. Maybe if I sealed the crap out of them they won't leak. But I don't want maybe for $58.99. I also don't want to stuff them full of gasket maker, then have a piece break off and float around in my brand new engine. So I ditched them for $10 Mr. Gasket bolts. Turns out only the front and rear bolts on either side go all the way through. So use them if you want, but put studs in the 4 through-holes. I probably would have known about the studs if I'd replaced a motor, but this is a new build. They should have sent me 4 locking bolts and 4 studs & nuts then.

Here are items that I don't think are going to work out. So if you're ahead of me or considering a portion of this, I want to point out the problems I haven't worked out yet so you don't get caught due to my failing to highlight the issue.
55amp alternator: It seems to be keeping up with the requirements right now, but the true test comes when I idle for extended periods with the fan running and I use the winch ... so I'll keep in the hunt for a bigger one that I can modify to fit.
Taylor wires are of questionable quality. First time I pulled the #1 wire, the connector stayed on the sparkplug. Read the rest of this website, and tell me - maybe I know how to remove a spark plug wire, or maybe it was the wire's fault?
Nobody was making block huggers for the Magnum motor. Summit Block Hugger headers for the LA motor bolt up to the Magnum motor, but there are two concerns: 1) the quality of the product isn't the best. The outer pipes turn so quickly that you can't get a real bolt in there. I ended up using an air hammer to dent the pipe so it will clear a bolt head (be careful if you try this - the metal's thin, I punched through it twice. Fortunately I was already welding them so it was no big deal). 2) The other item is that the ports are so big that they don't seal properly against the head. I've had to weld the insides of the header pipes to provide enough clamping surface. I hope it works. Read below on both of these point but wanted to put these at the top in case you're considering these headers for your own project. An aside is that Backwoods Offroad has a set of headers now for sale, for use in placing a Magnum motor in a TJ ... these would have been good to have a year ago. Guess I'm ahead of my time. For once <grin>
If you're putting a March Performance serpentine belt system on a Magnum crate motor, do the following: Get a March performance pulley for a GM alternator, I used a #112, then get a Powermaster Dodge one-wire unit. You'll have to shorten the adjusting bar buy cutting about 1" off each end and get a 5060430 Dayco belt. The write up is below. It worked out, but it deserves to be in the Caution section.

From Summit Racing, well over $10,000 worth of parts and still ordering:

320HP Mopar Magum 5.9L crate engine (see Jegs below)
Edelbrock ceramic headers - didn't fit, replaced with Summit's Patriot Block Hugger headers - not perfect either but at least I can keep my steering shaft!
Stewart Warner Maximum Performance Gauges: Speedo, Tach, oil pressure, vacuum, tranny temp, water temp, volts, air/fuel ratio (also feeding the DualCurve tuning computer for the propane system) - two oil pressure gauges: engine and tranny
Remote oil filter to clear headers (I later decided to go with block huggers so it's not an issue but installed the remote filter anyway)
Powermaster 170amp alternator - didn't fit, went with a local parts place 55A alternator from a 1979 Dodge W150 with a 360. At least it fits :( Then later ended up with a Powermaster 140a Dodge unit, write up is below.
Front and rear cross-drilled rotors
Engine and transmission cooler w/ onboard fan (had to remove the fan, cooler was too big!)
Remote transmission filter
Painless 16 circuit wiring harness - seriously modified after the fact
MSD Digital-6 ignition box and HVA blaster coil
March serpentine belt kit - front end of the Magnum crate engine is set up for the Chrysler "LA" block, not a magnum, so beware. See notes within about using an internally regulated (one-wre) alternator with the March kit.
Flex-a-lite Black X-Treme electric fan (had to turn it sideways and cover 1" gap top and bottom).
Sound deadening carpet
AGR power steering pump - again, not a magnum but an older dodge/chrylser setup
Front brake rotors for my TJ so I can drive it safely while I do the build-up
Grant steering wheel w/ anti-theft system, and Jeep horn button
4-wire heated O2 sensor (begins sending info faster for a better mix after startup) - might as well put this here: A wire (grey) is signal return (ground); B wire, black, is signal wire, voltage to box/gauge; C wire is white ground (heater), D wire is white 12v (heater).
12pt locking header bolts (see warning above, didn't work worth a #$%^)
10mm taylor wires, summit heat shield spark plug boots
Mastercraft rear seat (30% off on closeout, shipped it in conjunction with my crate engine so there was no extra shipping cost) - they don't have the fronts, but I found two sites that offer free shipping on Rubicons, which is good - Beard quoted me $600+ to ship the three seats from their factory in CA! A little savy shopping saved me about $300!
Lokar A518 nostalgia shifter to replace the piece of junk B&M cable shifter. Especially after I asked B&M how to modify their truck shifter to allow the R-N-D shift inside one gate. Their response? We don't do that, we're a racing company. Really? Wellll alllrighty then. Watch me buy a Lokar.
Flowmaster 40 muffler 3' both ends, 2.5" into 3" Y pipe
All kinds of other odds and ends to include about 300' of wire, about 50 weatherpack connections, about 20' of exhaust tubing, etc.

From Jegs, $3700, then $0.
320HP Mopar Magum 5.9L crate engine
OK, well, maybe not. See comments below.

From Powerdemon, about $2800:
46RH 4spd automatic PowerMax Extreme Duty - this is an overdrive version of the venerable Torqueflite 727, and has 3 wires to operate the electric solenoid to operate the torque converter clutch, and for the 3-4 shift. The 46RE is electronic, requires a computer and has lots more wires. Since I'm not using fuel injection, I don't need the computer, so why mess with the RE? The Extreme Duty has all the latest upgrades and will certainly survive the beating it's in for.
They're out of business now, apparently, so don't bother. Go to Performance Automotive and Transmission Center. Great guys too. It was basically a coin toss of who to buy the tranny from, I guess I backed the wrong horse.
![]()
From 4WheelDrive Hardware, about $2,000 worth:
Oversized steering components
stainless steel braided brake lines
Flaming River steering shaft
Mohave heater and plenum - decided to shelf this for now, it's too hot here to need a heater. What was I thinking? LOL
Blank dashboard for gauges - decided against this and made an insert instead
dual battery tray and management - trashed this idea too, for now
Bilstien shocks
Vehicle dollies
Z-box spring hangers for rear axle, so the revolvers don't twist the frame in half ... again!
other odds n' ends that are Jeep-specific


From other vendors:
Mad 4WD - Advance Adapters - Dana 300 32 Spline output shaft for a short output transfer case. Italics is important because these were supposedly only put in '80 and '81s. Mine's an '82 and was short so check your tailshaft!
Go2Guy Engineering - Dana 300 clocking ring, because I didn't need a new shaft like the ones included in most clocking systems. This guy knows dodge transmissions in Jeeps!
AdvanceAuto - Alternator, various bits and pieces
Fast Toys - Random 3" high-flow catalytic converter
Novak Adapters - Radiator with passenger side lower (I think it's the Chevy pattern), and engine mounts for Dodge motor- to- narrow frame Jeep
Full soft top from www.thejeep.com
Slider tubes from Shrockworks
Windshield
Autoaccessory4u - Brushed locking fuel door cover, for custom propane filler - ended up not using this so far
HD steering tie rod and drag link from Poison Spyder
Tellico 4x4 - front bearings for my TJ, for a safer daily driver while I mess with the '8
J&P Cycles - no kidding. One Harley part in the Jeep, just for good measure!
Skycraft Surplus - lots of electrical components. Specifically, Normally Closed 30A continuous relays and relay connectors.
Rockhard 4x4 CJ-8 SportCage with dash and frame tie-ins
From Ebay:
Windshield washer tank & pump; power steering pump (bought it for
the reservoir to go on the AGR pump); rear sump oil pan, just in case
Things I have to address myself or with local assistance:
Sandblast, repair and repaint body (skipping this for now)
Relocating the propane filler valve and re-route the exhaust ** done
Powdercoating of full roll cage ** done
Skid plates for driveline and propane tanks
Fab or buy rear bumpers w/ spare tire rack
Build my beefed-up AMC-20 rear with Detroit
Ected Locker and disc brakes ** done
Phase II: Parts Acquisition
Here are my comments on my experiences with various suppliers so far:
![]() Summit has done a great job. Their
website is very
organized, almost everything has a picture, and you can actually use
their
website to figure out what parts will fit or not. Their selection
is
fantastic when you consider that they're mostly a racer's supply store,
they
carry a LOT of stuff for Jeeps. When you order, you get an email
with a
hyperlink you can use to track your order. The only complaint I
have is
that they couldn't arrange for liftgate delivery of my crate engine to
my
house. Kind of a pain to pick it up at a terminal or make
arrangements
with the terminal to pay extra, but they couldn't tell me what company
they'd
use so I could at least plan for the added trouble/expense. So I
went with
Jegs. See below for the rest of that. Anyway, Summit is
very good
about shipping quickly, for free, $10.95 for handling regardless of the
size of
your order. They also don't charge tax in my state. Saved
me a lot
of money. - update - time is money, and I'd rather spend an hour
finding the
truck terminal than wait 2 weeks for Jegs to get it to my house.
Summit
wins, again. Update: they list a LOT of stuff on their website,
but watch
out for the ship dates. I still have parts outstanding from my
first order
a month ago. Not a big deal, but something to watch out
for. They're
still the first place I shop. Update: The crate engine arrived, the
crate was smashed. I could have refused shipment, but who knows how long
I'd have to wait. So I took it. The only damage was the oil pan took
a shot and doesn't seal up right, but I think the seal got jarred - so I'm going
to reseal it and see if it leaks. My favorite go-fast parts store. A
year after I wrote this first part, they've helped me a dozen times, to include
cycling through a couple alternators and power steering pumps trying to find the
one that fits. They even added a part to their inventory for me and STILL
beat most of their competition's prices. I've had two problems with stuff
they've sent me, both dealing with brakes ... cross-check your part numbers,
then CALL to make the order.
Summit has done a great job. Their
website is very
organized, almost everything has a picture, and you can actually use
their
website to figure out what parts will fit or not. Their selection
is
fantastic when you consider that they're mostly a racer's supply store,
they
carry a LOT of stuff for Jeeps. When you order, you get an email
with a
hyperlink you can use to track your order. The only complaint I
have is
that they couldn't arrange for liftgate delivery of my crate engine to
my
house. Kind of a pain to pick it up at a terminal or make
arrangements
with the terminal to pay extra, but they couldn't tell me what company
they'd
use so I could at least plan for the added trouble/expense. So I
went with
Jegs. See below for the rest of that. Anyway, Summit is
very good
about shipping quickly, for free, $10.95 for handling regardless of the
size of
your order. They also don't charge tax in my state. Saved
me a lot
of money. - update - time is money, and I'd rather spend an hour
finding the
truck terminal than wait 2 weeks for Jegs to get it to my house.
Summit
wins, again. Update: they list a LOT of stuff on their website,
but watch
out for the ship dates. I still have parts outstanding from my
first order
a month ago. Not a big deal, but something to watch out
for. They're
still the first place I shop. Update: The crate engine arrived, the
crate was smashed. I could have refused shipment, but who knows how long
I'd have to wait. So I took it. The only damage was the oil pan took
a shot and doesn't seal up right, but I think the seal got jarred - so I'm going
to reseal it and see if it leaks. My favorite go-fast parts store. A
year after I wrote this first part, they've helped me a dozen times, to include
cycling through a couple alternators and power steering pumps trying to find the
one that fits. They even added a part to their inventory for me and STILL
beat most of their competition's prices. I've had two problems with stuff
they've sent me, both dealing with brakes ... cross-check your part numbers,
then CALL to make the order.
Jegs' website is junk in comparison.
Very few
pictures, it's difficult to tell if a particular part will fit so you
have to
cross-reference from the brand's website. Not a big deal unless
your
competition is making it easier. They don't have half the
selection of
Summit. They're advertising free shipping, but it won't help if I
can't
get what I want, or worse - can't find it! I ordered my crate
engine from
them because they would arrange for liftgate to my house. Nice,
except
that it's been 10 days and my engine still hasn't left their warehouse,
according to their website. I wonder if my hand-built
transmission will
beat it here? Probably will (update: it did). I won't use these guys again.
- update
- Well, I found out 10 days after I ordered (had to call to get the info, wasn't
on the website like it is at Summit) that
the engine was back ordered and it may be another 2-3 weeks. I
called
Summit, it was on the way the same day. The last trip taken on the old AMC
360 engine was to the terminal across town to get the new engine. Kind of
poetic in a way.
![]() 4wd Hardware:
Great site, lots of pictures. They don't charge tax and their prices
are the same as Quadratec. See below for my thoughts on
them. They
do charge shipping but it doesn't seem too outrageous. Their
website is now completely fixed, great service, support, pictures, absolutely no
complaints. Their prices are great, and there are only a few items that I needed
that I couldn't get from them. My favorite jeep parts store. These
guys continue to be my first stop (and usually my last) for Jeep parts of any
flavor.
4wd Hardware:
Great site, lots of pictures. They don't charge tax and their prices
are the same as Quadratec. See below for my thoughts on
them. They
do charge shipping but it doesn't seem too outrageous. Their
website is now completely fixed, great service, support, pictures, absolutely no
complaints. Their prices are great, and there are only a few items that I needed
that I couldn't get from them. My favorite jeep parts store. These
guys continue to be my first stop (and usually my last) for Jeep parts of any
flavor.
![]() Quadratec: They used to be
my favorite
warehouse. I They have recently annoyed me by selling my dad a gift
certificate that I can't use online, I guess I have to phone in the
order.
Not a show-stopper but annoying. The other thing is that their
catalog has
gone too far with their latest scantily-clad not-so-hottie in front of the
Jeep. (Turns out it's actually Bree from JP, like I care. This is a trend/competition between them and 4WDH, which you don't
notice unless
you save the catalogs. 4WDH has a girl too, but I don't
mind my
daughter seeing that picture. I hope Quadratec sells a lot of $10
peel-and-stick
chrome junk to the punks who will buy from them based on their catalog
pictures. They'll have to in order to make up for the $4,000+
worth of
parts that I bought from their competitors. The only parts I will
by from
Quadratec now are the ones I can't get anywhere else for
roughly the same
money. It occurs to me that I should scan the covers of the last two
years'
worth of catalogs for these two companies to prove my point, but I have
thrown
out my old catalogs due to recent spring cleaning. If you have
any back
catalogs and can email
me the front cover, please do and I'll post it here with my thanks
and
credit due. Update: they shipped me the wrong shocks - I ordered
the right
ones, the bill says the right ones, the invoice says the right ones,
but the
boxes were wrong, and by the way the shocks that were in the box didn't
even
match the box. It took two phone calls and 12 days to get the right
shocks. Good thing I wasn't in a hurry. Later, I gave them another
try ... basically because I had a gift certificate and couldn't avoid it.
They got it almost right. Seems that a rear track bar bushing for a
TJ is too hard to find for them. Guess I'll get that one from 4WD or
Summit. I have now downgraded them to STOP. This time the offending
part was Warrior U-bolt skid plates. I got two right-side plates.
Good thing I didn't want to ... you know ... DRIVE my Jeep or anything.
There's another week down. Then when I did get the box, they were
CJ plates. I ended up cutting the shock mount off one of the righty,
welding it on the other side to make a lefty. Sure I could have done that
in the first place but that's not the point. Now, to be clear, they simply
reshipped the box that Warrior sent to them, but I can't waste two weeks again.
BLUF: These guys screw up every order I place. I'm done with them.
Quadratec: They used to be
my favorite
warehouse. I They have recently annoyed me by selling my dad a gift
certificate that I can't use online, I guess I have to phone in the
order.
Not a show-stopper but annoying. The other thing is that their
catalog has
gone too far with their latest scantily-clad not-so-hottie in front of the
Jeep. (Turns out it's actually Bree from JP, like I care. This is a trend/competition between them and 4WDH, which you don't
notice unless
you save the catalogs. 4WDH has a girl too, but I don't
mind my
daughter seeing that picture. I hope Quadratec sells a lot of $10
peel-and-stick
chrome junk to the punks who will buy from them based on their catalog
pictures. They'll have to in order to make up for the $4,000+
worth of
parts that I bought from their competitors. The only parts I will
by from
Quadratec now are the ones I can't get anywhere else for
roughly the same
money. It occurs to me that I should scan the covers of the last two
years'
worth of catalogs for these two companies to prove my point, but I have
thrown
out my old catalogs due to recent spring cleaning. If you have
any back
catalogs and can email
me the front cover, please do and I'll post it here with my thanks
and
credit due. Update: they shipped me the wrong shocks - I ordered
the right
ones, the bill says the right ones, the invoice says the right ones,
but the
boxes were wrong, and by the way the shocks that were in the box didn't
even
match the box. It took two phone calls and 12 days to get the right
shocks. Good thing I wasn't in a hurry. Later, I gave them another
try ... basically because I had a gift certificate and couldn't avoid it.
They got it almost right. Seems that a rear track bar bushing for a
TJ is too hard to find for them. Guess I'll get that one from 4WD or
Summit. I have now downgraded them to STOP. This time the offending
part was Warrior U-bolt skid plates. I got two right-side plates.
Good thing I didn't want to ... you know ... DRIVE my Jeep or anything.
There's another week down. Then when I did get the box, they were
CJ plates. I ended up cutting the shock mount off one of the righty,
welding it on the other side to make a lefty. Sure I could have done that
in the first place but that's not the point. Now, to be clear, they simply
reshipped the box that Warrior sent to them, but I can't waste two weeks again.
BLUF: These guys screw up every order I place. I'm done with them.
Shrockworks: Jim is a good guy, pleasure working with him again. I'm sure the parts he's custom making for me will fit exactly. Update: they did, and boy does it look cool!
![]() Powerdemon: Robert is a good guy as well,
great working
with him. He certainly knows his stuff and stands behind his
product. I can't wait to get that tranny on the road! Update: that being
said, he's out of business. I hope it's not because the trannys he
builds are junk. I'd have to count to ten a few times then go looking for
him. Update: tranny's
working fine, but I haven't tried the 3-4 or OD shifts. I remain
confident.
Powerdemon: Robert is a good guy as well,
great working
with him. He certainly knows his stuff and stands behind his
product. I can't wait to get that tranny on the road! Update: that being
said, he's out of business. I hope it's not because the trannys he
builds are junk. I'd have to count to ten a few times then go looking for
him. Update: tranny's
working fine, but I haven't tried the 3-4 or OD shifts. I remain
confident.
Poison Spyder: Couldn't buy what I wanted
on their
website because they didn't have a "buy it" button on that particular
page. So I
just called them instead - I don't mind cutting a little slack to a
company that
knows all their employees by their first name, I might be in that same
boat someday if I'm lucky. So I also bought a hat :) I'll be back
for their tube fenders.
Local parts houses - Advanced Auto, Napa, Pep Boys, AutoZone: The Pep Boys here is populated/frequented by gearheads of all types. As a result, their employees know their stuff, and their selection is great. It also happens to be on the right side of town, unlike Napa, so they'll get a lot of my "oh, crap, I forgot to order that" business. They cater to the tuner crowd, but I don't have a problem with that - do you know how to install an oversized turbo with nitrous and not blow up your motor? Are you mapping your fuel curve on a NASA-capable laptop as you drive? I can't, but these kids do - they're gearheads too, so cut them some slack! I still can pound them with my 500+HP Excursion though! <wink> Napa has the good parts, so I buy my serious components from them. AutoZone here is OK, but you'd better know what you want before you get there, and watch for the quality of the part they hand you. (you get what you pay for!)
UPS: They carry everything that I buy - on their backs all the way to my door. My delivery guy is a car nut, and was extra careful to protect a delivery from the rain - good thing because it had the MSD ignition and all the gauges inside! These guys ROCK!
Phase III: Hands-on planning
This part will be the phase where I mark, cut, weld, plan for and re-evaluate. Initial plans get wrung out here, and this is where the next batch of ordering (and sending parts back) will occur if I messed up Phase I. It's going to be easy to get distracted, and I will have to stick to my initial planning guidance otherwise this project will spin out of control in time, scope and money. (Not good on either front). Messing this up will produce a junkpile of mish-mash.
Phase IV: Tear down, prep and paint
Take it all apart, one last check for serviceability of anything you're reusing. Verify your paint scheme. Metal prep is crucial, don't get excited and paint over a patch of hidden rust - you'll hate yourself for it later. Every piece I take off, I put the fasteners in a baggie that's marked with where they came from. "I'll remember" works on a weekend job. 8 months later you won't remember where that last Torx bolt came from.
Phase V: Reassembly
Take your time putting it together. Here's where "Jeephead's rule of 3" comes into play - on every project I get in a hurry, forget a step and end up installing, pulling then reinstalling something three times! Make a plan before you start. Use lots of masking tape when fitting painted parts together so you don't scratch your new paint. Pay attention to torque specifications where it applies. Make a list of any bolts that you have to leave loose for some reason. That's the one that will rattle out on the freeway at 65 MPH. Don't rely on yourself to "remember to tighten that one". I put a strip of blue painter's tape on something if I need to remember to add oil, retighten a bolt, etc where it won't come off so I don't forget. Blowing up a brand new crate engine would be very bad indeed.
Done? OK, check EVERY BOLT again, especially the steering and suspension. Those will KILL YOU, in a very literal, dead, kind of way. Check them again.
Now, go ahead and fill the engine, radiator, transmission, transfer case, power steering, differentials, brake and clutch with the appropriate fluid. Make a list of everything that needs a fluid and cross it off when it's filled and bled.
Phase VI: Shake down
If you've not installed your exhaust yet, make sure it's at least not pointing at your fuel line, brake line or wiring harness before you fire that demon up and scare the dipstick neighbor next door. Usually best to do this really late on Sunday night. Everybody around here has a Harley with Vance and Hines pipes, so now it's my turn: 5.9 magnum with 3" of downtubes on the headers. <wink>
Take it slow, and make sure you follow the break-in recommendations for things like: camshafts, engines, brakes, transmissions, lockers, ring gears, etc. Some have specific heat cycles they need to go through or it will void your warranty in the case of PowerSlot brake rotors and Hawk brake pads for example. Here's an example, not the actual procedures: The engine may need to be run at temperature for 1/2 hour then driven with varying speed. The tranny just needs to be warmed up and topped off before you hammer it. The disc brakes need to be gradually warmed up then hammered hard down to zero from different speeds. The radiator has to be burped after you warm it up enough for the thermostat to open and let the air out of the manifold. You get the idea. Have a plan to accommodate all of these or something's not going to operate as advertised for very long.
Once you've taken your victory lap around the neighborhood, check everything for leaks, anything that smells hot, and check ALL the bolts again. Look for wires that may be touching something sharp or hot. Go get your license plate off the shelf and put it on, since you forgot because you were so excited to take the beast around the block. Not that I've ever done that myself, with the state cop living across the street watching the whole thing :O
Phase VII: Scramble on! See you on Tellico, Uwharrie, and if I can manage a month's vacation, another Rubicon Scramble!
(I'd like that to be the happy ending, but maybe this is: Phase VIII: e-bay all the stock stuff you took off and put it against the credit card you just ran up! <grin>)

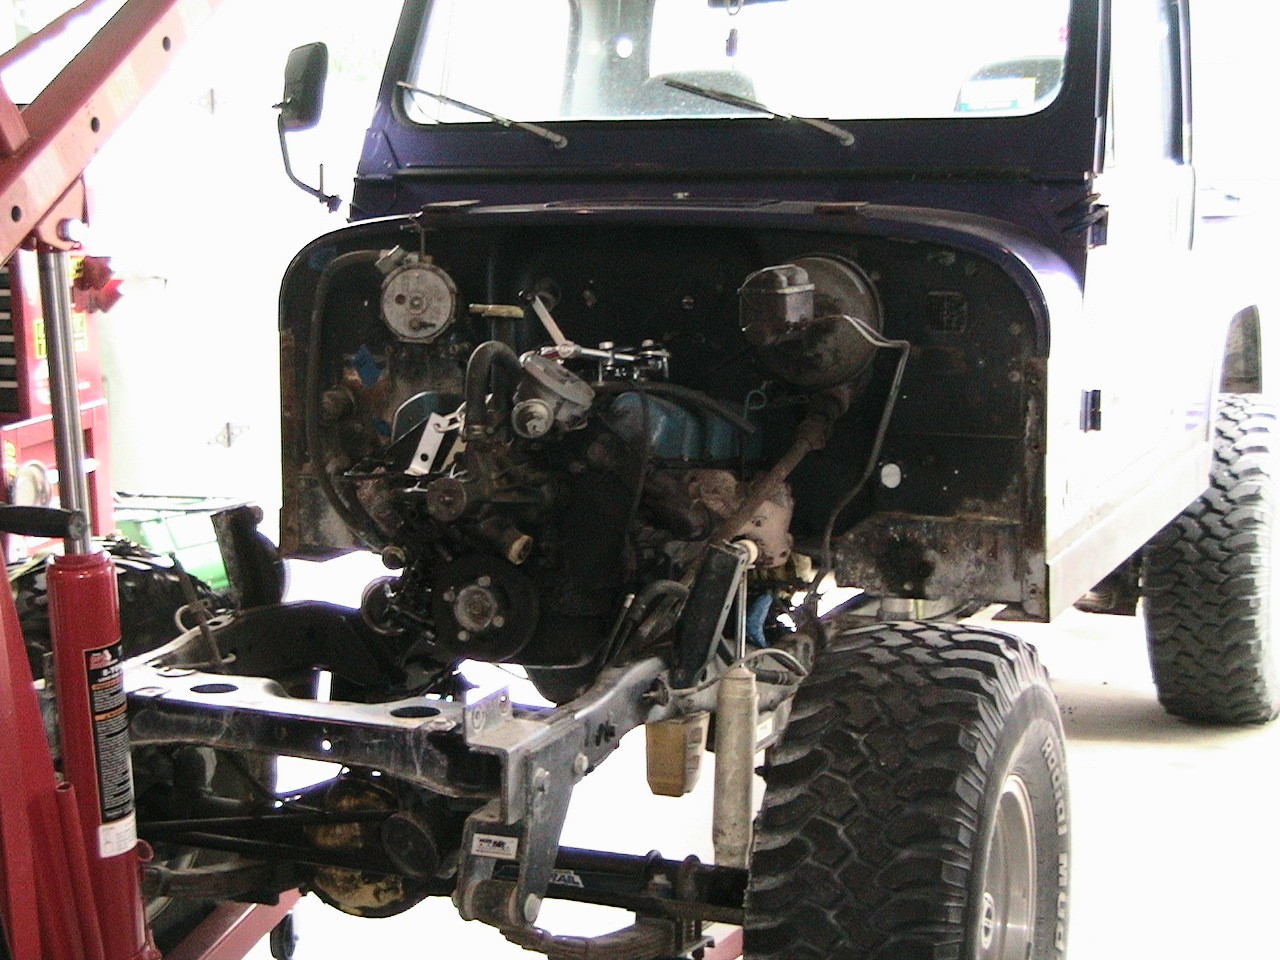
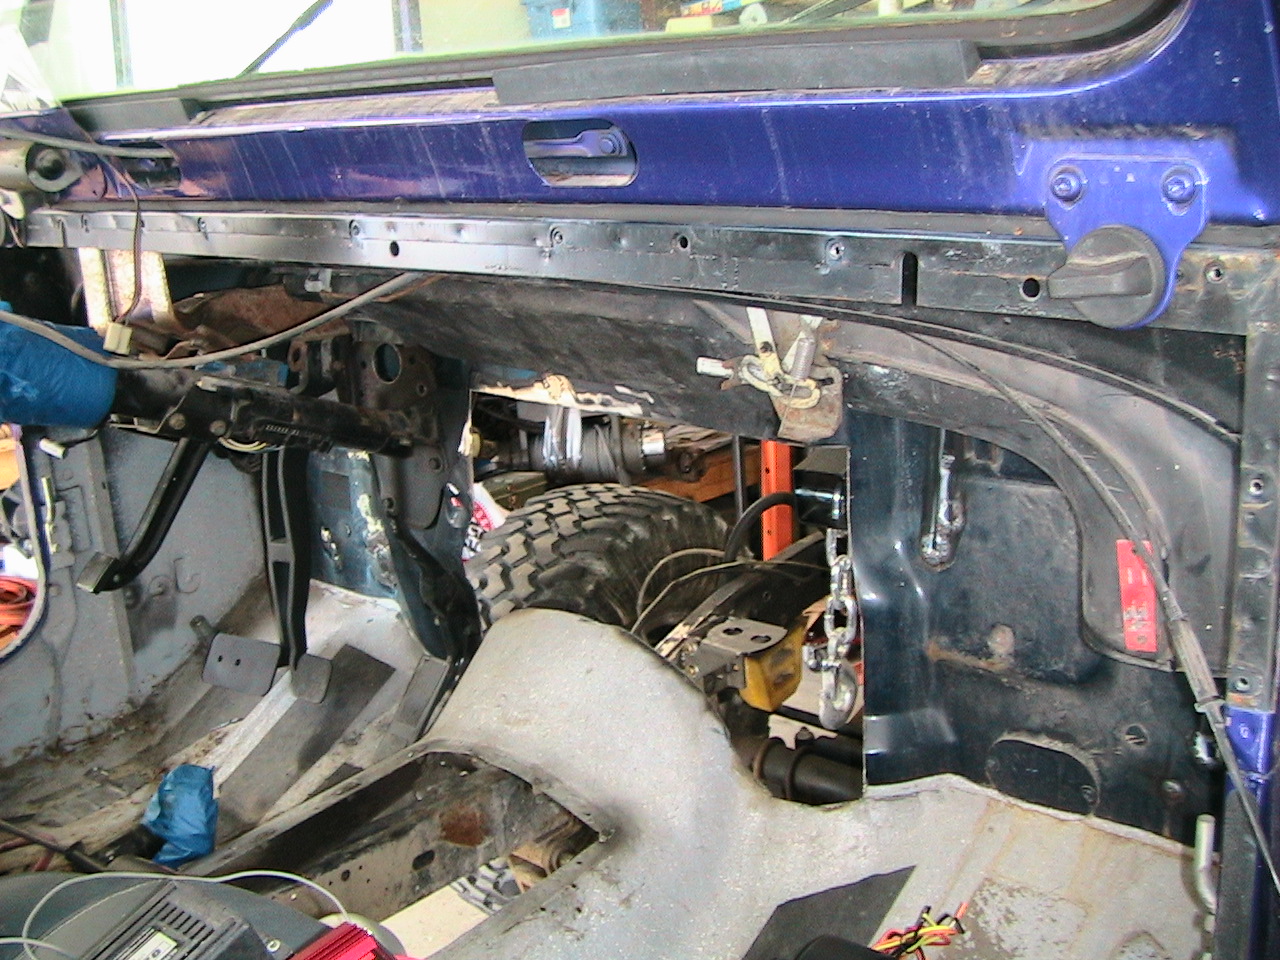
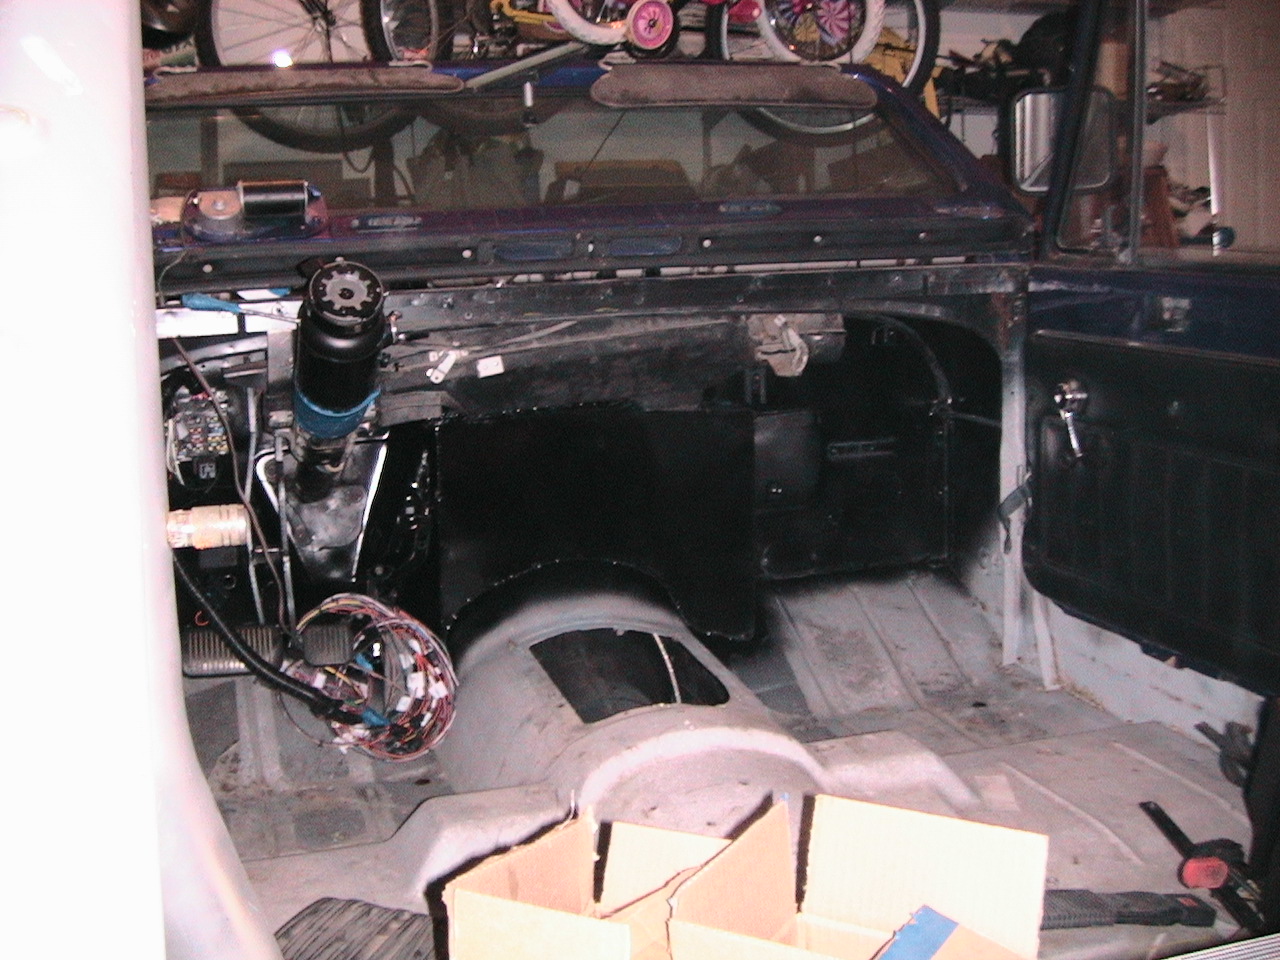
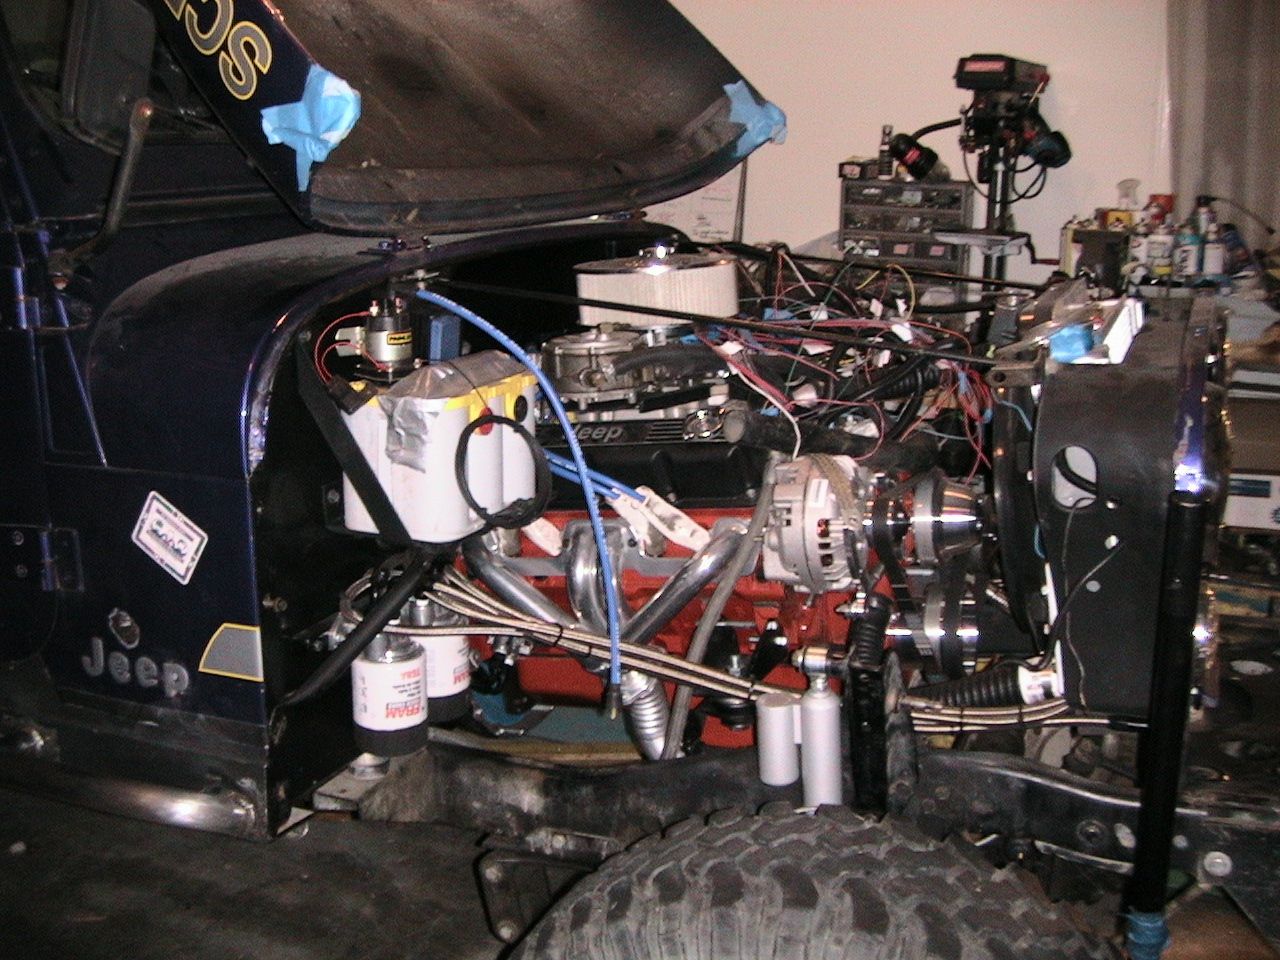
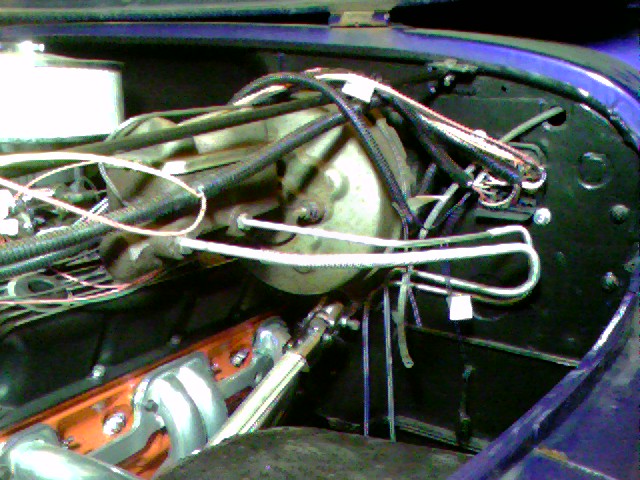
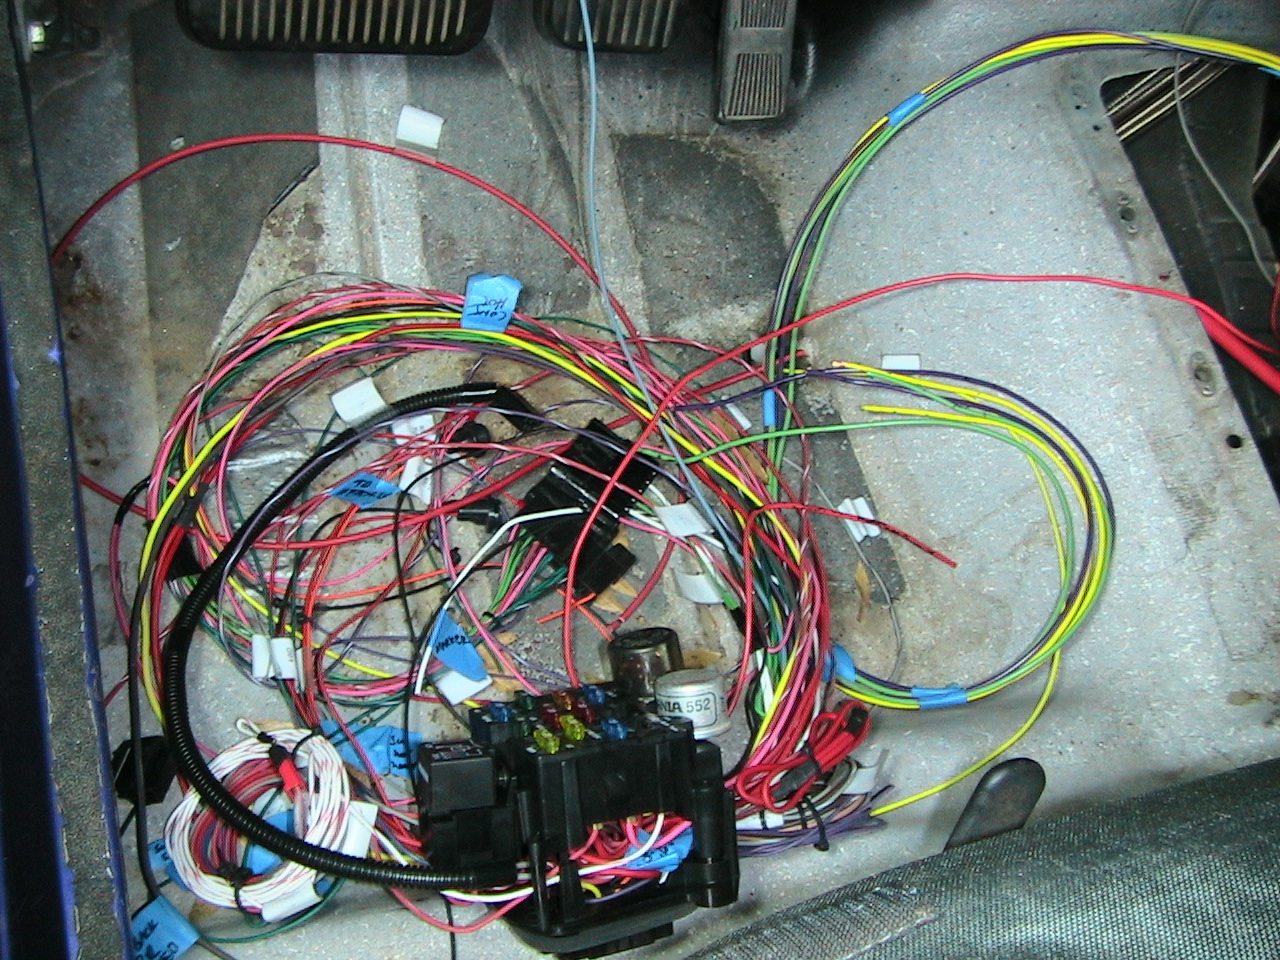
Ready to pull the engine. Finally got the rat's nest of wires out of there. One of the wires from the alternator FELL out ... boy, that could have been bad. Here are a couple pictures - it's a little tight in the garage with the door down:


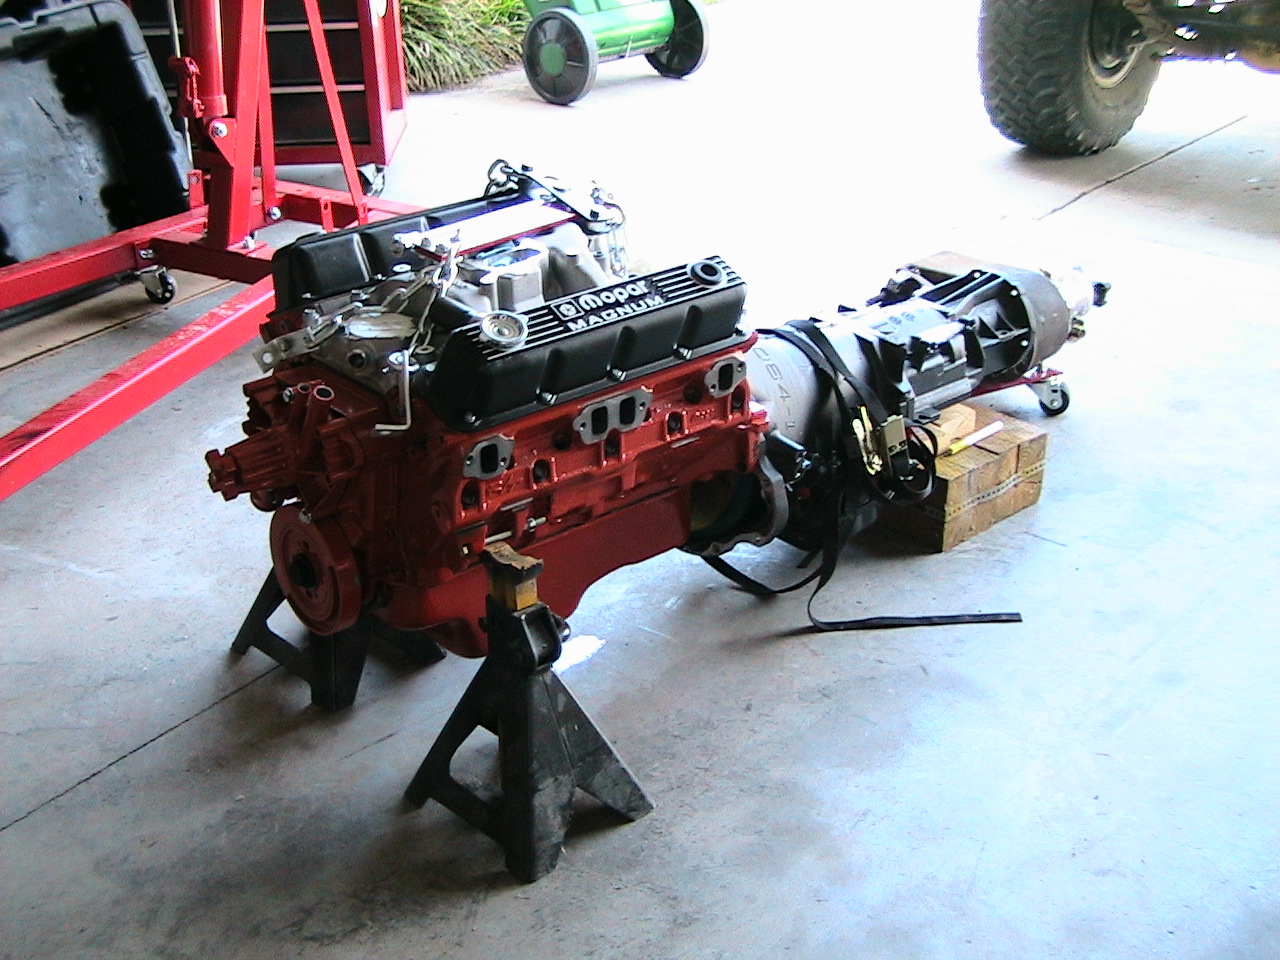
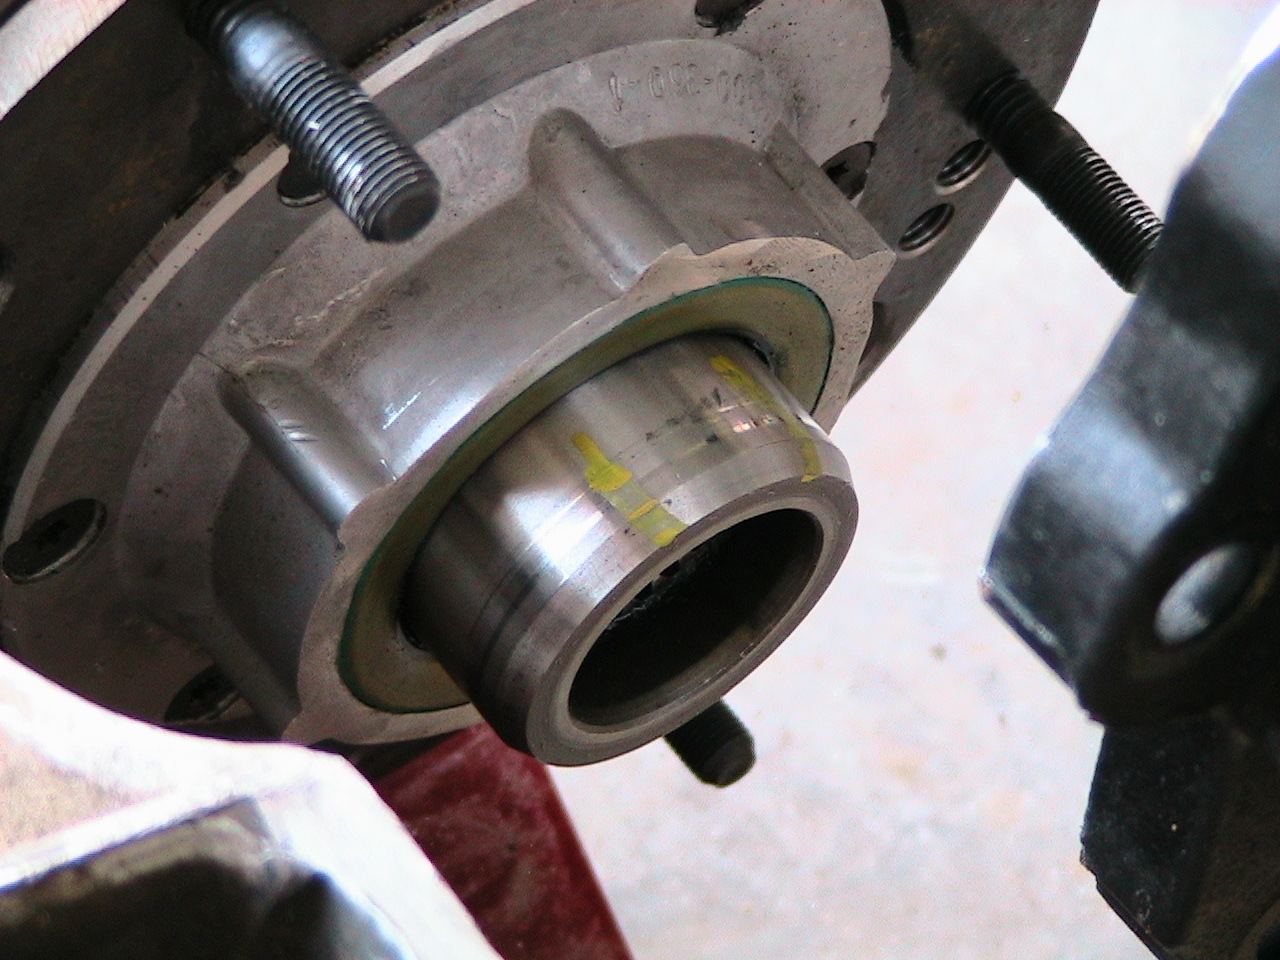
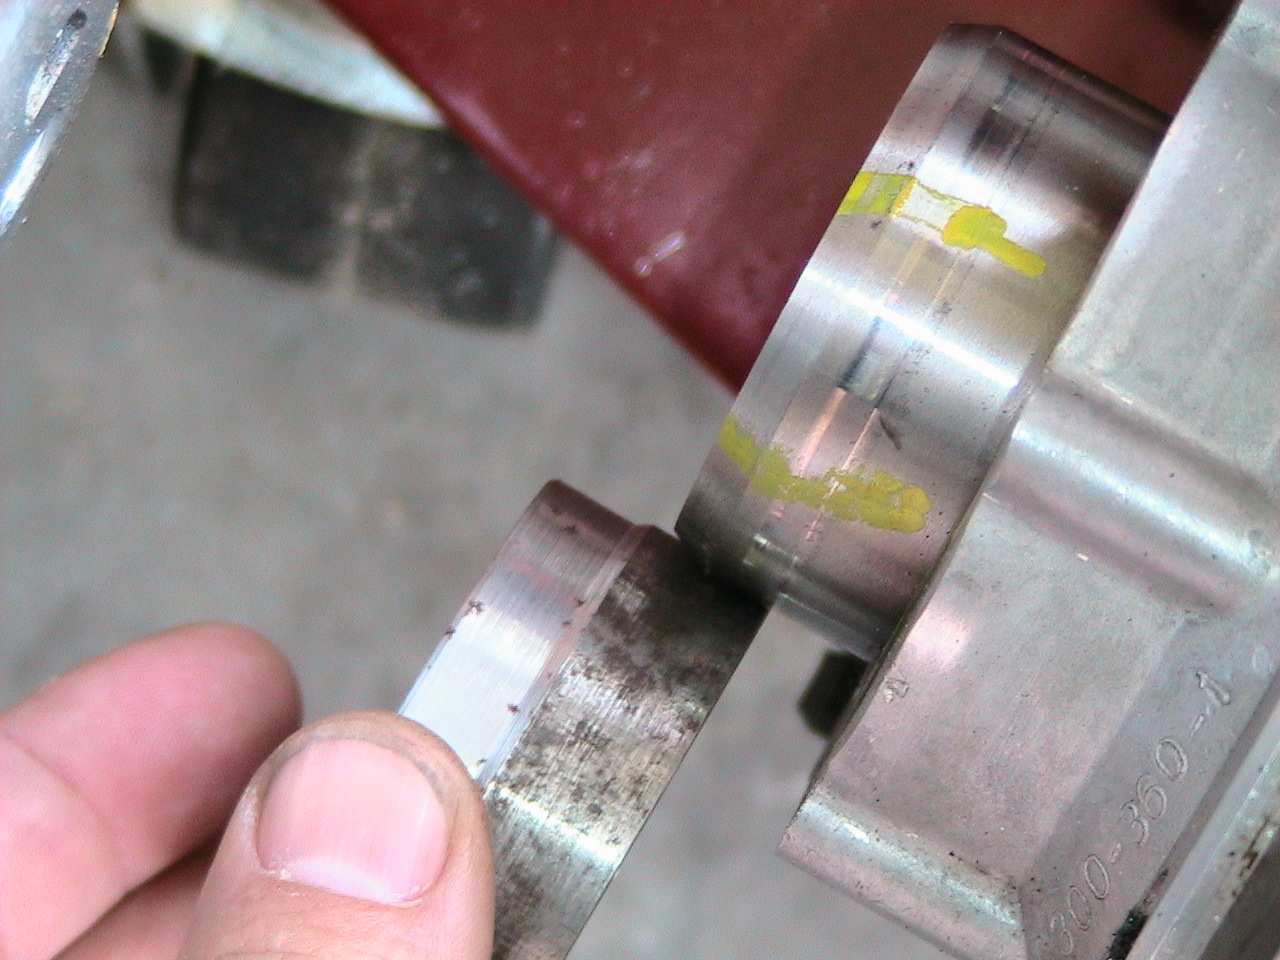
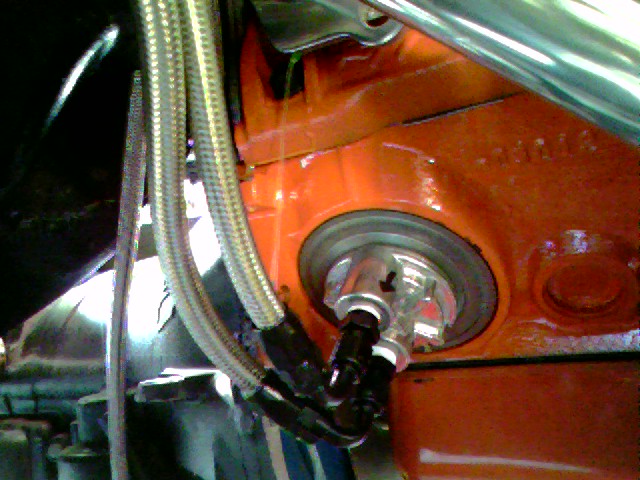
When mating the Dana 300 to a 46RH, 46RE, A-518, A500, A518 and probably the same with the 47RH, 48RH: You will need a spacer that's at least 1/4", better to go 5/16" to account for expansion of shafts and rearward motion from helical cut gears. It won't take much movement to waste a thrust bearing, so a little more spacer is better than a little less. I used a clocking ring from Go2Guys Engineering, who sells only the ring, not the full kit like from AA or JB Conversions. If you get the full kit, you'll get a clocking ring w/ spacer, but you'll also get a lengthened input shaft and be in the same boat you were before. Also, Ken advised me to grind the lip off the input housing flush with the seal and that will give me the clearance I need. Not bad for half the price of a full clocking kit. See the paint marker stripe where I checked that the output seal on the tranny engages the input shaft on the transfer - note, you have to do this when the paint is WET <grin> Looks like I've got good seal engagement, so I don't need to use the supplied seal extension.
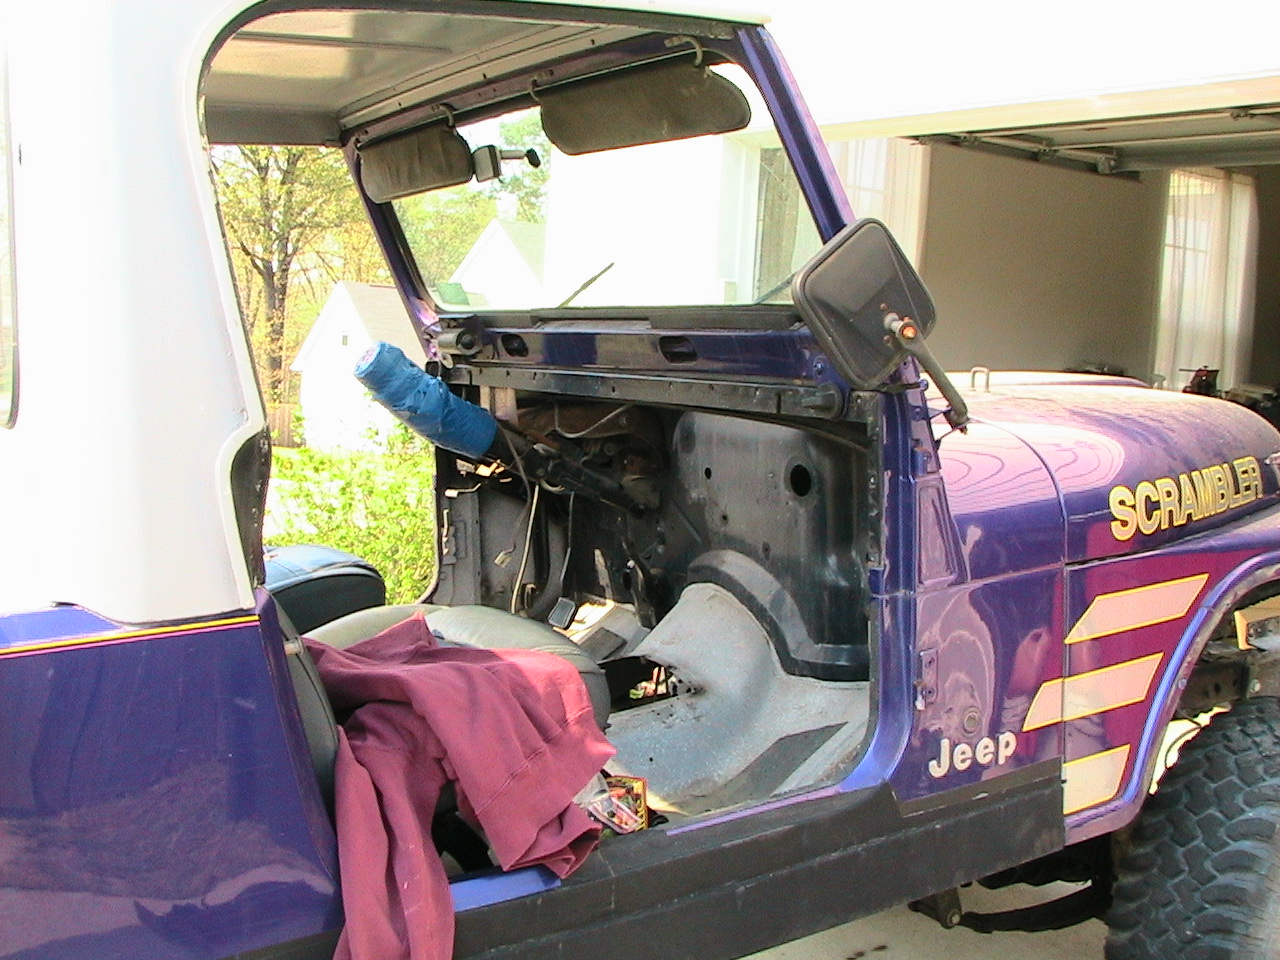
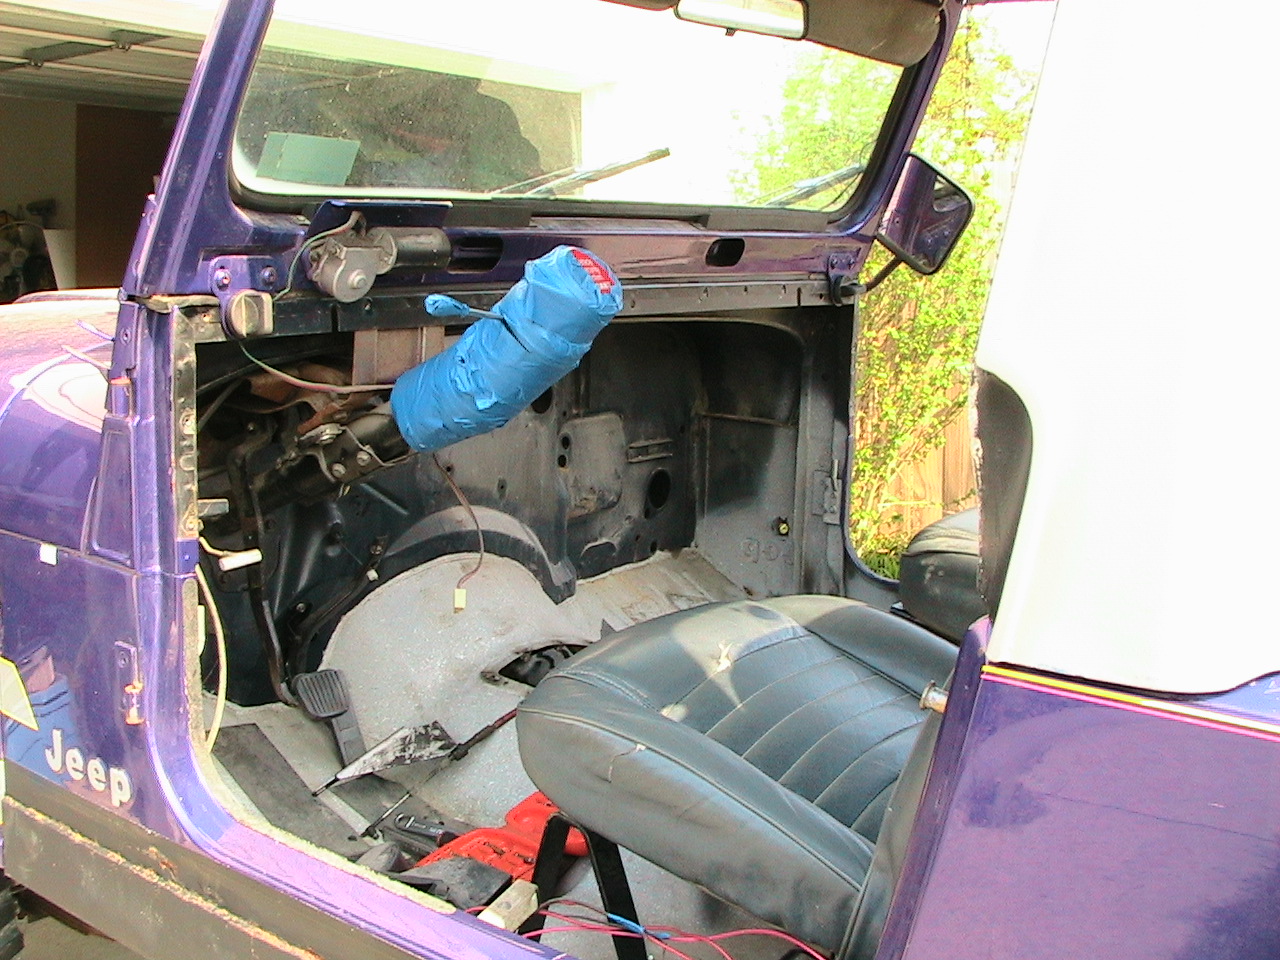
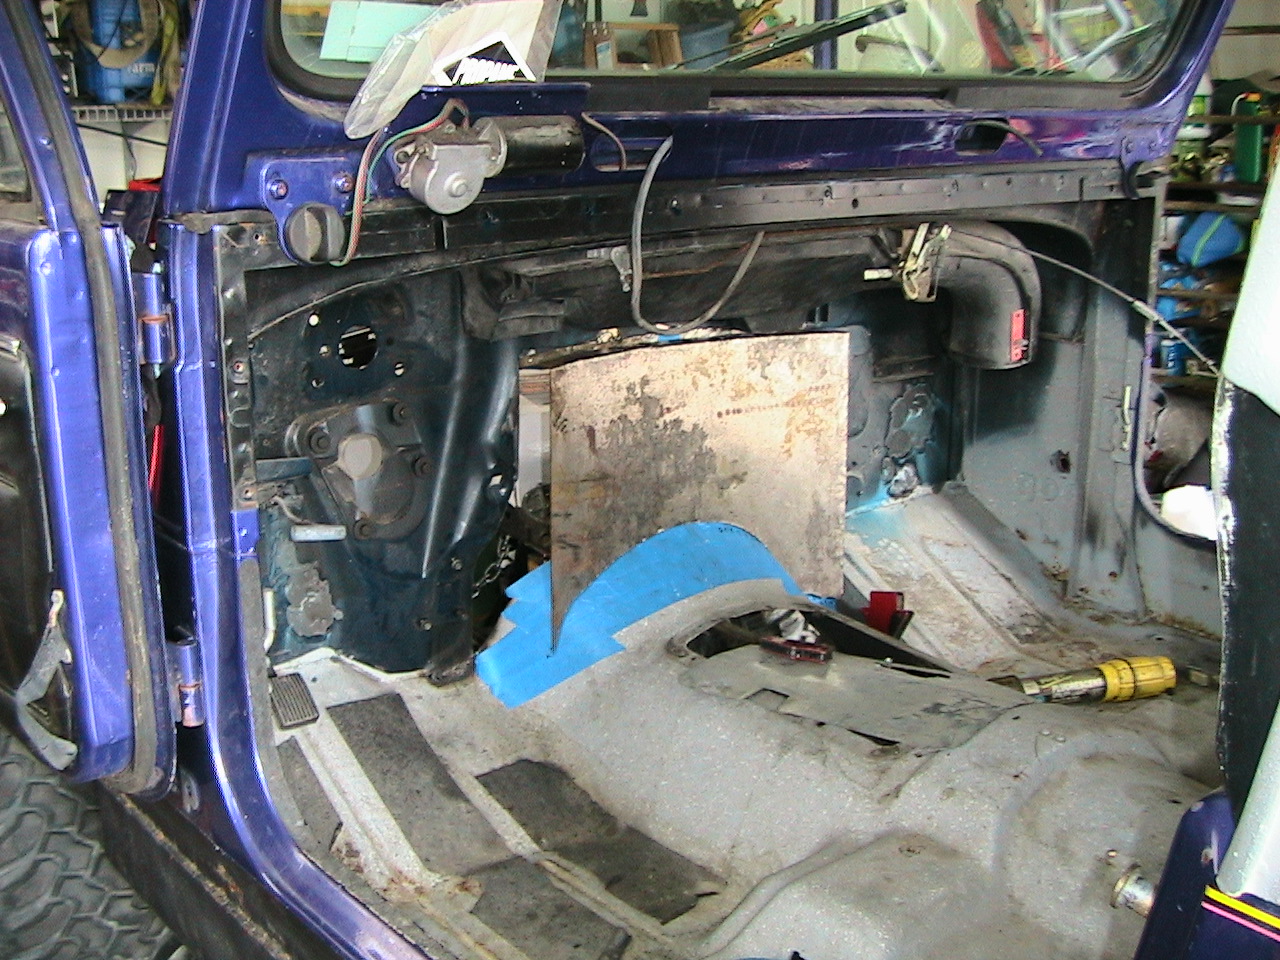
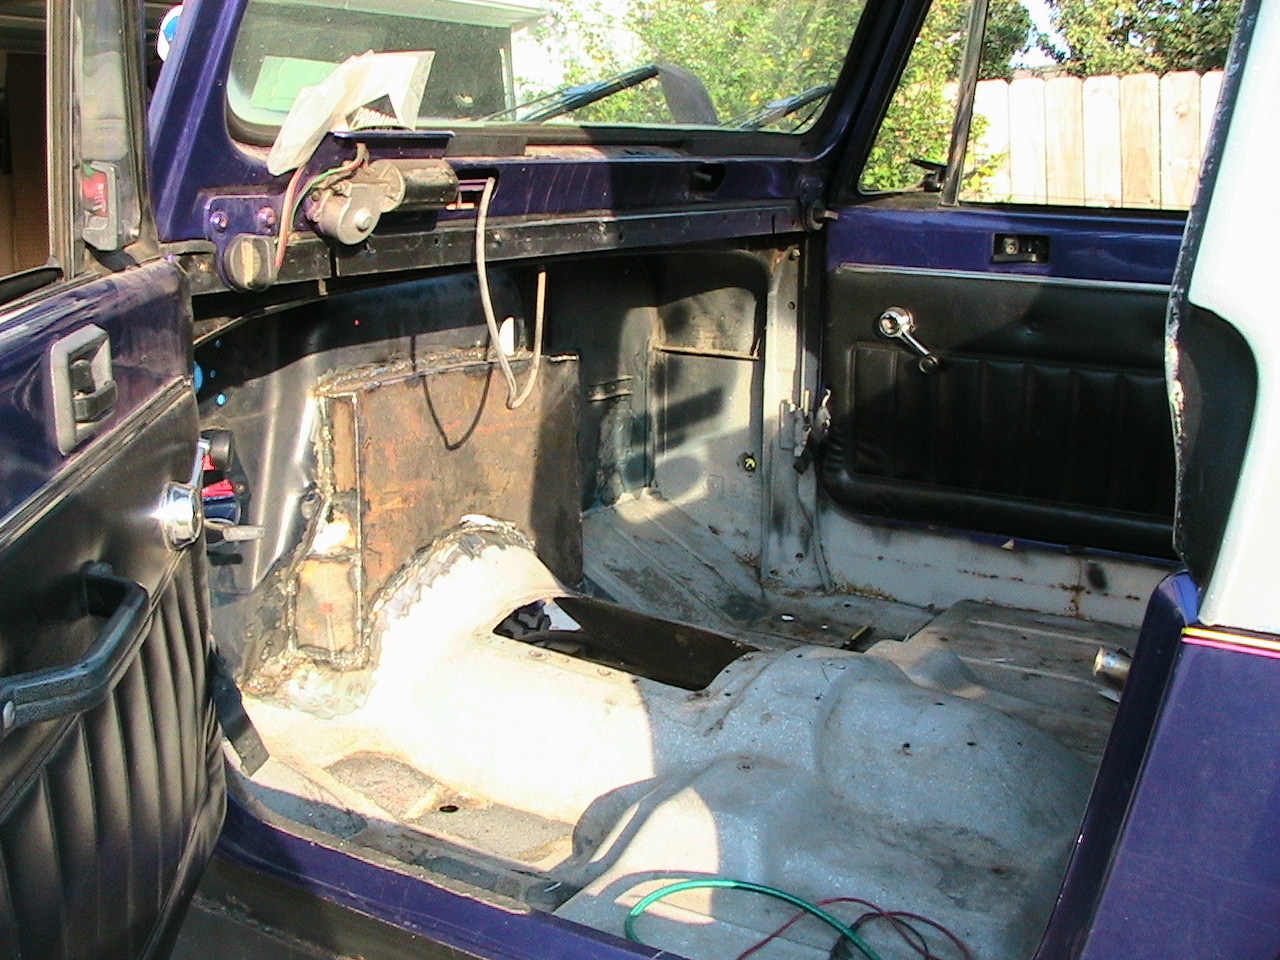
I've completely gutted the interior. With the Mohave heater, I
won't need all that duct work, so even the dashboard is not a
given. I'll probably keep the vent system and plumb it into the
engine compartment for a stealth-snorkel approach, as long as I can be
sure I won't get water in there when driving in the rain. There's a
high-pressure envelope that develops at the base of the windshield at higher
speeds, great for feeding the beast some cold air ... as long as rain water
doesn't carry in and soak the air filter.
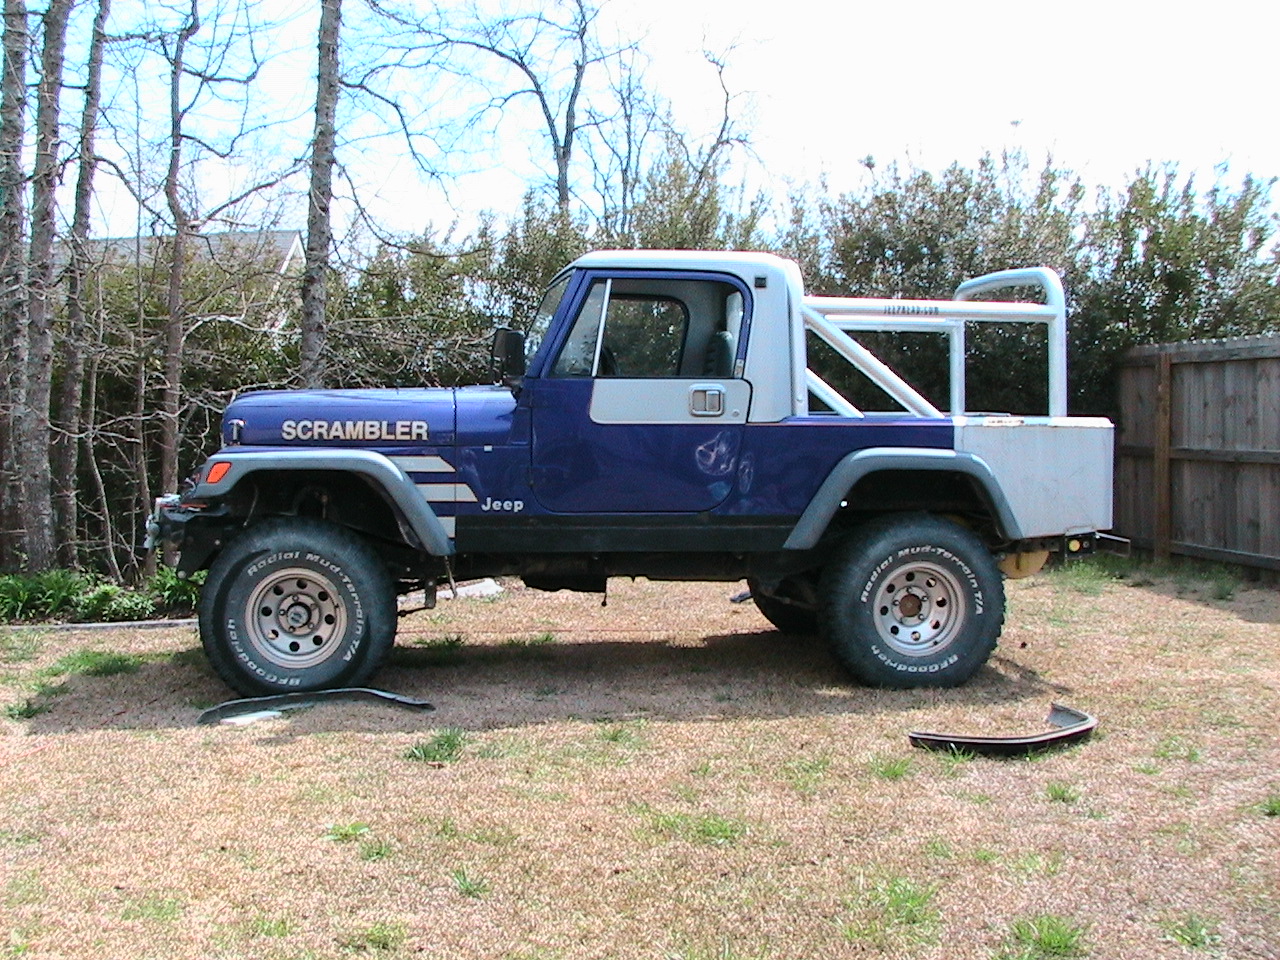
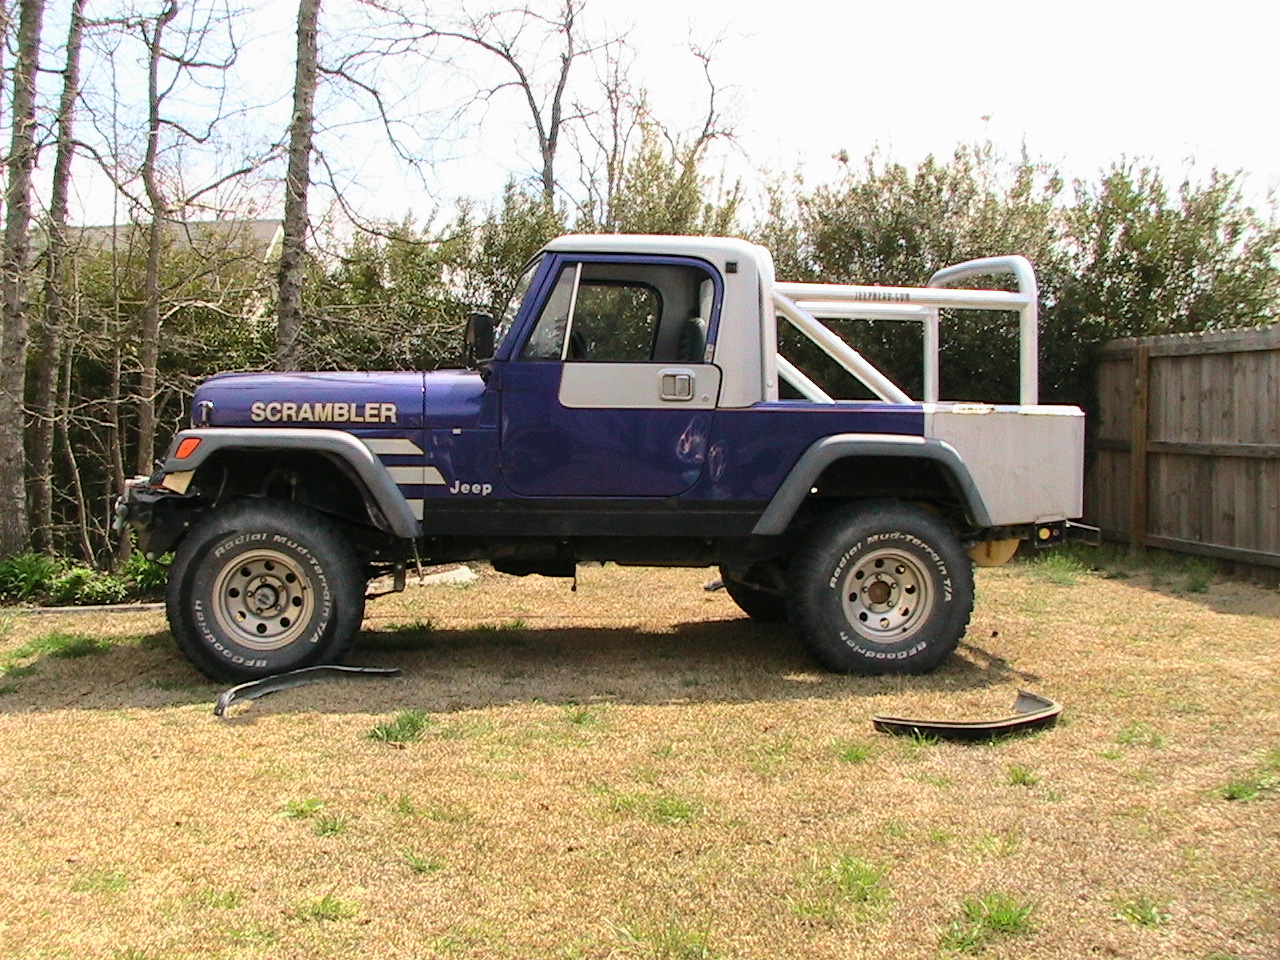
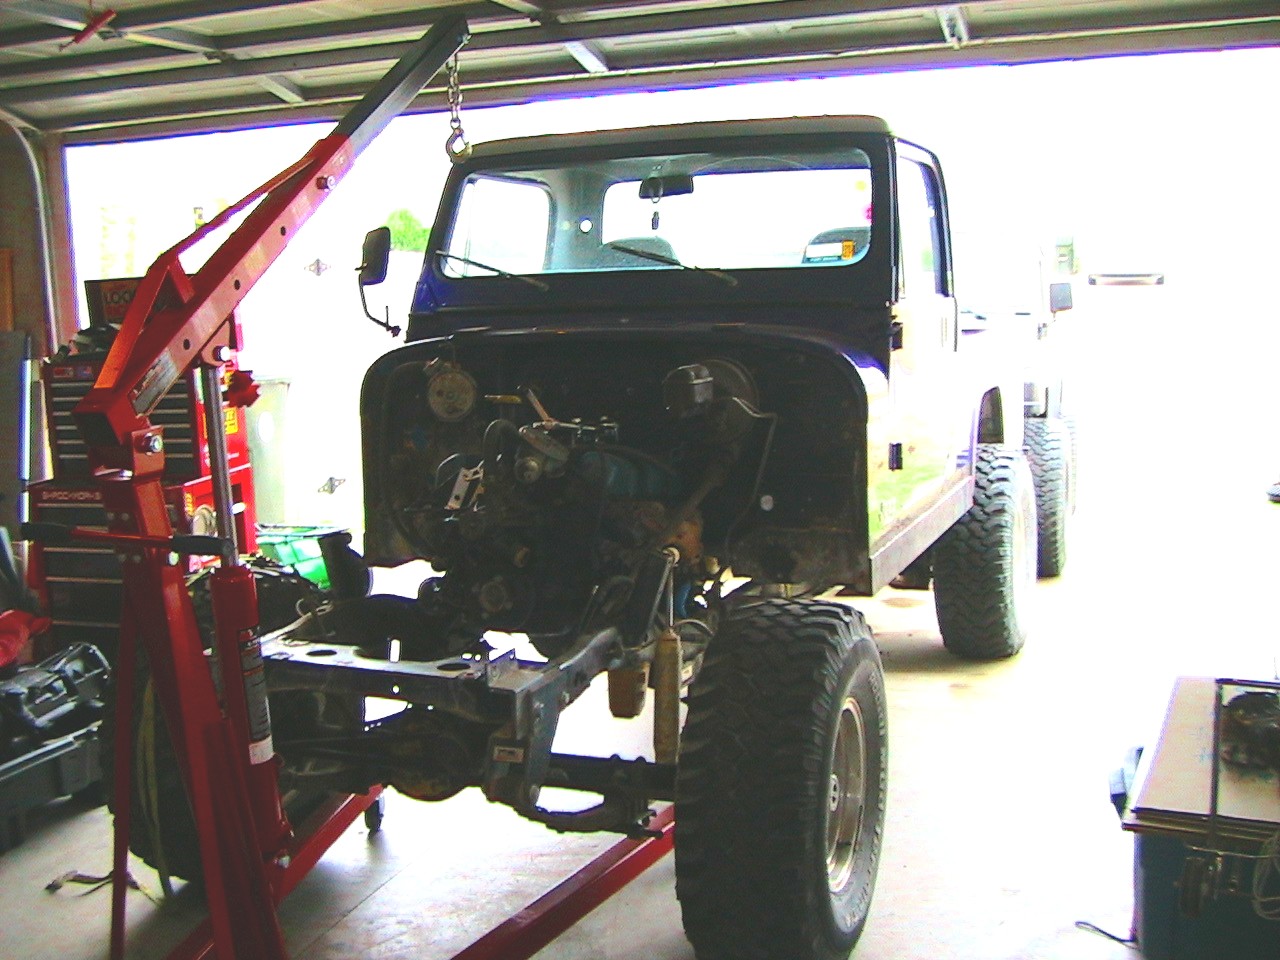
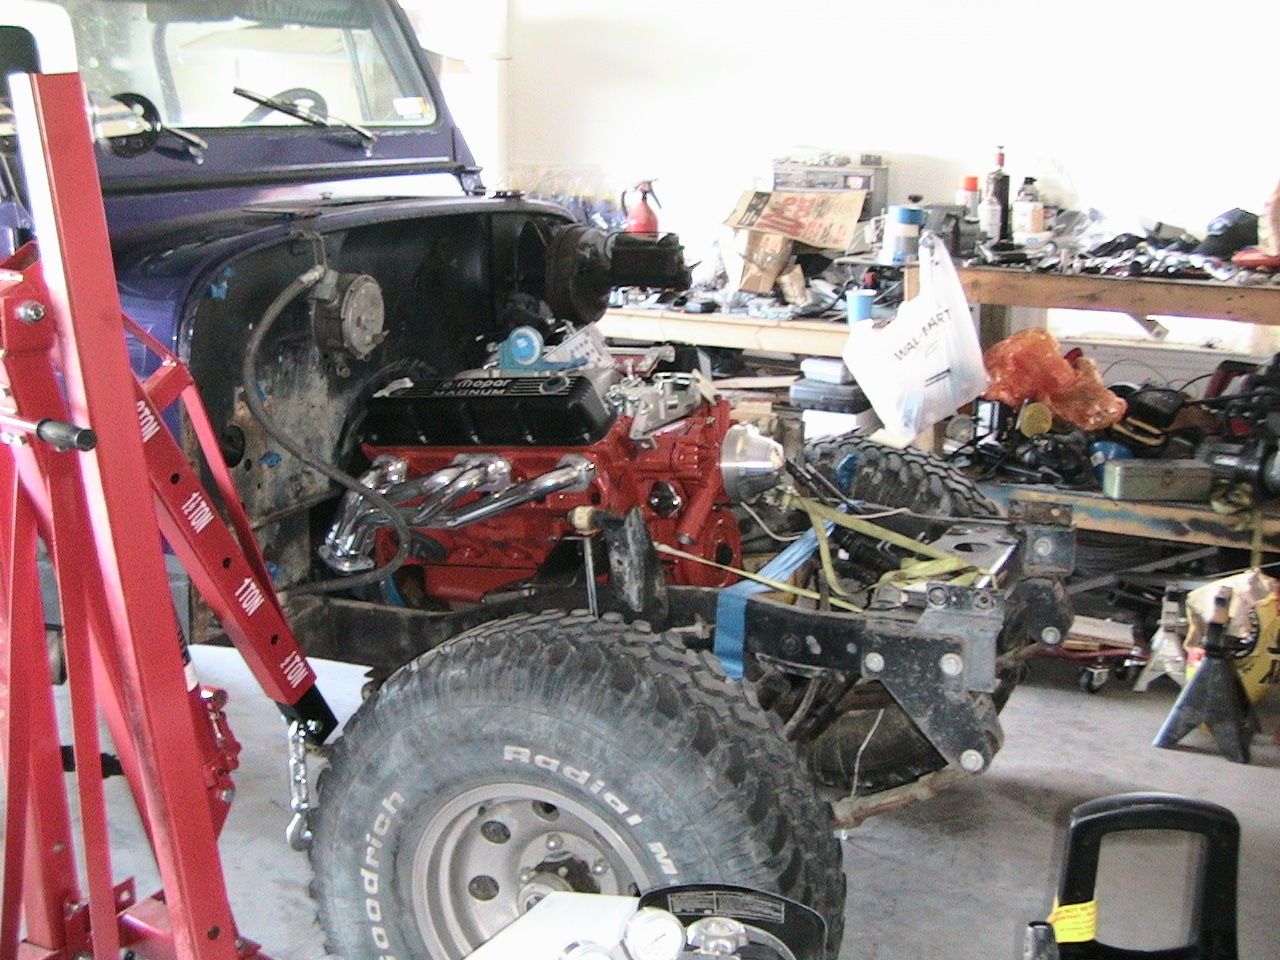
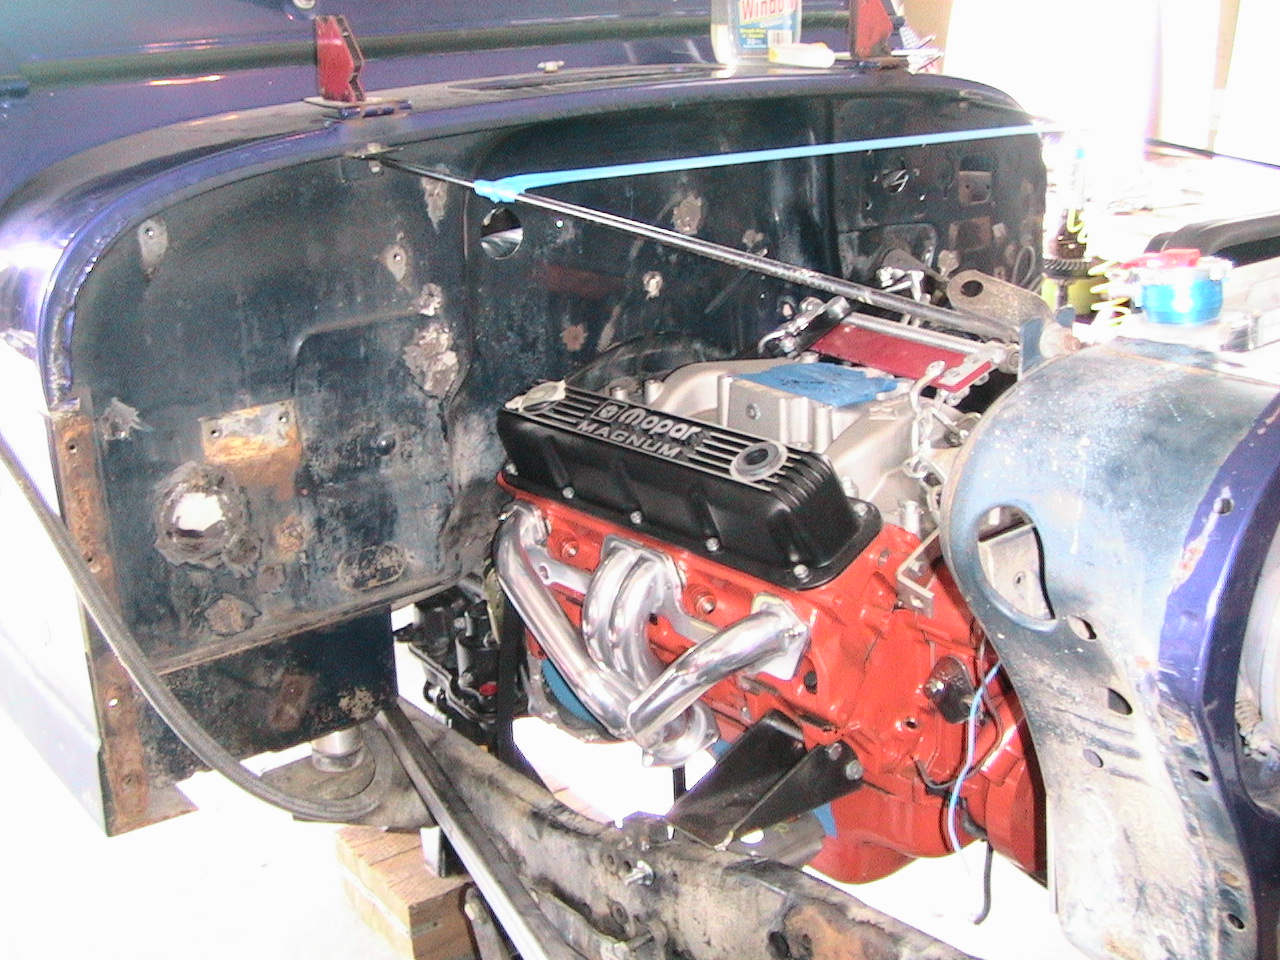
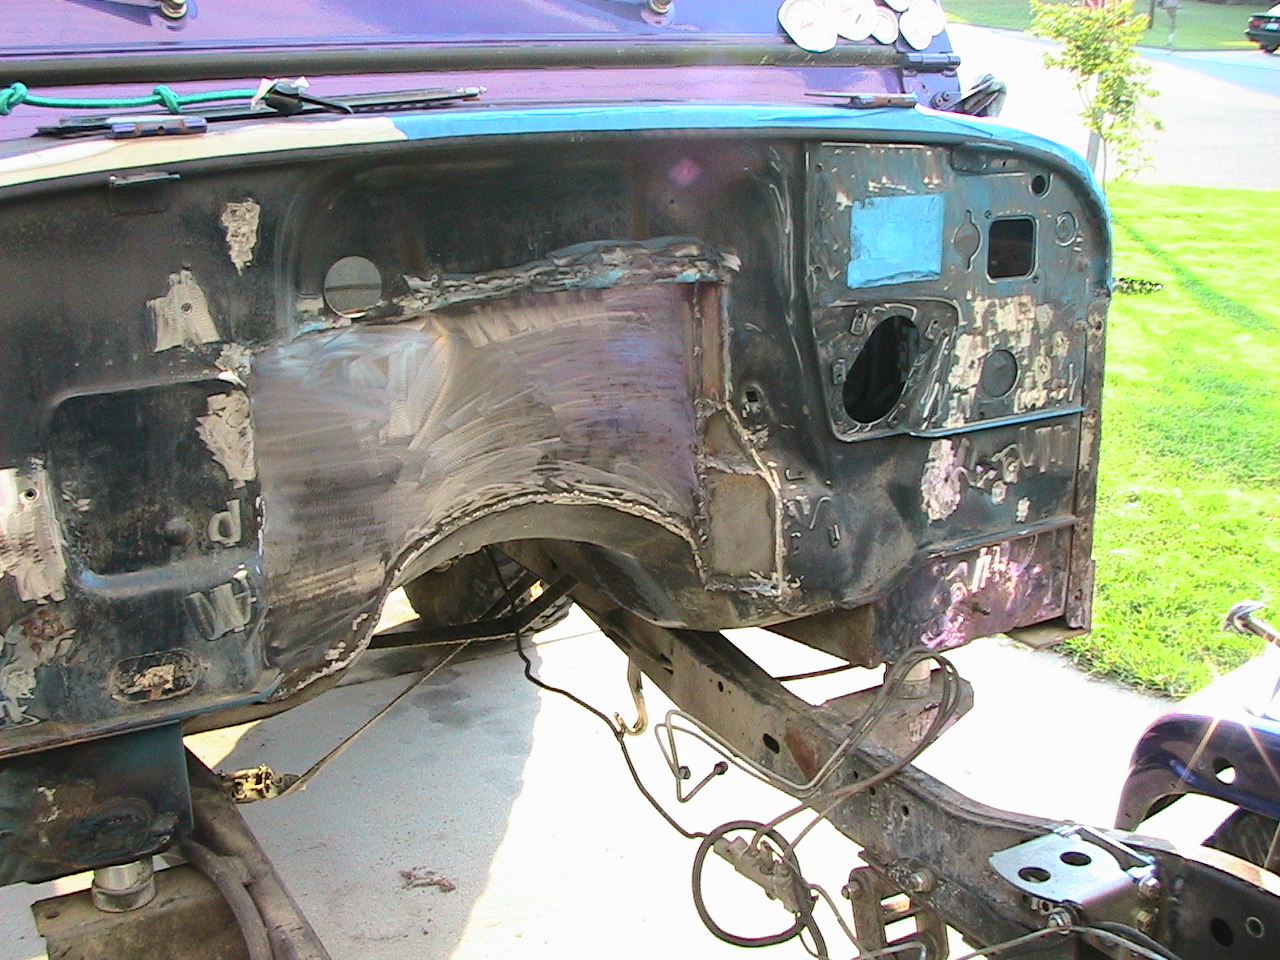
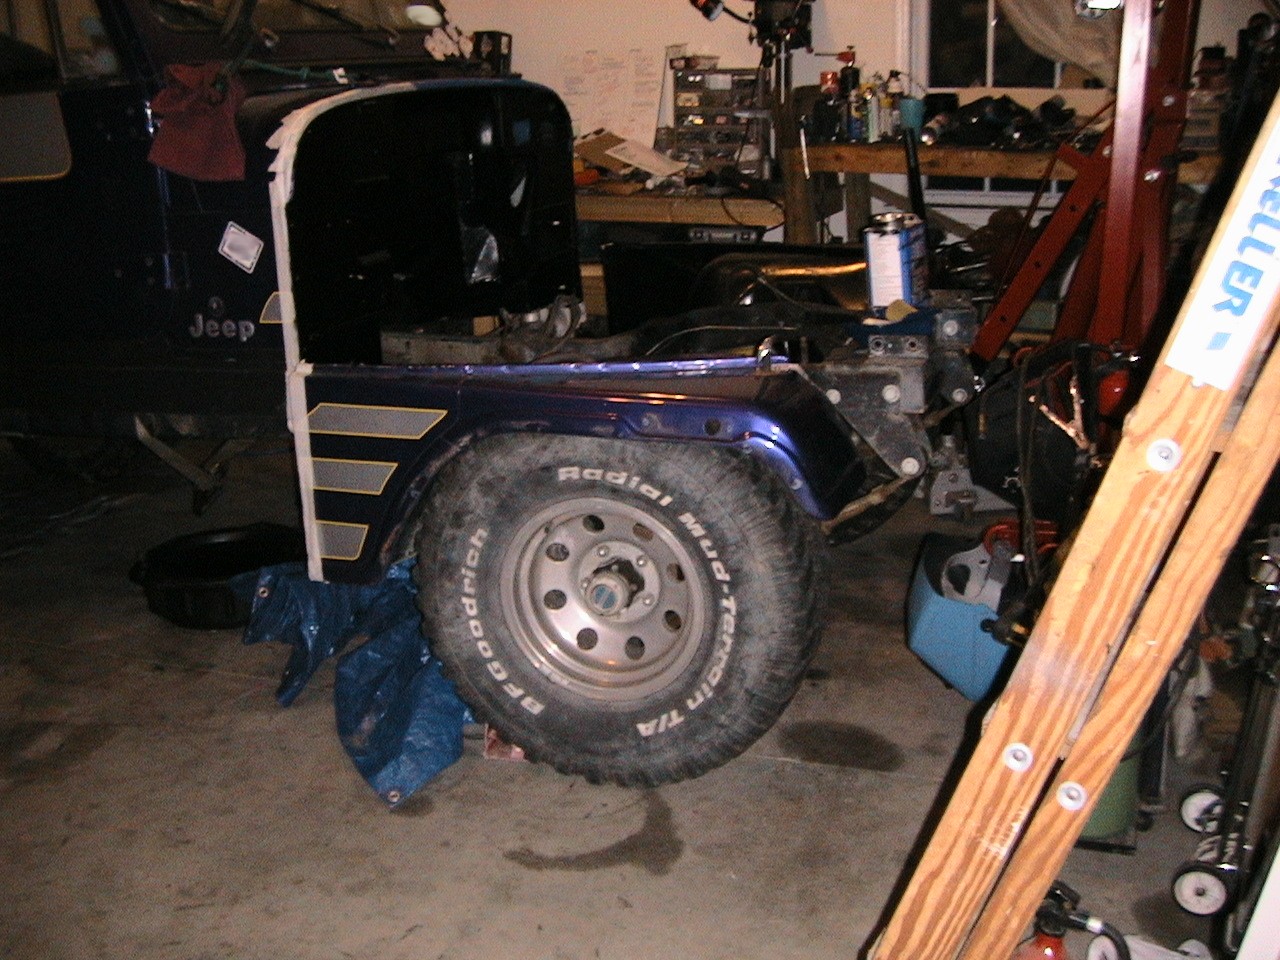
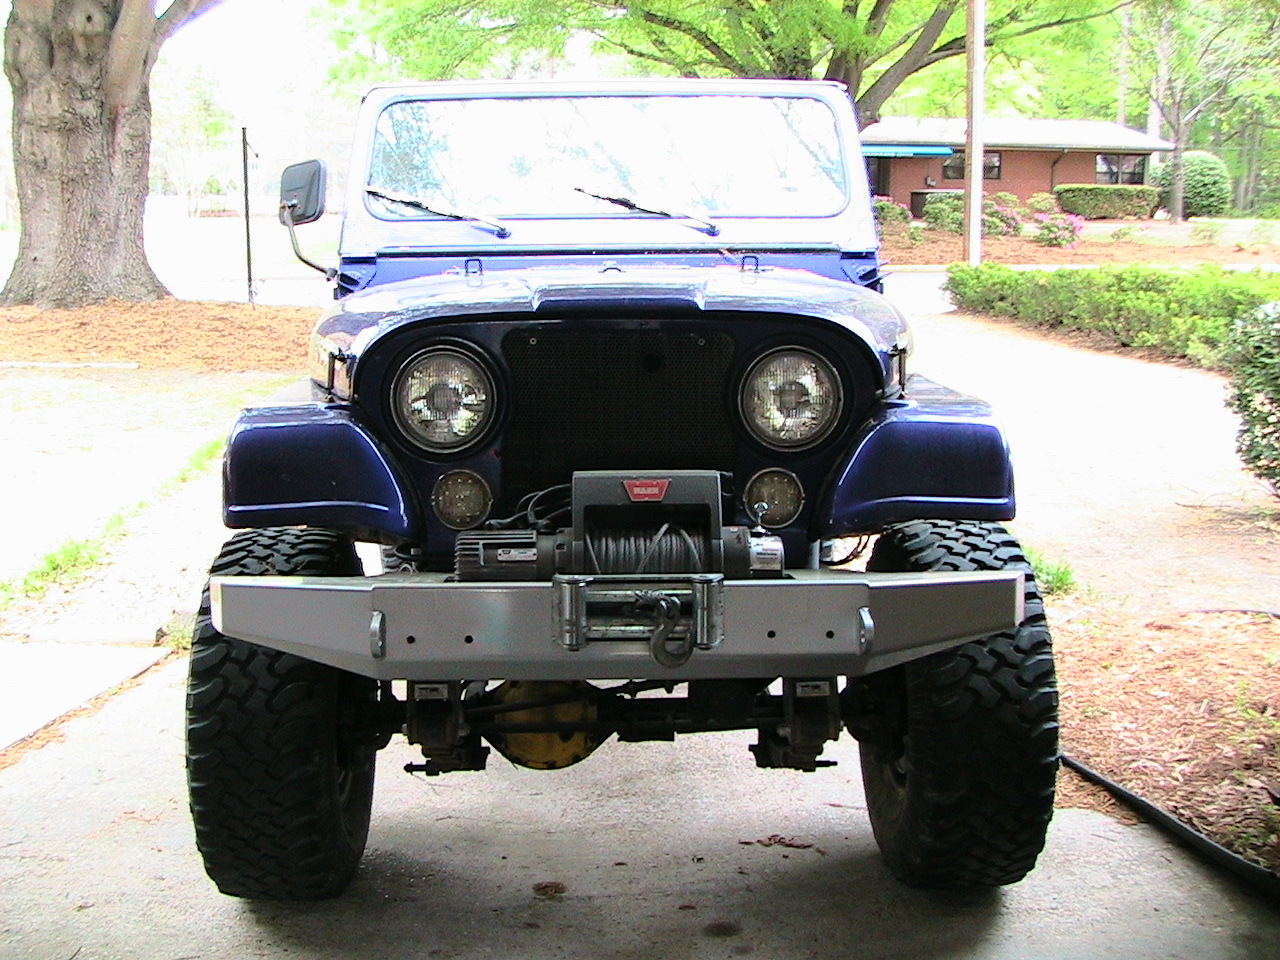
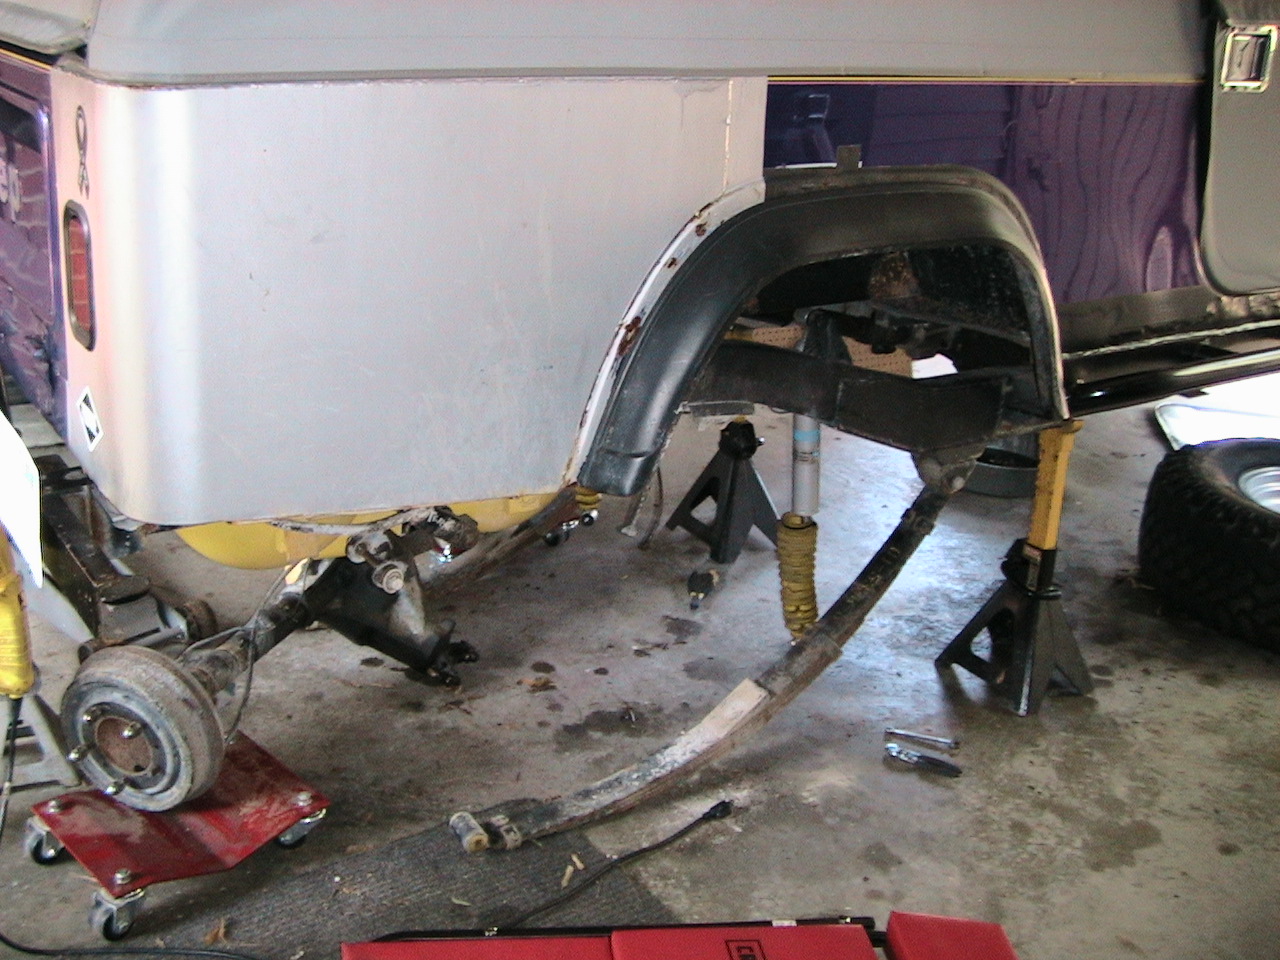
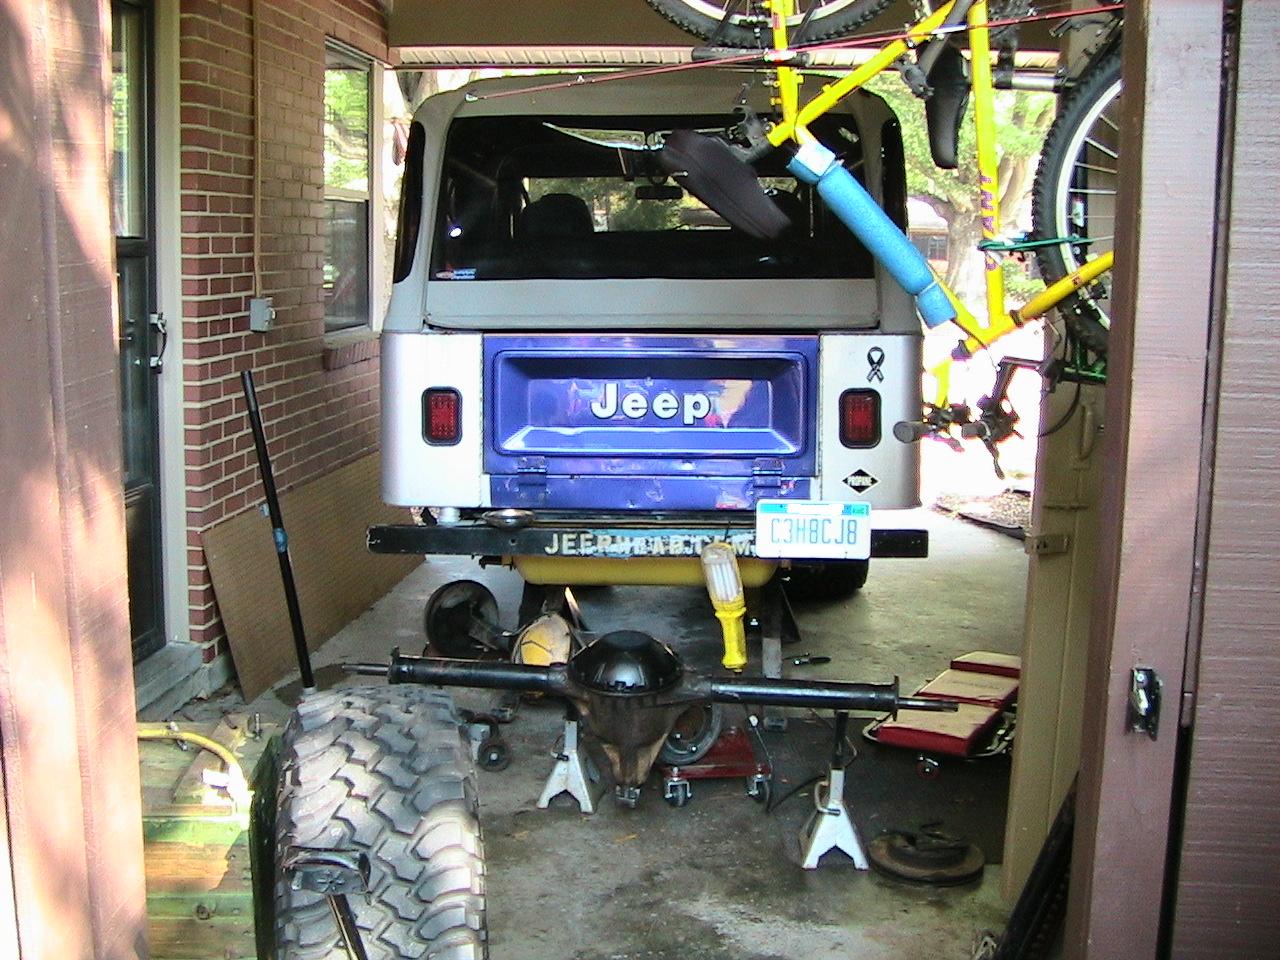
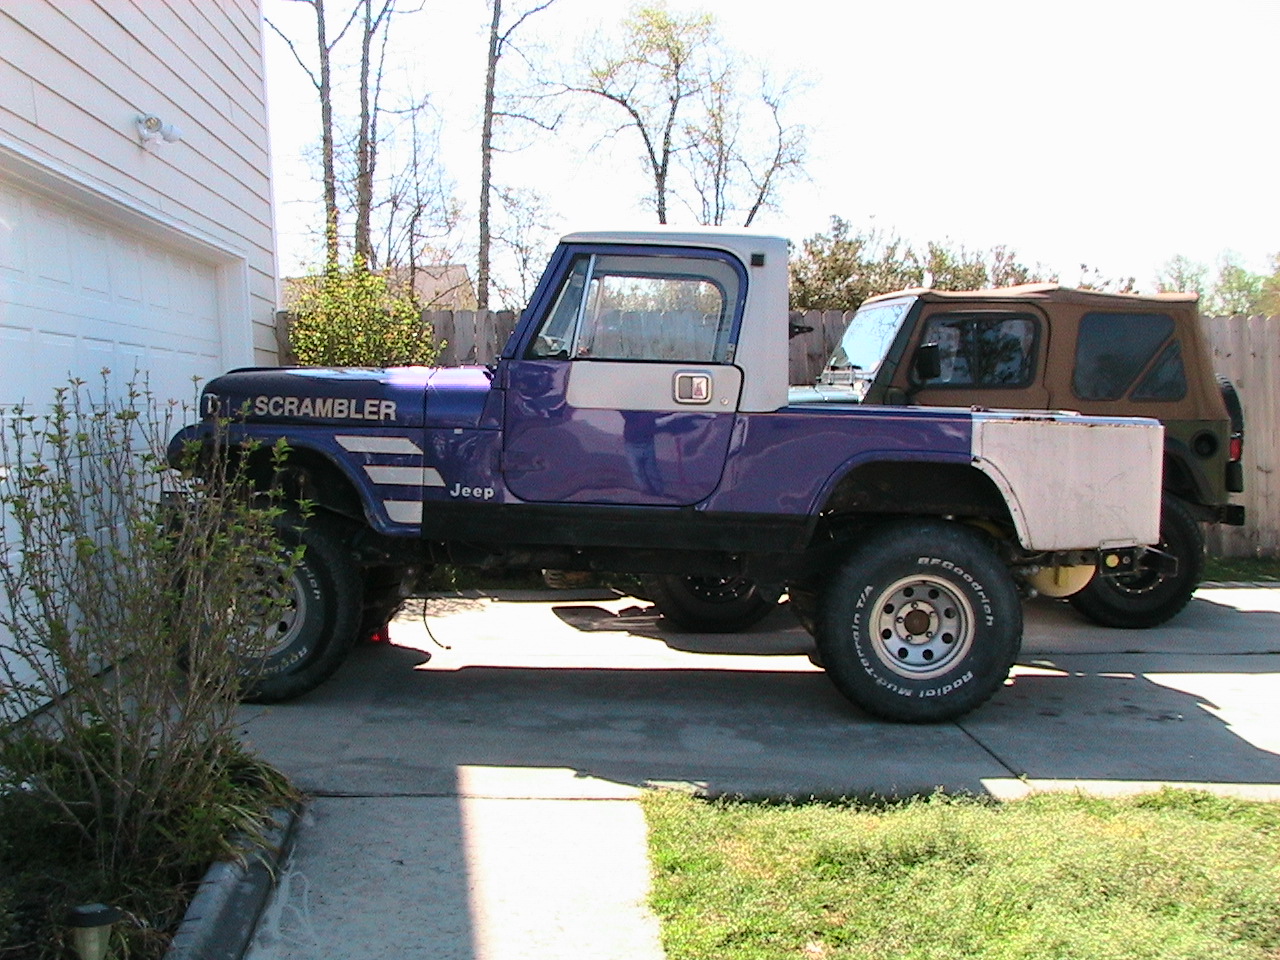 Being nice to the neighbors, I reattached the fenders and hood while I built the
driveline in the garage. I don't have enough room inside for everything so
I had to push the Scrambler into the driveway.
Being nice to the neighbors, I reattached the fenders and hood while I built the
driveline in the garage. I don't have enough room inside for everything so
I had to push the Scrambler into the driveway.
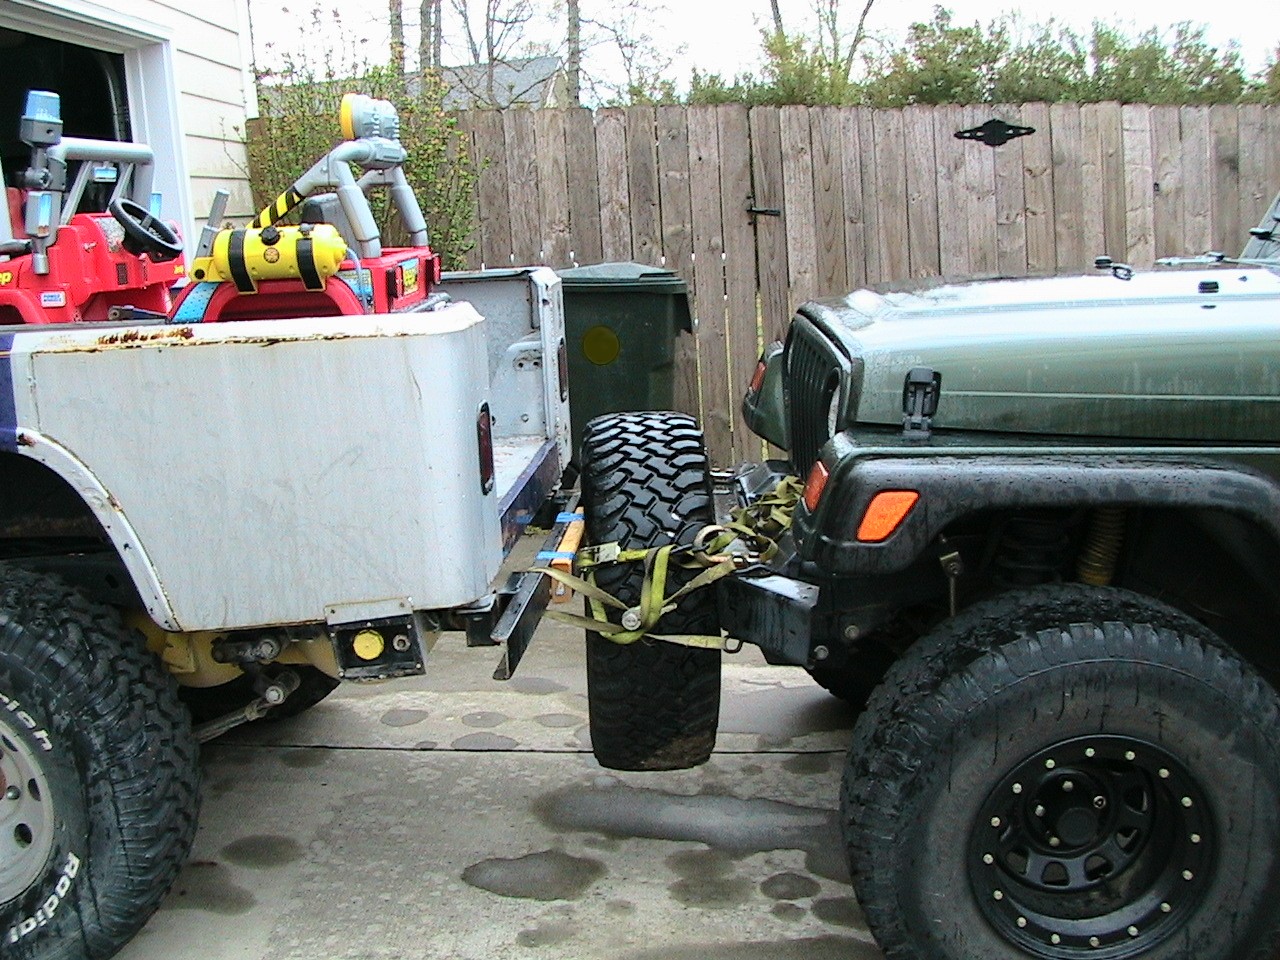 Here's how I move it back in - very carefully! Don't try this with your
wife's car! Note that it was raining at the time (fun) and also my kid's
Jeep in the back of my Jeep!
Here's how I move it back in - very carefully! Don't try this with your
wife's car! Note that it was raining at the time (fun) and also my kid's
Jeep in the back of my Jeep!
During the engine mockup, I must have put in and pulled the engine/transmission a dozen times or more. I am now sorry I saved $50 on a cheap-a$$ engine hoist. It now can't hold the driveline up unless I reef on the valve - eventually that won't work either. I learned long ago not to buy cheap tools. Too bad I don't listen to myself sometimes.
Novak Adapter's motor mounts work well. Their instructions suggest shifting the driveline's centerline 1 1/4" to the left to clear the front driveshaft. Without the Patriot Headers I'd never get close to that. Anyway, the most critical positions are forward (leave room for the radiator, fan, pulleys) and left for the steering shaft. Back for the firewall, but then I've cut the seam out of the center already. Letting it go back some will require cutting for the distributor and left cylinder head but it's all good.
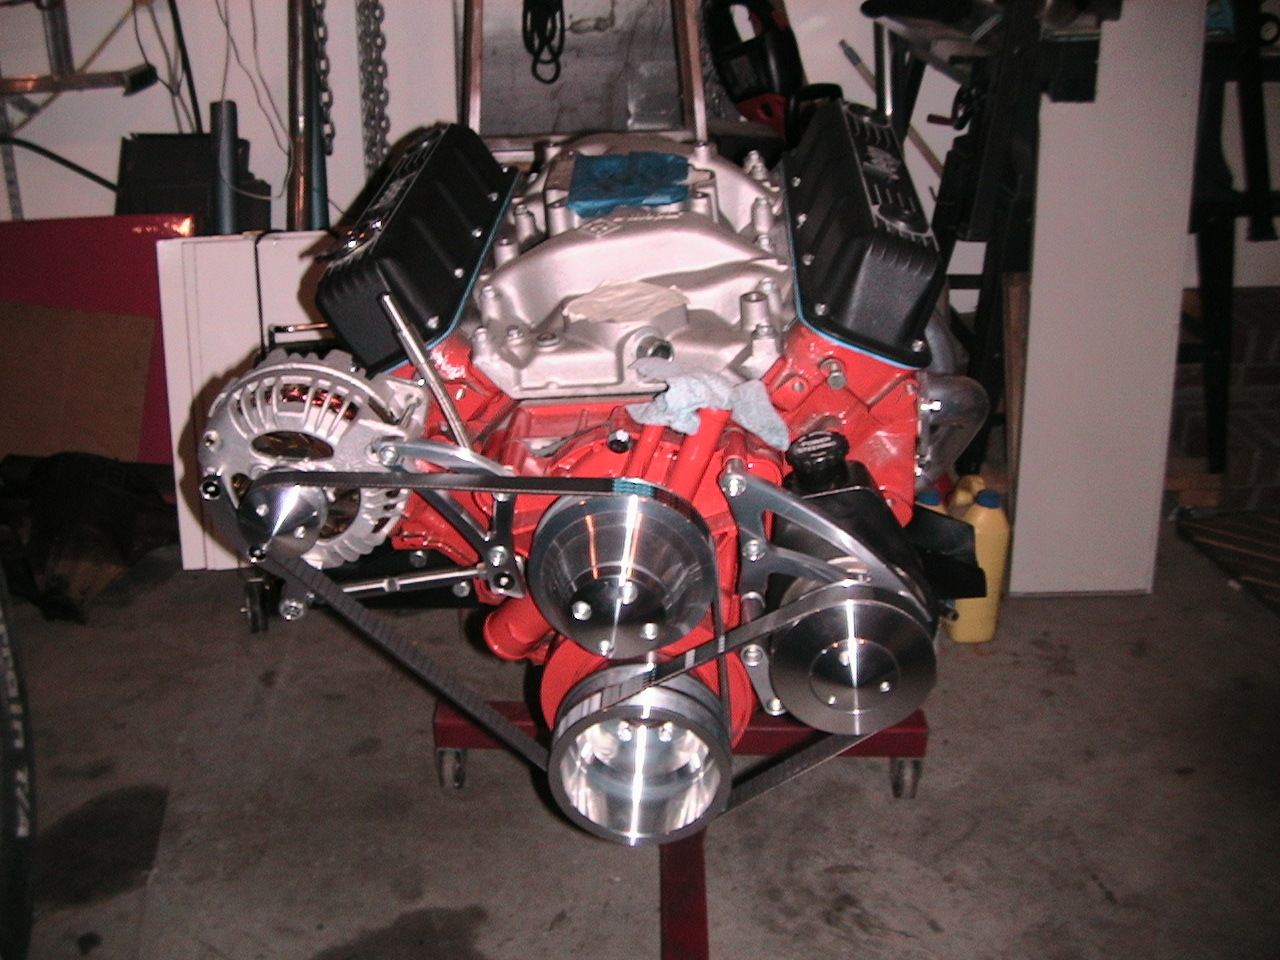
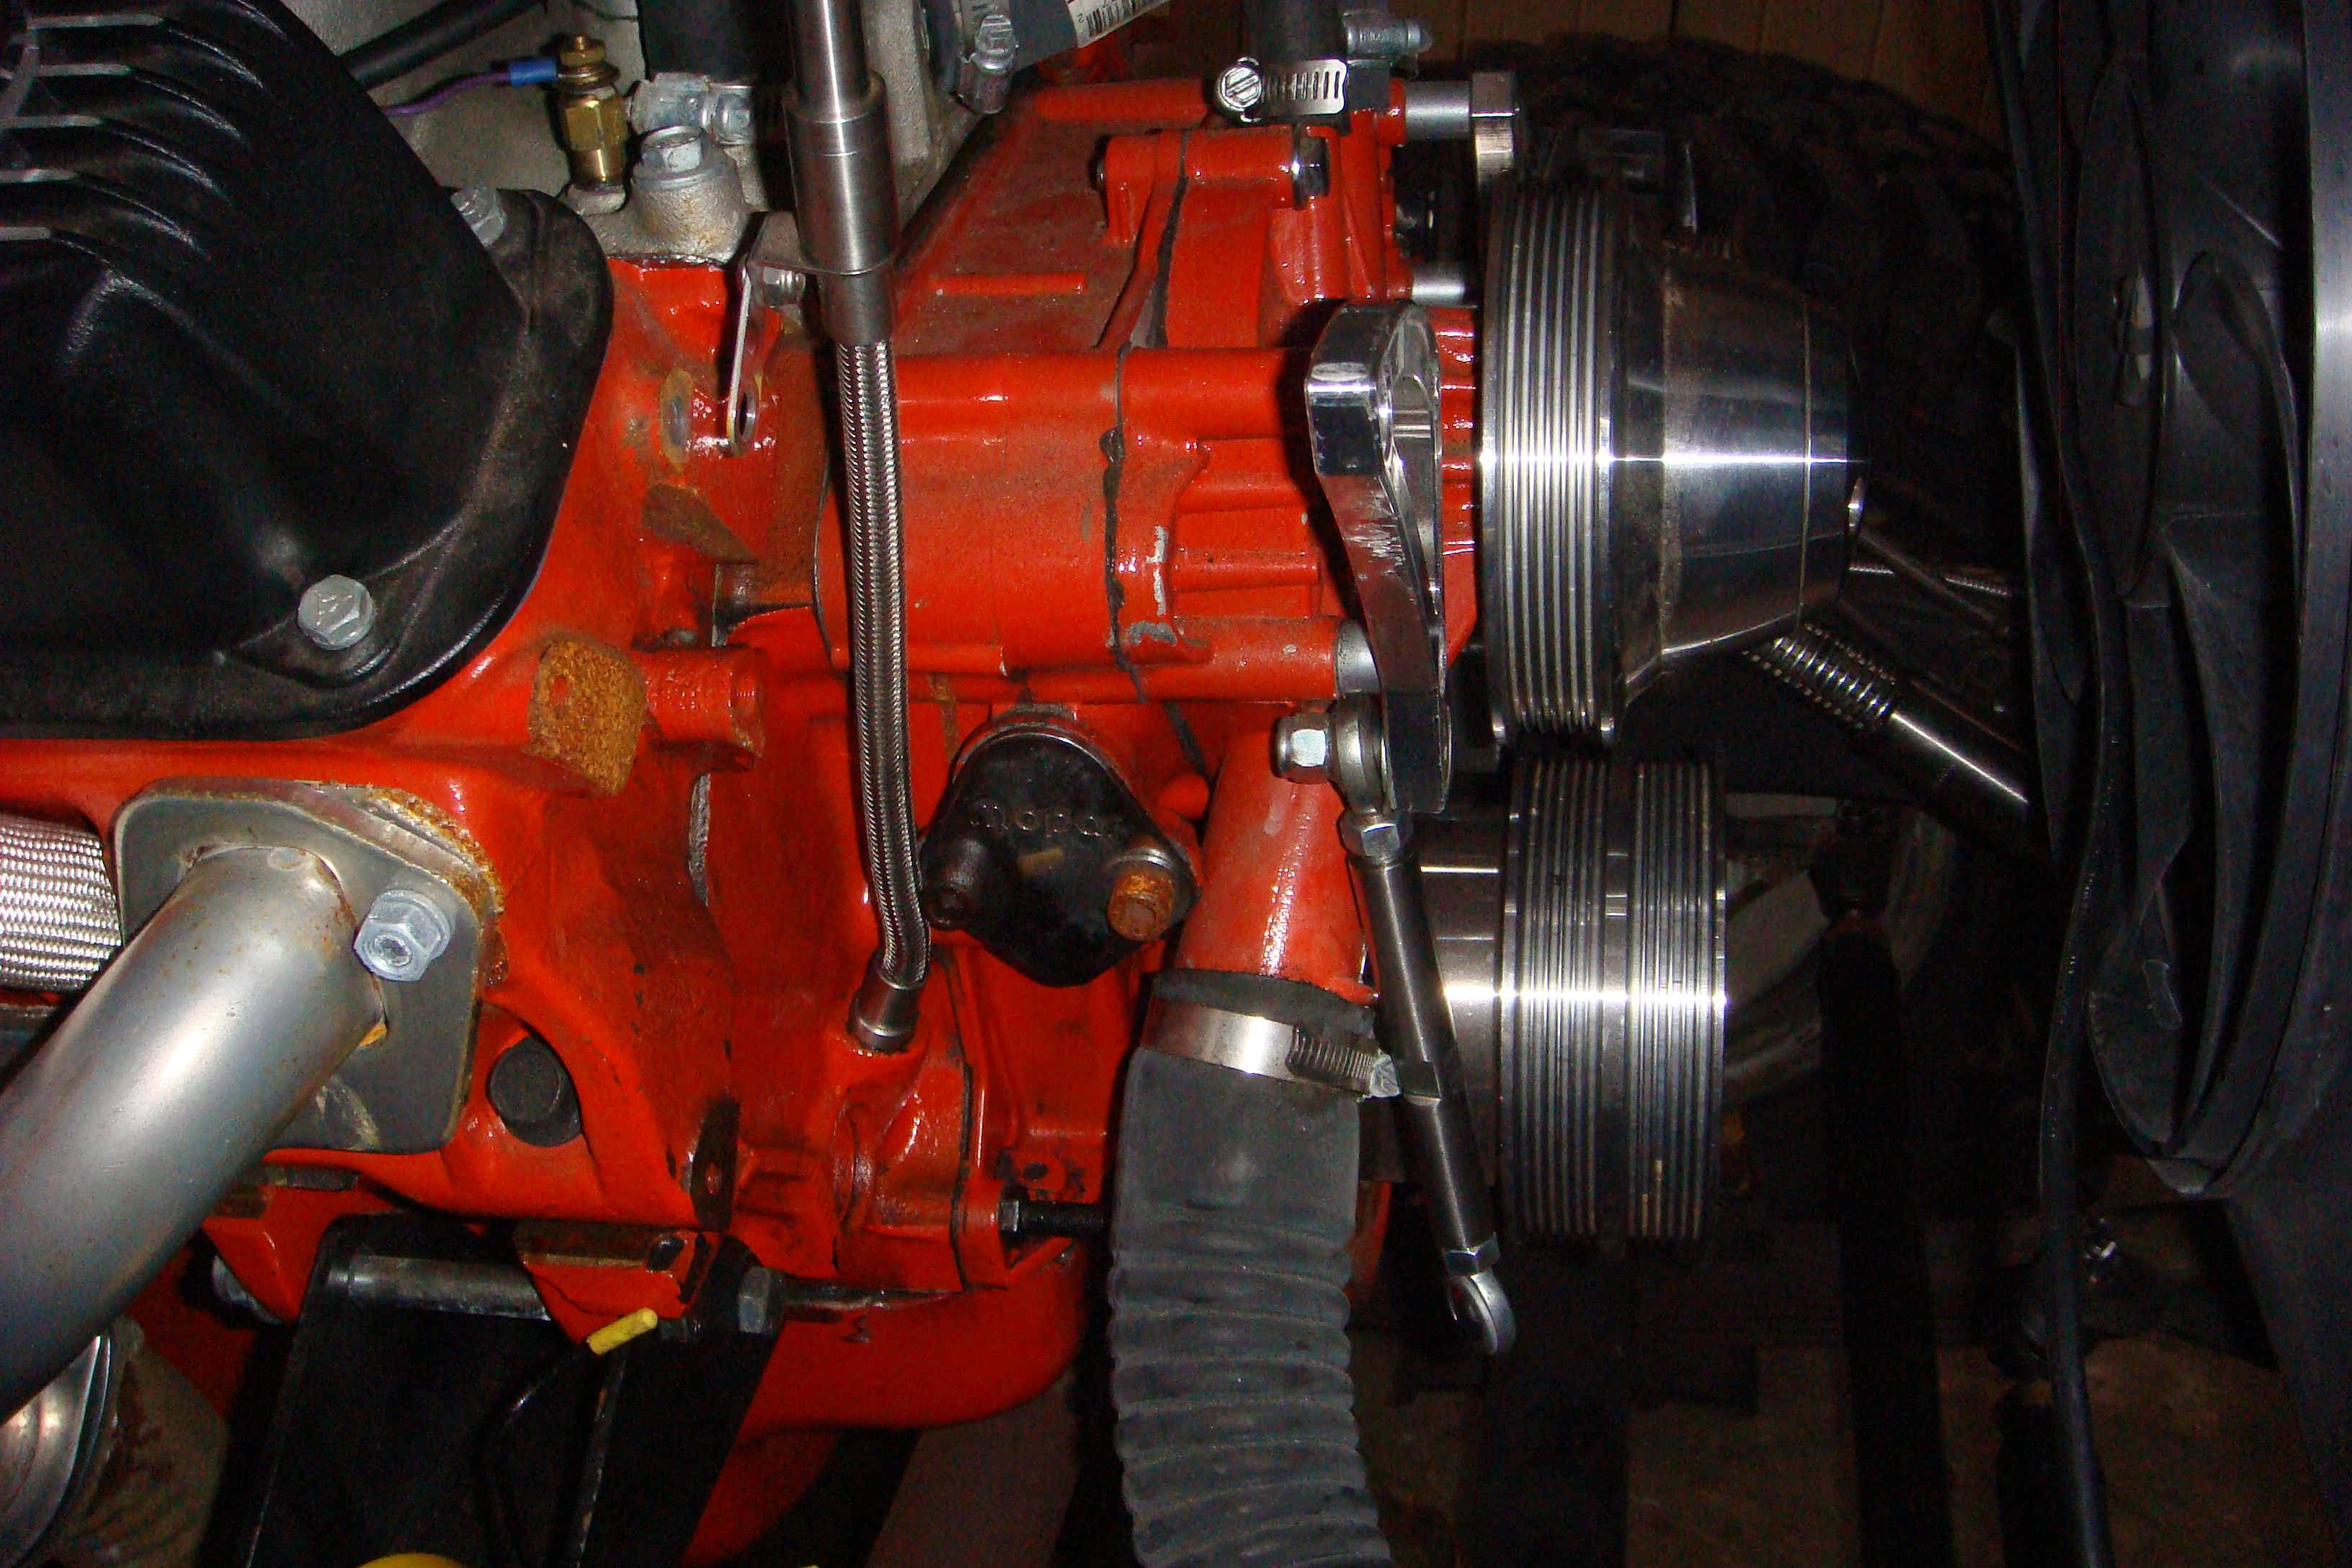
The accessories have been a challenge as noted above. So far, I've tried an alternator for a Magnum Dodge pickup V-8, a Magnum Jeep V-8, no dice. Now I have an externally regulated alternator from a 77 Dodge 360, seems to line up so far. The AGR power steering pump for the Magnum Dodge pickup didn't fit, then I tried a different part number, same. Currently have an AGR for a Dodge 360 pre-magnum, with a Magnum Dodge reservoir on the back, with 6 cyl jeep power steering pump bolts holding it in place. The pump because it has to bolt/line up with the rest of the March pulleys, the reservoir because it's got a better shaped return line than the jeep one I have, and the bolts because the pump requires ASE bolts, not metric ones according to the AGR directions.
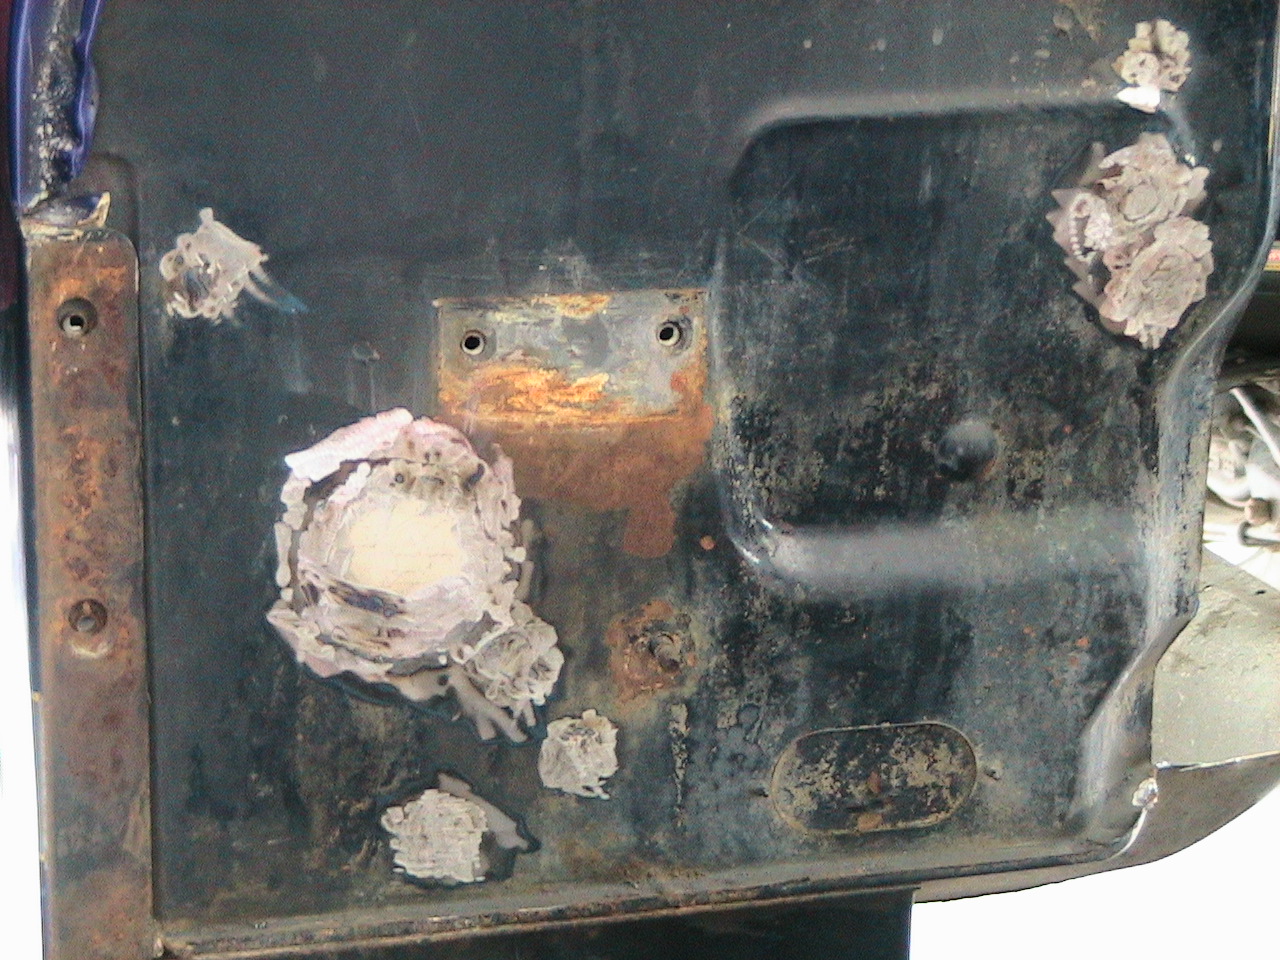
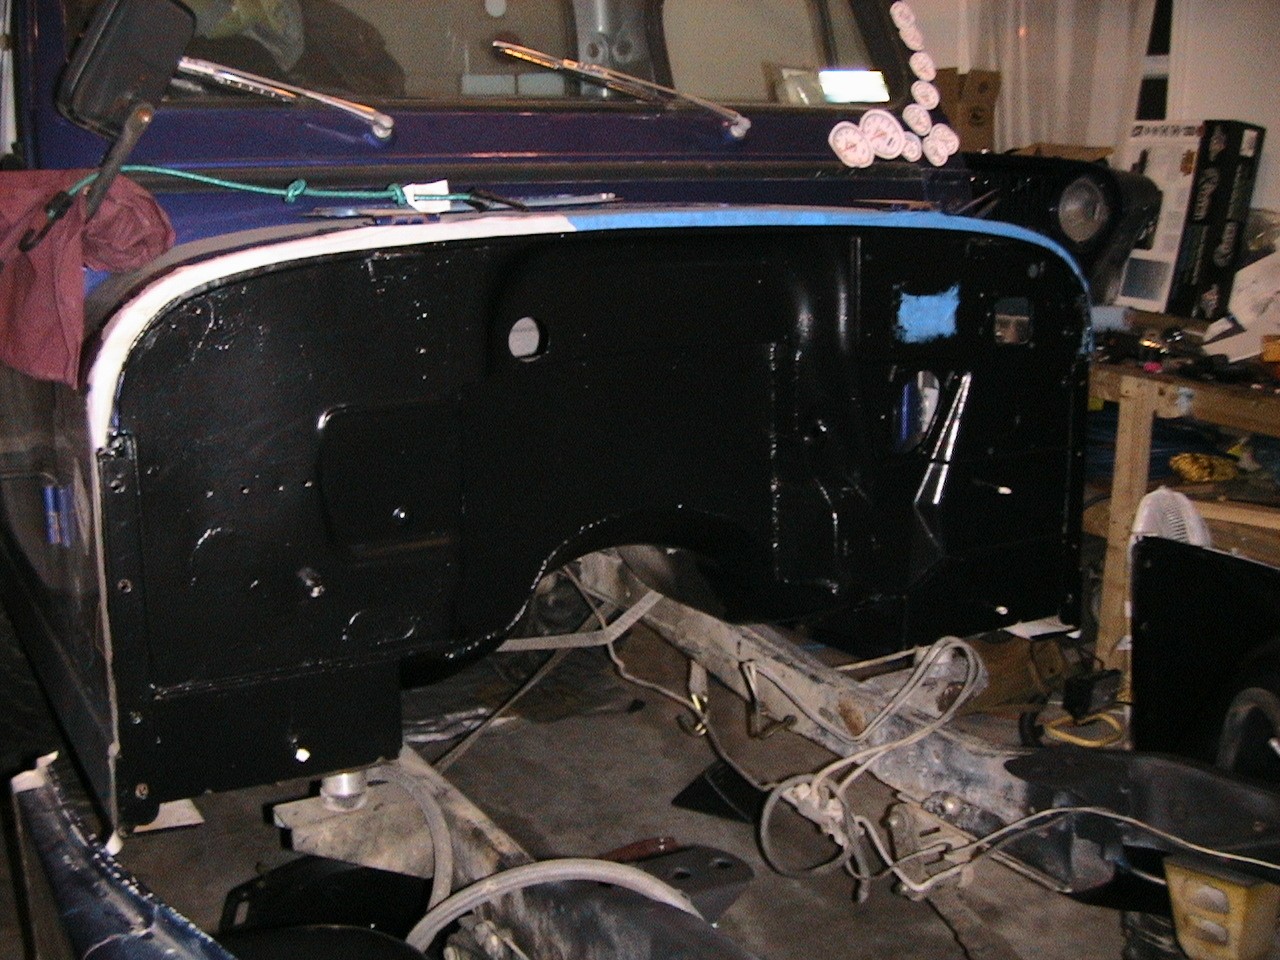
I've sealed up all of the holes in the firewall that I don't need and will use bedliner stuff on the entire engine bay to try to keep the heat, noise and vibration down.
So far it looks like the Dana 300 can be clocked all the way up, and the only part of the driveline below the framerail is the tranny pan.
Once the position of the driveline is locked in, I'll set up all of the hoses etc so I can get the brackets and firewall holes set before I line it with the bedliner. Part of this is going to be placement of the MSD ignition, autotronics controller (for the propane mixer) and Mohave heater which will go inside the cab. I may have to work out placement of gauges and stuff to make sure I get these components in the right place before I cut the holes.
I've had to move my brake lines, I should probably swap to an upgraded brake system, including rear disc brakes which will be on the new axle which will also have a locker and 4.56 gears, which means the front axle needs to go to 4.56s. Or I might just find a new place for my brake lines until I get this thing running.
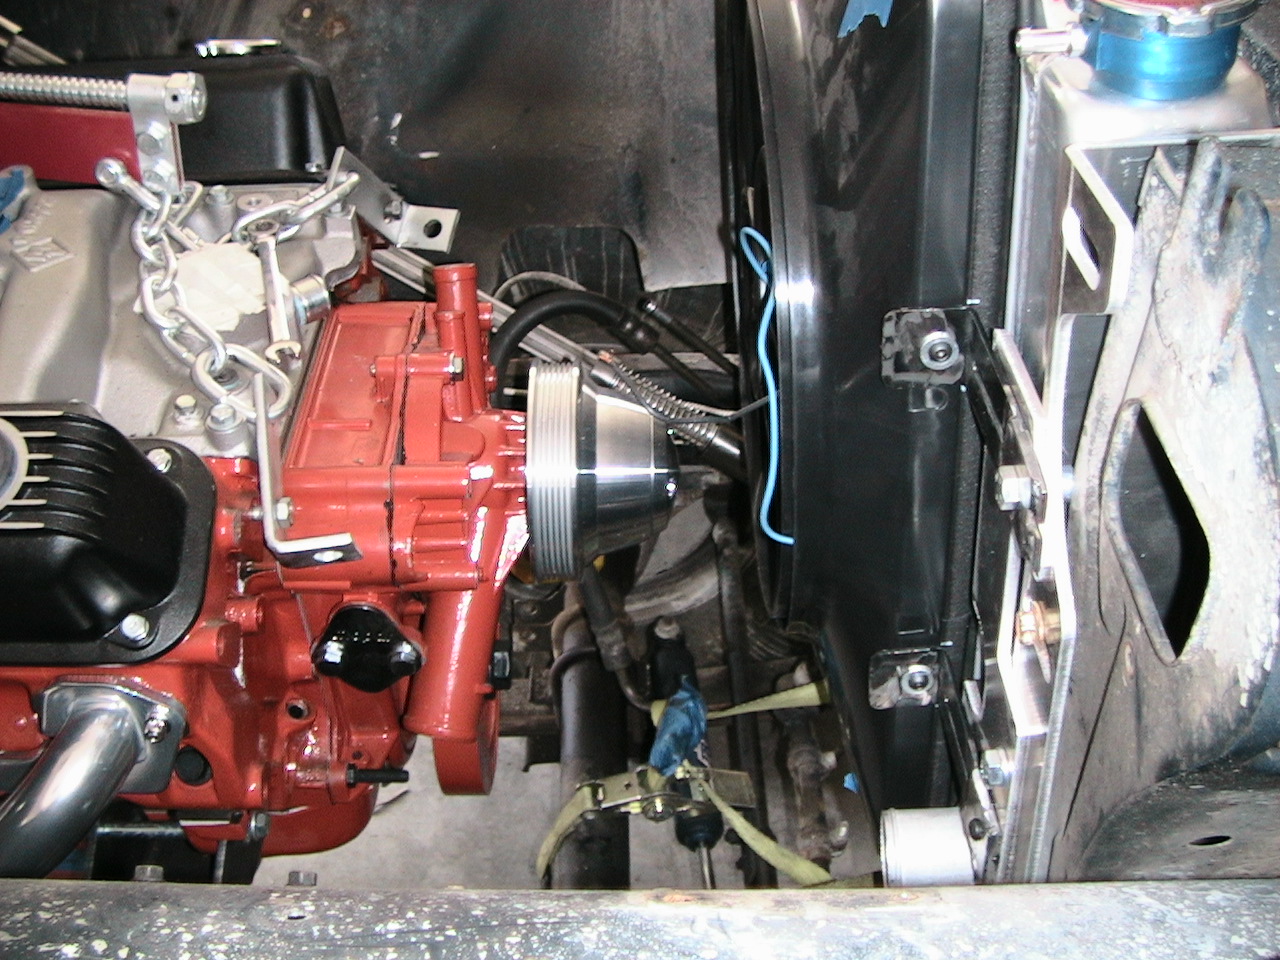
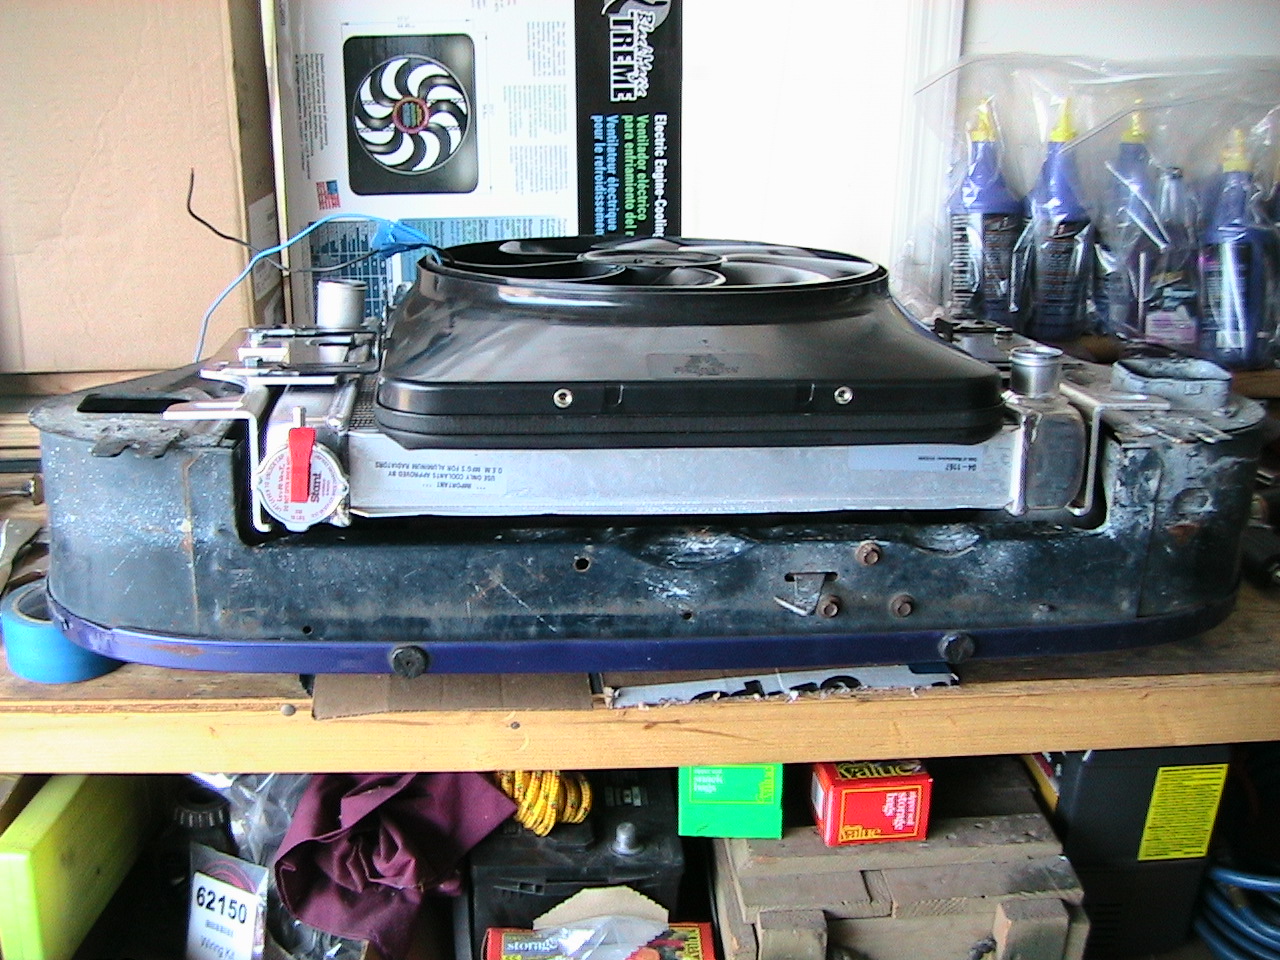
I modified the included brackets for the Black X-Treme fan - it's the biggest (CFM-wise) one they make, and it has to be mounted rotated 90 degrees to fit, but it only hangs an inch over top and bottom, easy to seal off. I got the thermostat switch with it, and will also wire an override switch for water crossings.

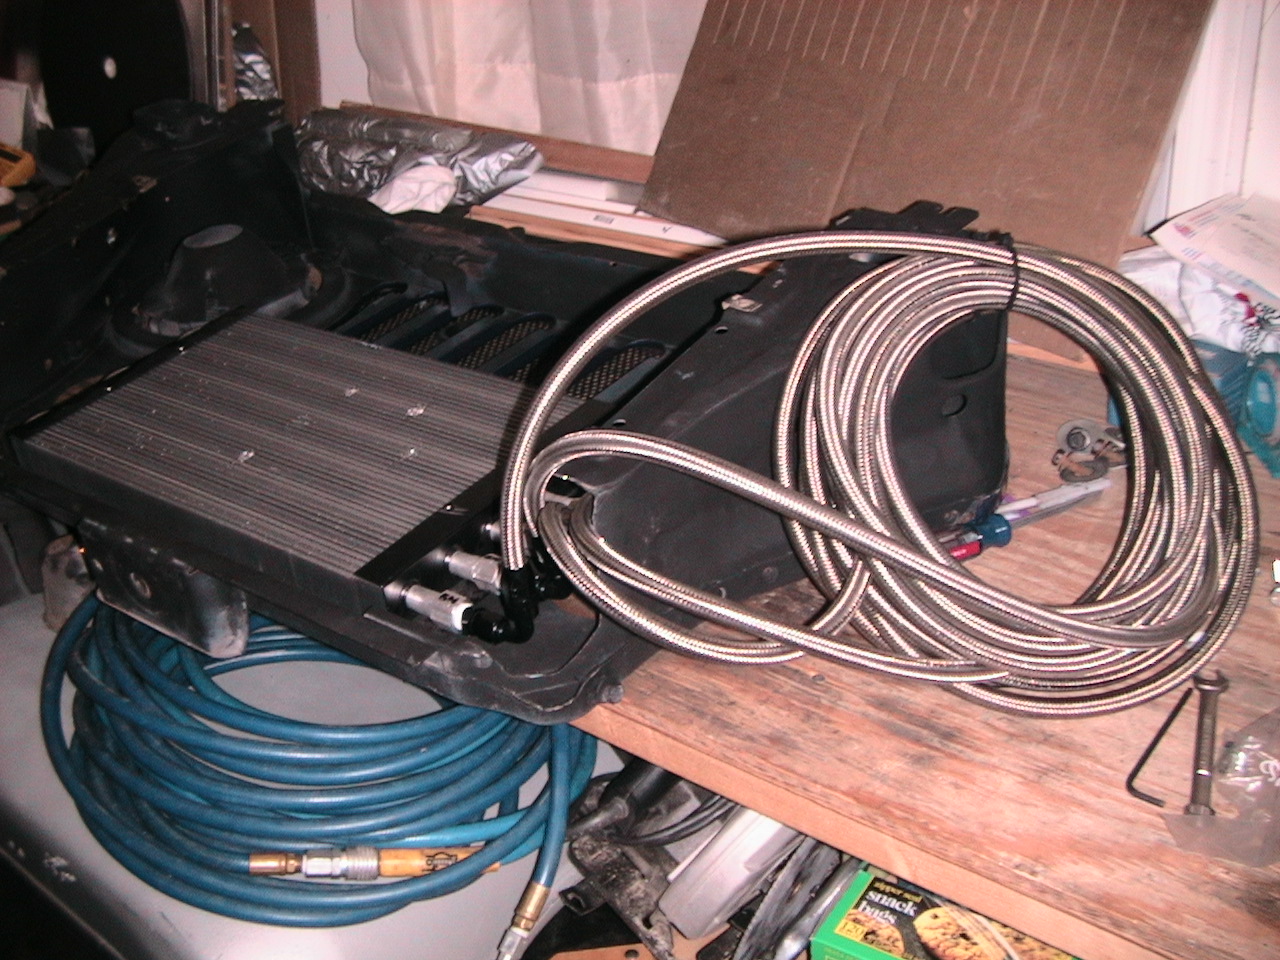
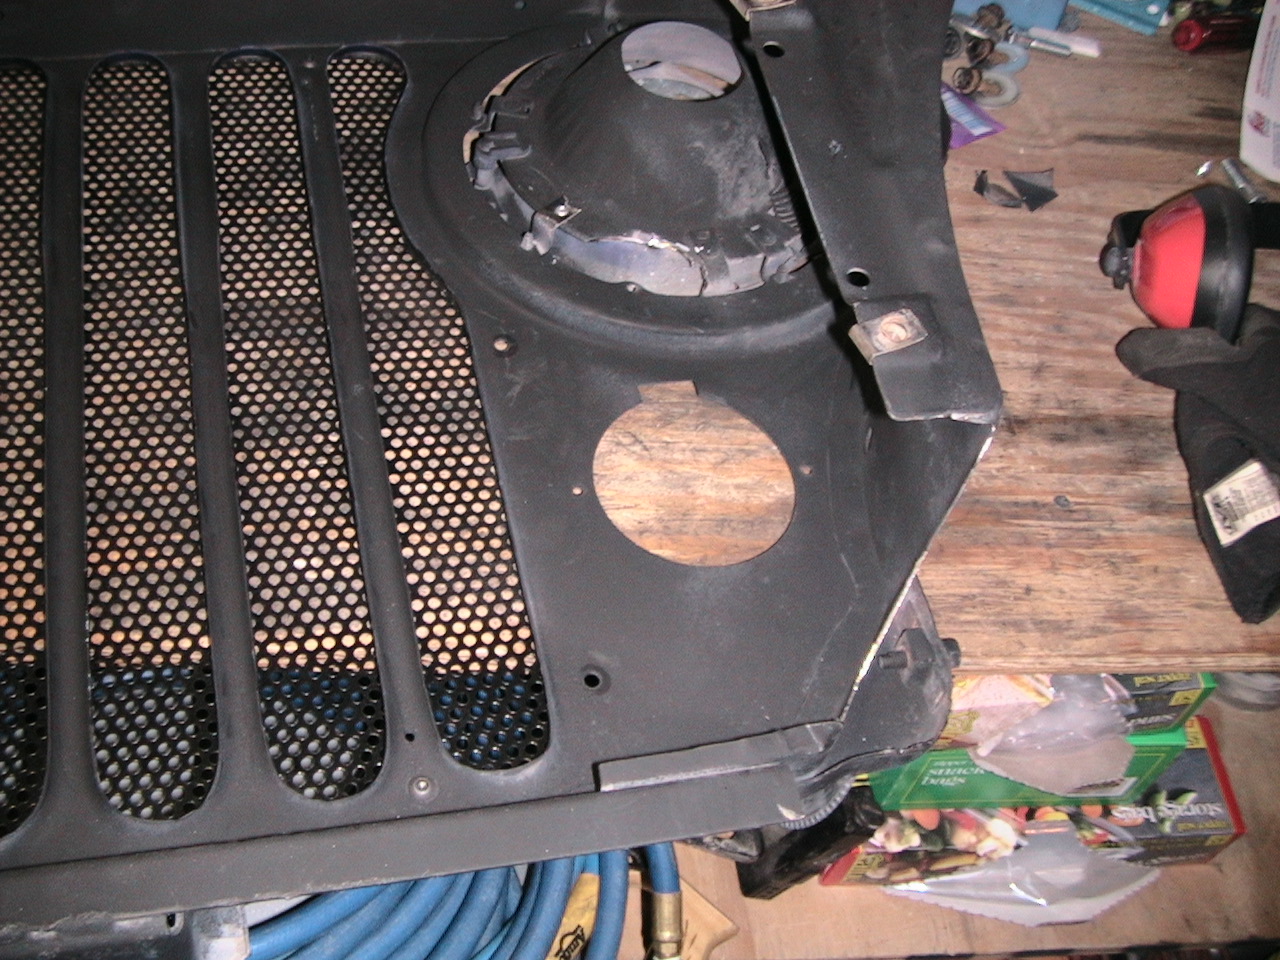
Here's a top-down view of the radiator with the cooler in front, I wanted this clearance so that's why I ground down the grille and mounted the cooler to the grille instead of to the radiator which would have required long bouncy brackets that would either break or let the cooler bash the radiator. A black bug screen on front won't look too bad but should save the cooler from a big stick on the trail.


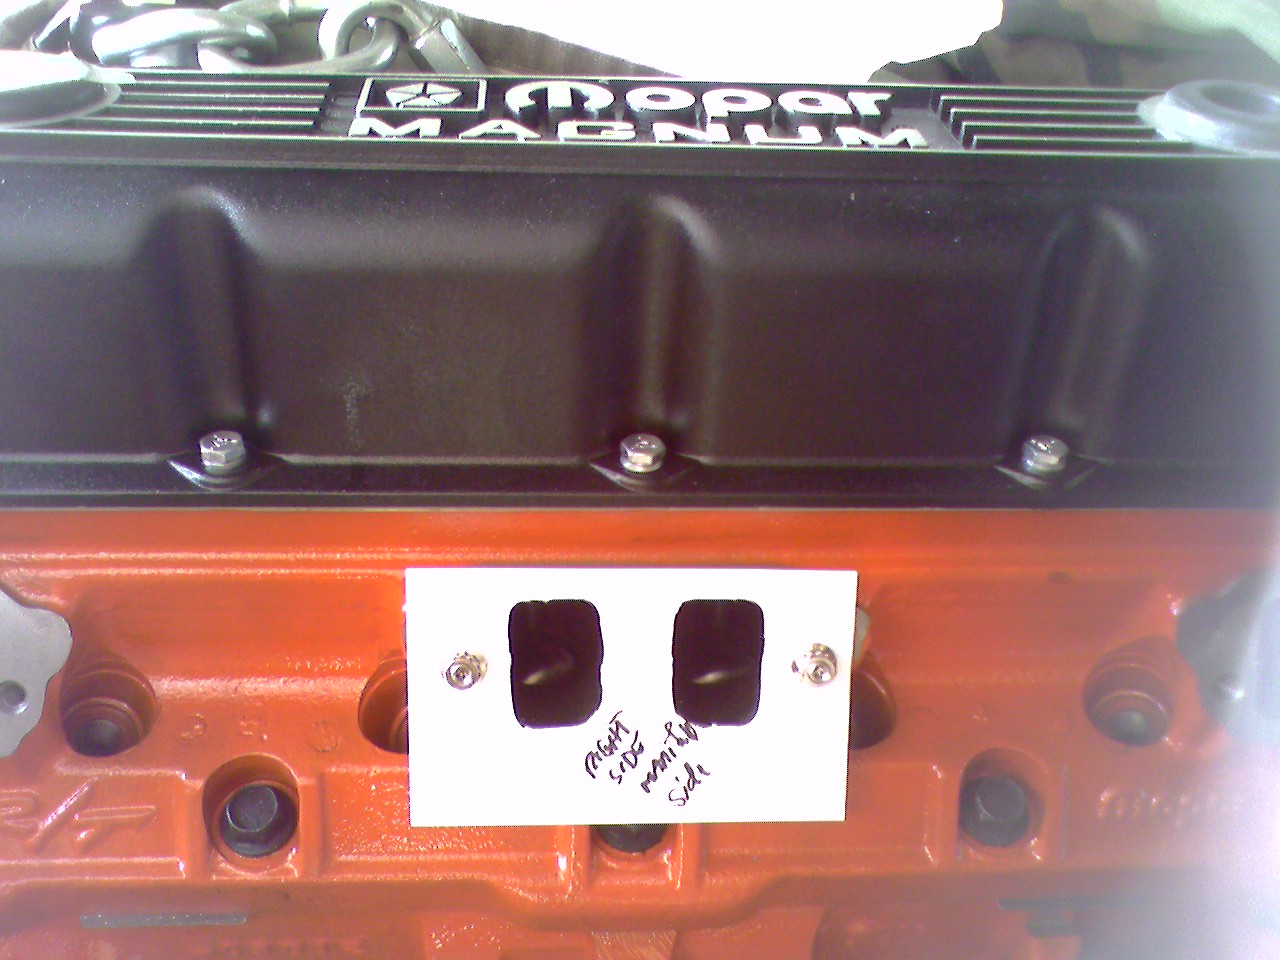
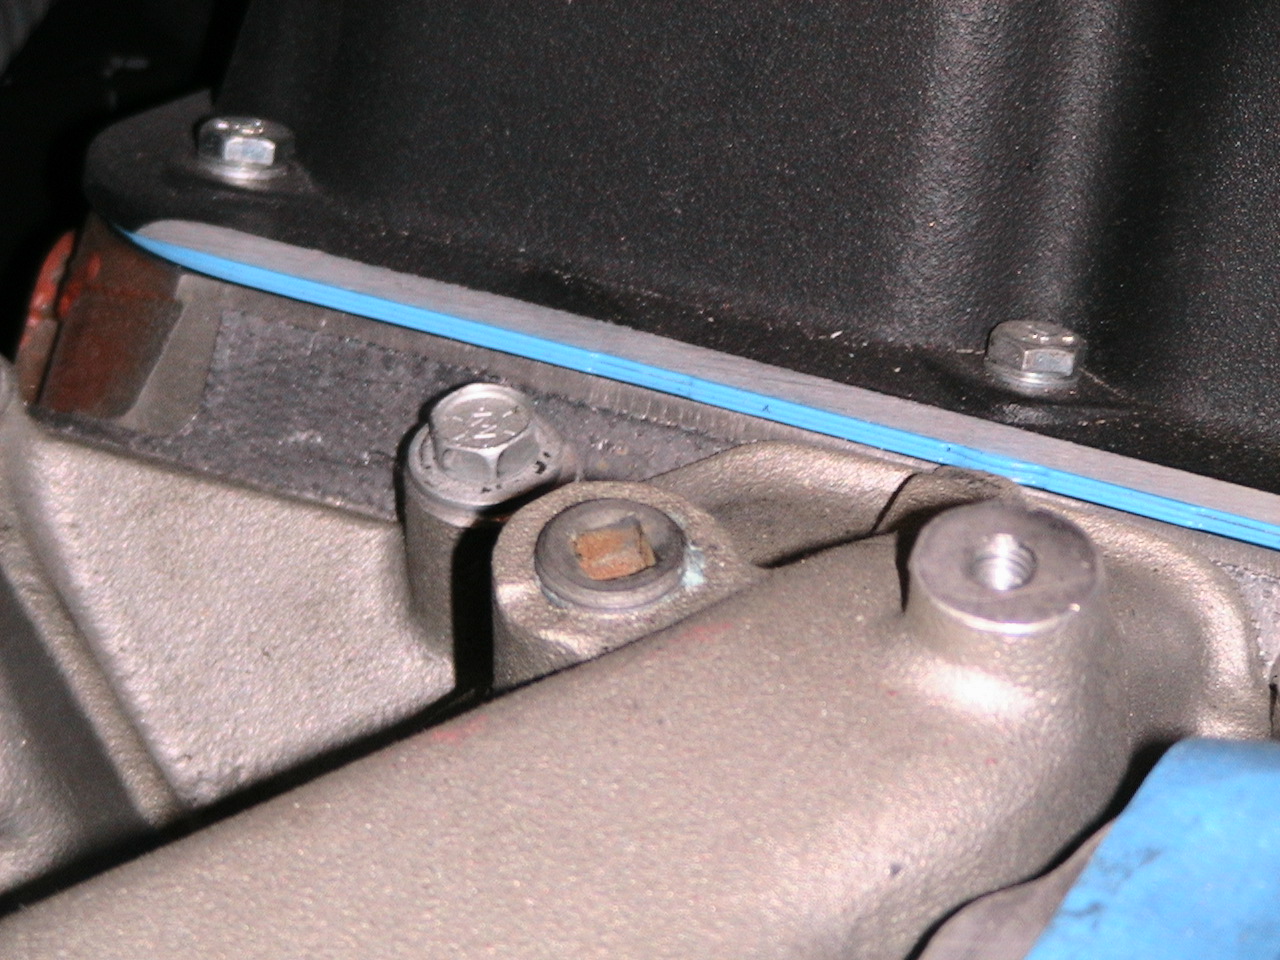
While gasket matching the headers, I discovered that although the LA motor headers will bolt up, the mating surface is kinda thin at the top. Not many options here, so I'll roll with it and if it develops an exhaust leak, I'll have to remove the headers and have somebody (or try it myself) weld the header ports shut a little bit so there's more sealing surface. I'll get a better picture in here but you can kinda tell that the R/T head ports are way smaller than the exhaust ports on the headers. Good for anti-reversion I guess <grin> (update: they do leak. I may have someone laser cut a spacer, then weld it on the headers due to the bolt clearance issue below)
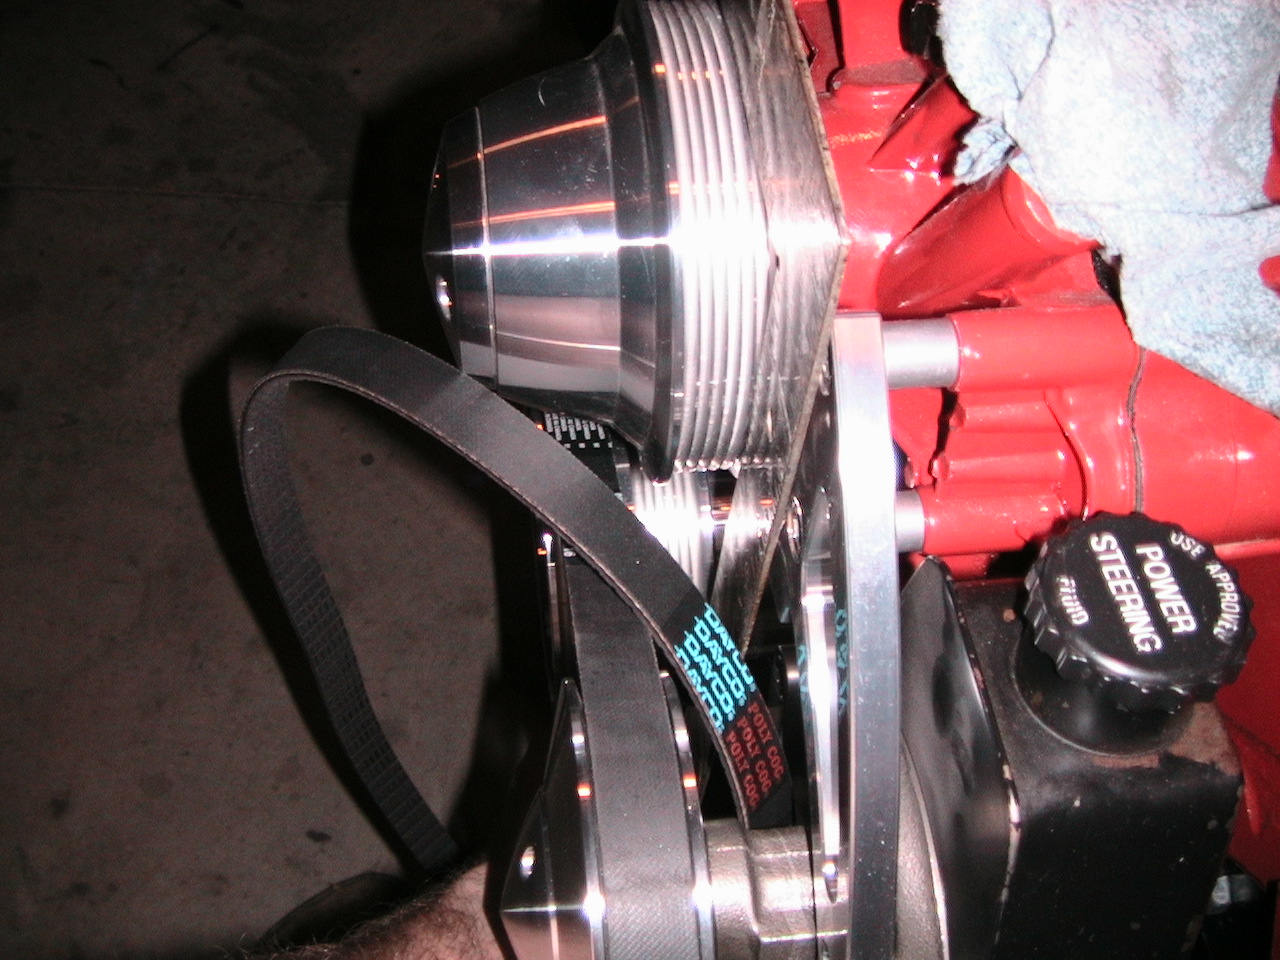
6 September 06 update: I've had to buy more header bolts, because the locking ones I have won't fit under the left-most pipe. A regular bolt barely fits, so I got some "clearance head" bolts, which are just as tall as the locking ones. Sheesh. Guess I'll have to knock one down with the wheel grinder. The AGR power steering pump is finally installed. There was a little bit of a casting bump I ground off to make sure it cleared the bracket. I got the pulley installed, but the belt that March Performance recommends is too short. The reservoir hits the front cover, giving me a limited range of adjustment, so either the next-size-up belt (cheap) or a smaller diameter pulley (not cheap). I finally got the firewall cover welded up, and four layers of bedliner on it and the inside fenderwells. Looks pretty good, actually. So, I'm getting pretty close to being able to put in the driveline for good. Once I get the accessory drives set up I'm ready to go.
The firewall is worth it's own discussion some day, but here's the short version: I cut the hole to make room for the cylinder heads and the distributor. Instead of making three small notches, I figured one big hole is more ... dramatic. So first I figured out how far into the cabin I needed it. It was about 1.5 inches, but 3 took it parallel to the bottom of the cowl vent system, so it looked better. The first piece I made went along the top of the hole and stuck into the cab 3 inches. Then I marked every 1/2 inch across from one side to the other, then hung the plumb bob, transferred the mark to the floor, and measured the distance and transferred that to a sheet of steel to get a swag on the front plate dimensions. Then after banging and grinding, got it close and welded it in. The sides were next, and pretty tough with all the weird angles. Only while welding the sides in did I realize a good technique for shaping is to tack it in place where it touches and hammer the gaps together. Looks pretty good now, if I don't say so myself. I must admit, everything I know about working with metal I learned on the Discovery Channel! ha ha. Thanks, Jesse, Paul Sr, Paul Jr, Vinny and even Mikey!

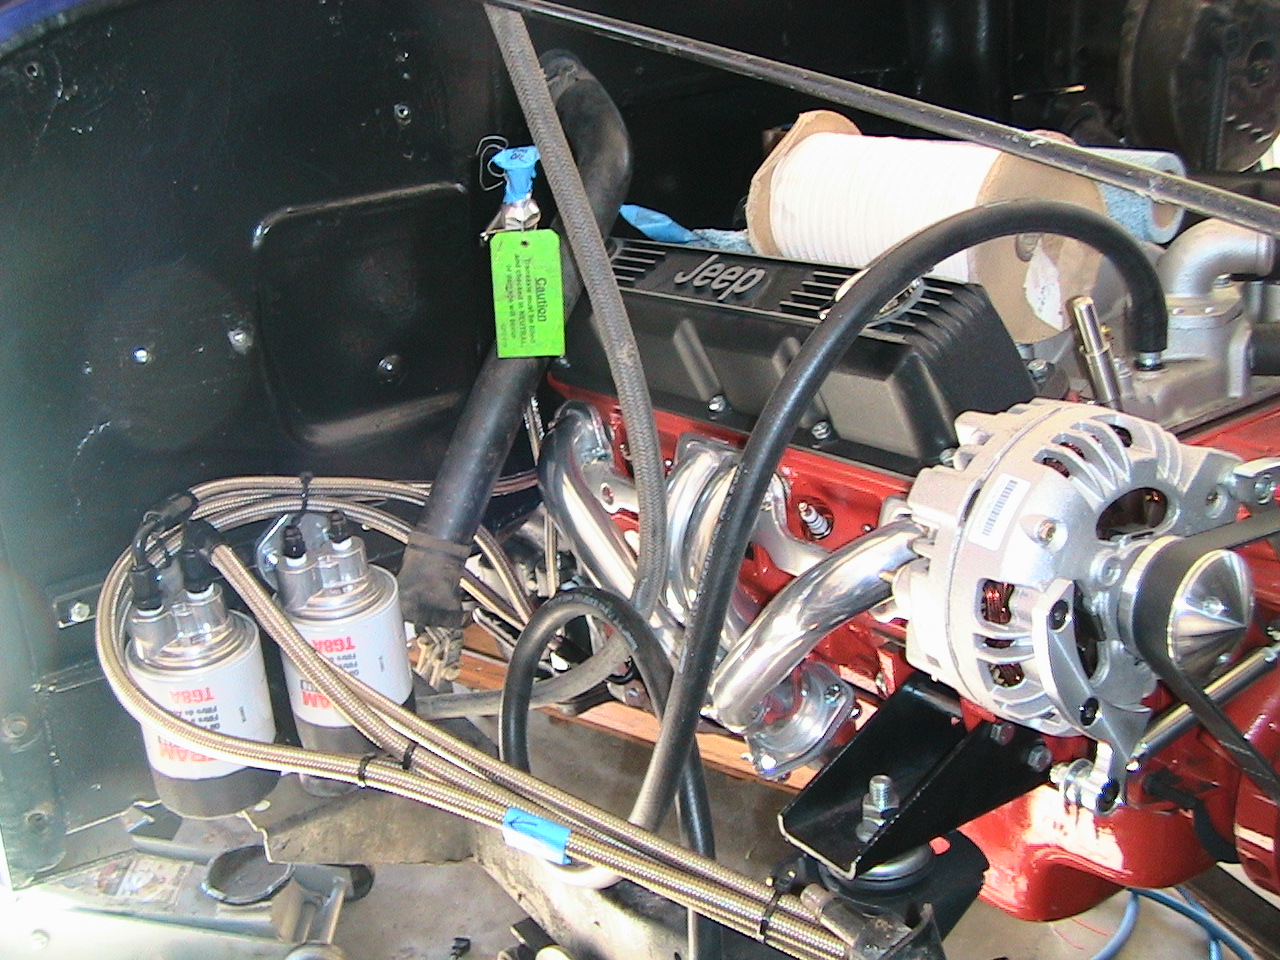
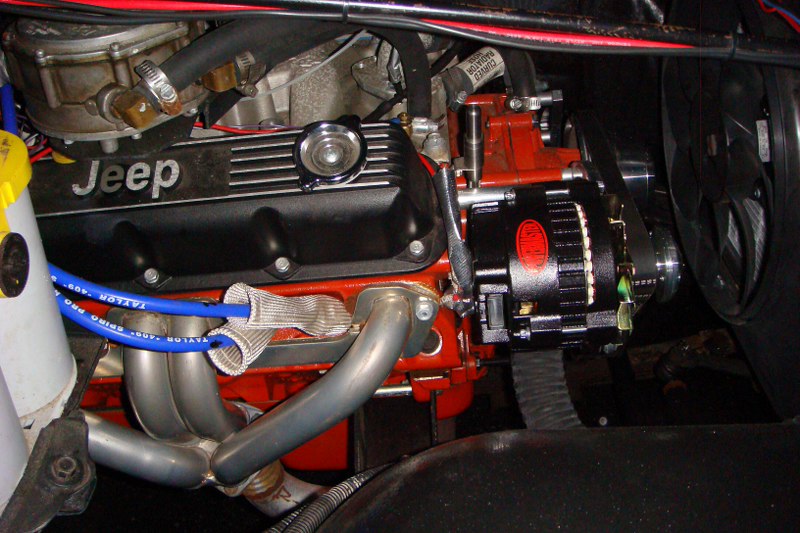
17 Sep 06: Power steering is installed - the reservoir hits the front cover if I try the belt that's recommended by March Performance (pulley manufacturer), and the next one up is too long. So, to get it installed I had to disassemble part of the bracket. Once the belt is over the pulley it adjusts just fine, so I will have to put a big dent in the PS reservoir so it can swing in enough to get the belt over the pulley. I'm fighting with the Patriot Block Hugger headers - the tubes are so close to the flange that I can't get a header bolt under it, not even the Mr. Gasket "clearance" bolts. A regular bolt barely fits. I guess I'll have to take a chance using a regular bolt, and hope it doesn't loosen up. There's not even enough room for a lock washer. I also had to grind away part of the flange to get the bolts to line up, so I'm not really happy with Patriot right now. I'll call them this week and see what they recommend I do, but I can't wait forever. Because the alternator is so big, I'm going to have to grind a bit off the right side cylinder head, but it's just a mounting tab so I'm not worried (much) about getting into the water jacket. I still have to press on the alternator pulley, but at least I got the stock one off - what a struggle but it's off. I got some Jeep valve covers, they look much better than the Mopar Magnum ones that the crate motor came with, and they did put the 5.9L in a Jeep Grand Cherokee ... for one year ... so technically I'm still keeping it Jeep <wink> Another bit of advice: when you get the crate motor, immediately change the oil pan gasket to a FelPro PermaDry - the stock one is 4 pieces, short ones rubber and long ones cork. The Felpro is one solid gasket which requires no adhesive and has no joints to leak. Very cool.
As I find things that I have to leave loose while I assemble, I'm marking them with blue masking tape and writing it on my list so I don't forget to come back later.
19 Sep 06:
 Finally got both accessories on there. Still have to shorten one of the
spacers, beat a dent into the power steering reservoir and replace one of the
bolts I lost. What a pain. At this point, I'm thinking it would have
been easier, cheaper and more effective to buy the used 2001 Magnum 5.9, had it
completely worked over, put on R/T heads, and I'd probably be ahead of the game,
not to mention have an FI system to sell. Hindsight. But that's why
I'm doing this, so you have less pain than I do! <grimace>
Finally got both accessories on there. Still have to shorten one of the
spacers, beat a dent into the power steering reservoir and replace one of the
bolts I lost. What a pain. At this point, I'm thinking it would have
been easier, cheaper and more effective to buy the used 2001 Magnum 5.9, had it
completely worked over, put on R/T heads, and I'd probably be ahead of the game,
not to mention have an FI system to sell. Hindsight. But that's why
I'm doing this, so you have less pain than I do! <grimace>
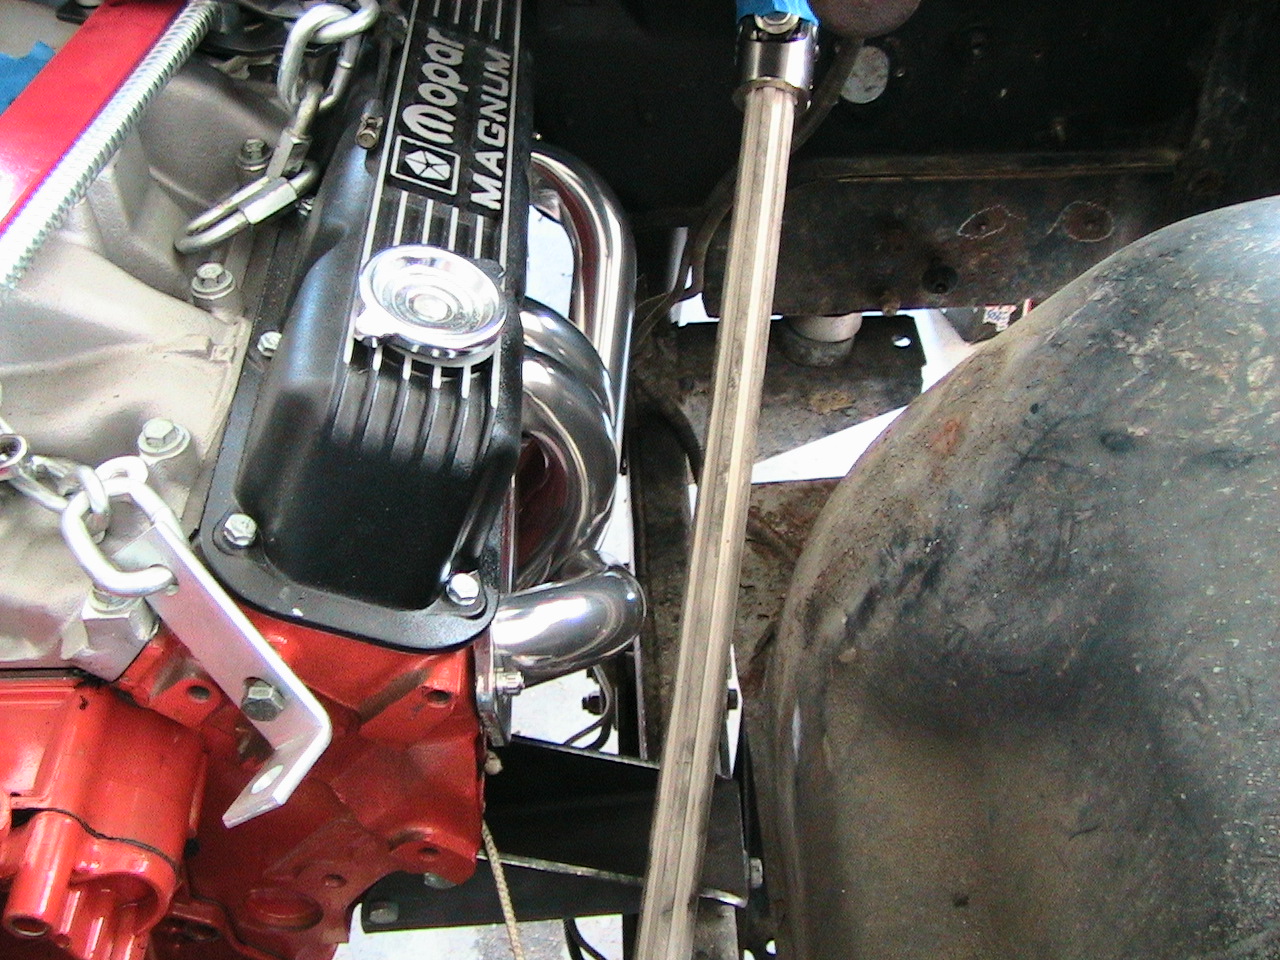
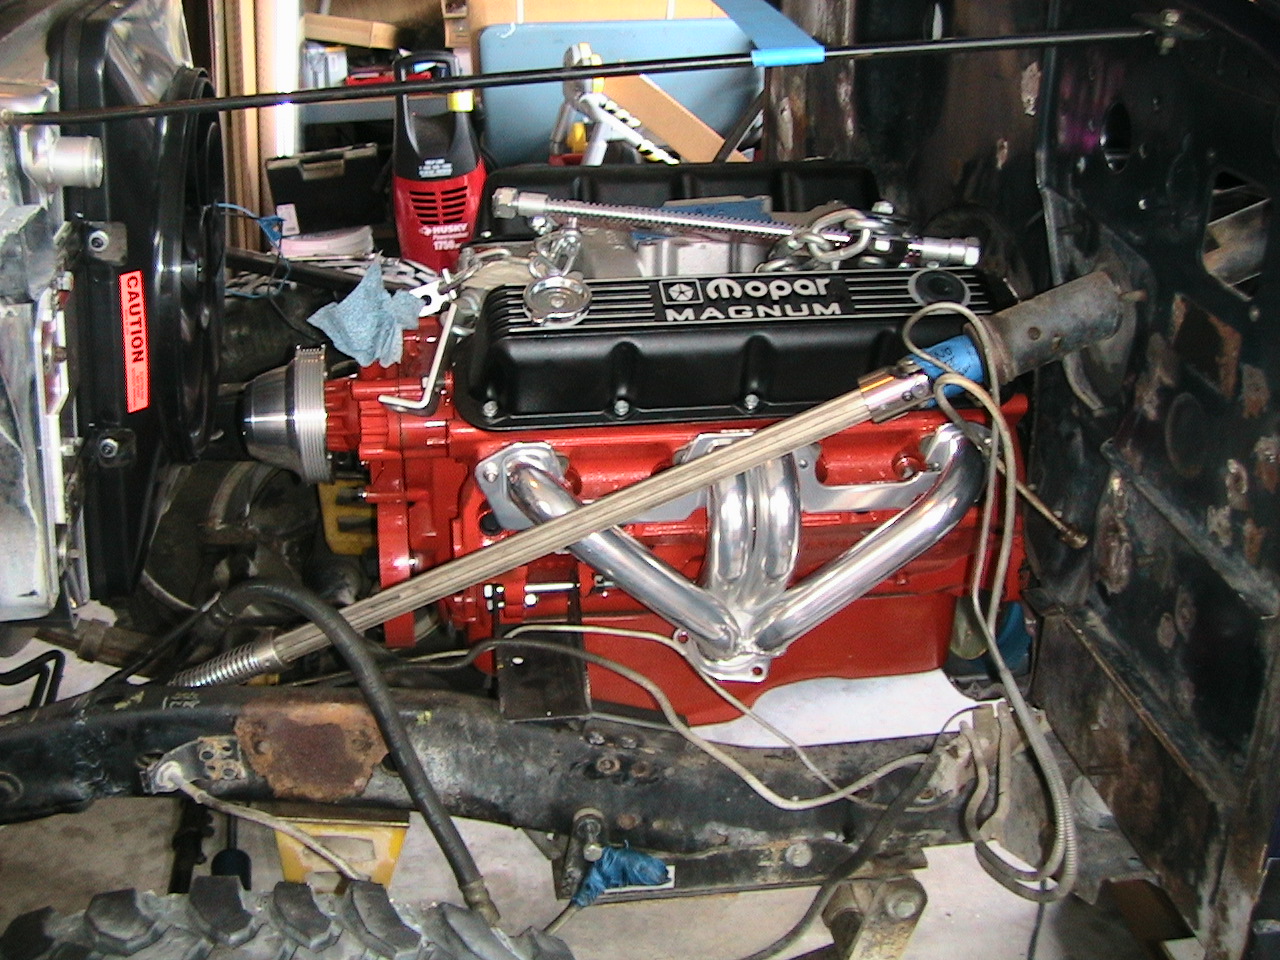
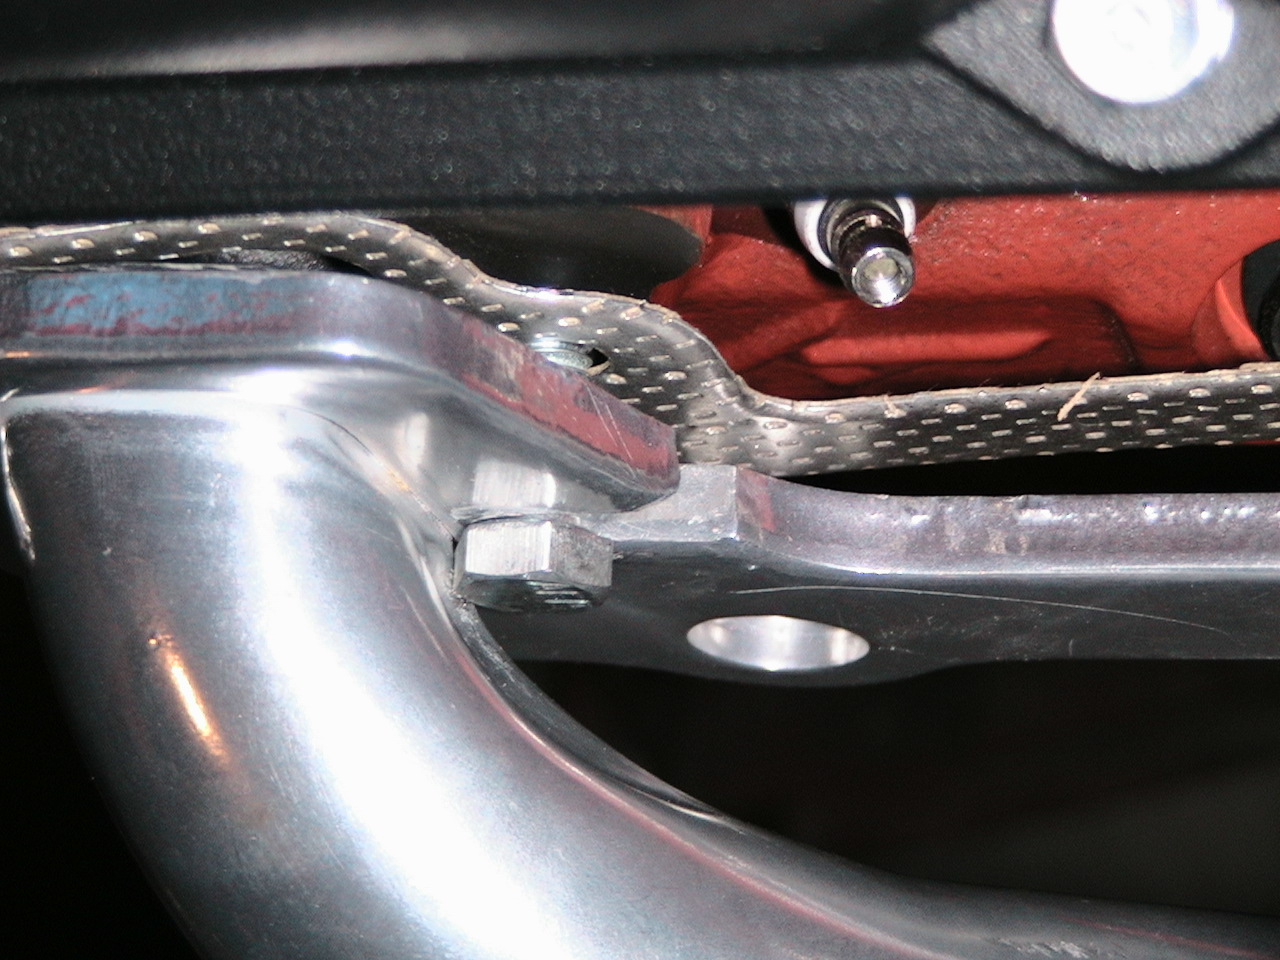
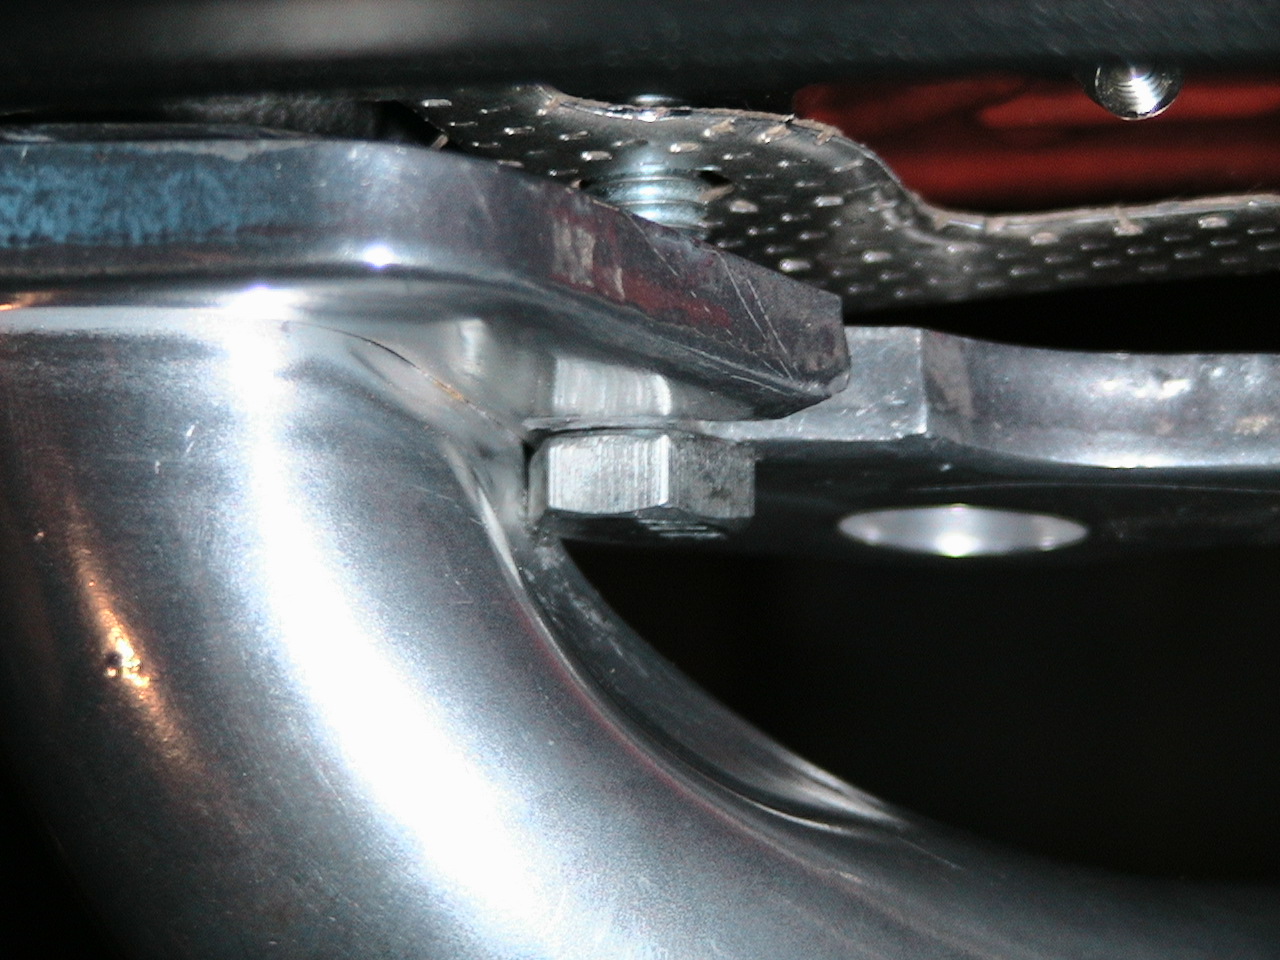 These are the only block hugger headers for the Magnum I can find, they're from
Summit. Unfortunately, they can't seem to make those end pipes bend enough
while clearing header bolts, so here's what I'm stuck with. I hope these
things don't leak, or I'm screwed. I could also cut these tubes out of the
flange, then weld another flange on, basically a spacer, that'd get the bend
away from the top of the bolt. Sounds like a bunch of ... trouble.
I'll hang on to hope for the moment.
These are the only block hugger headers for the Magnum I can find, they're from
Summit. Unfortunately, they can't seem to make those end pipes bend enough
while clearing header bolts, so here's what I'm stuck with. I hope these
things don't leak, or I'm screwed. I could also cut these tubes out of the
flange, then weld another flange on, basically a spacer, that'd get the bend
away from the top of the bolt. Sounds like a bunch of ... trouble.
I'll hang on to hope for the moment.

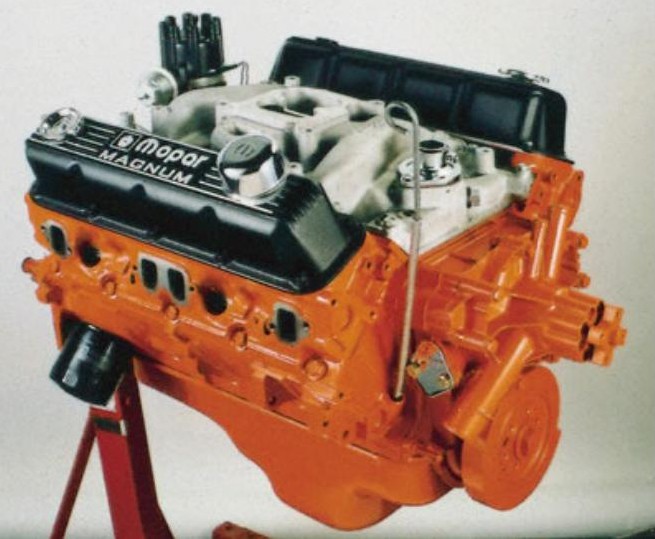
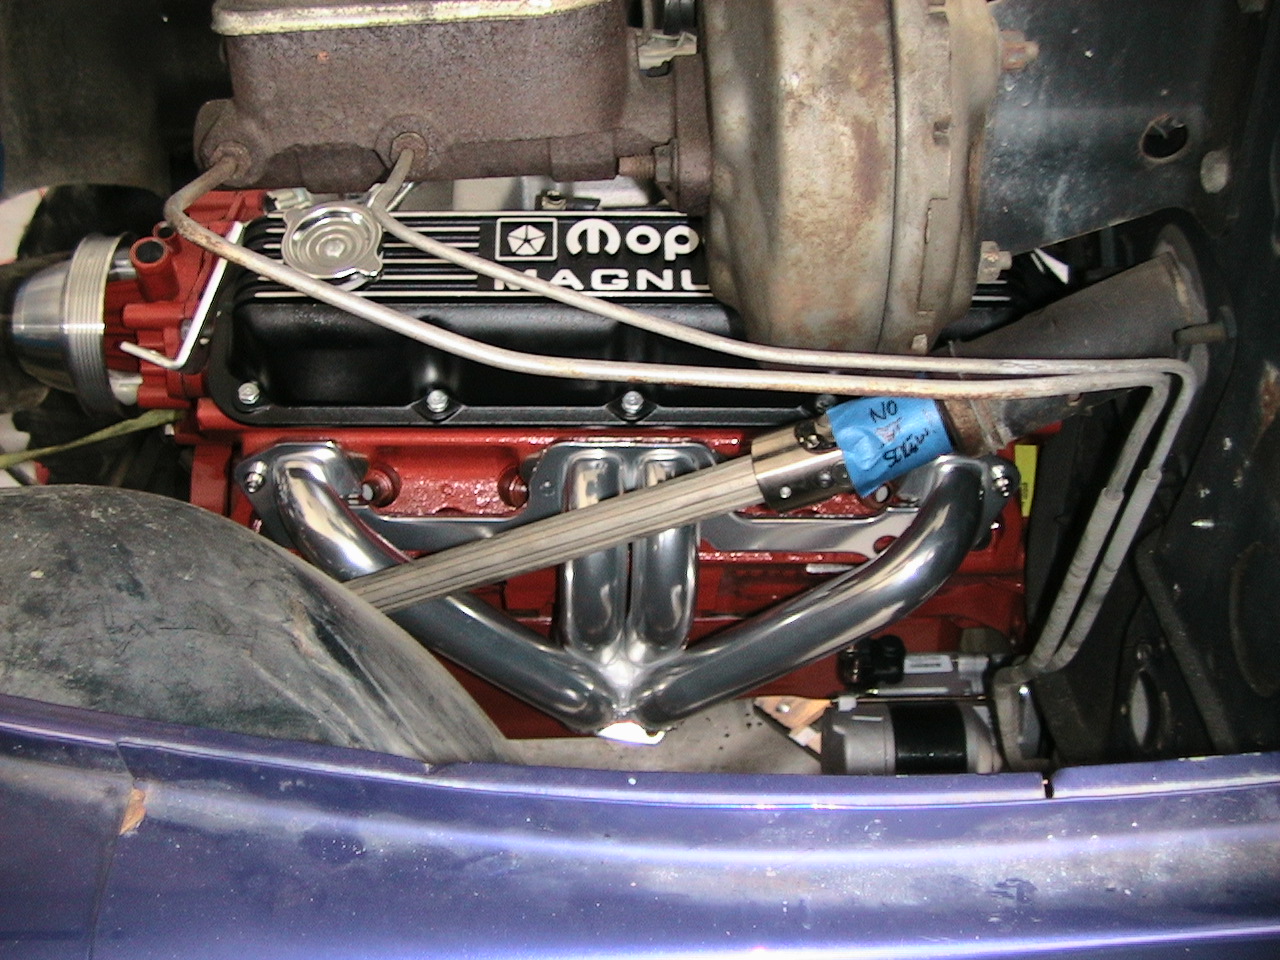
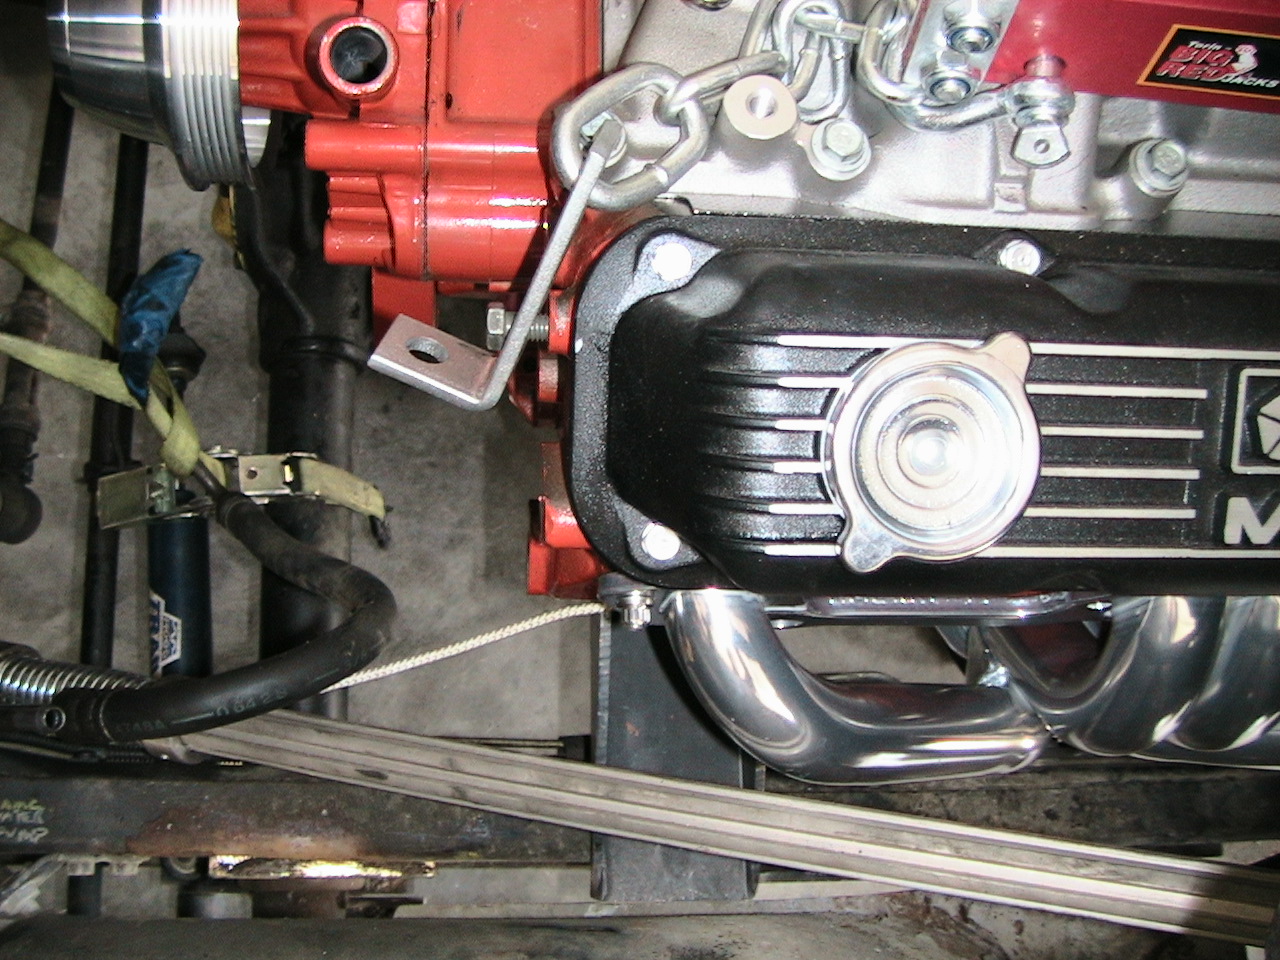
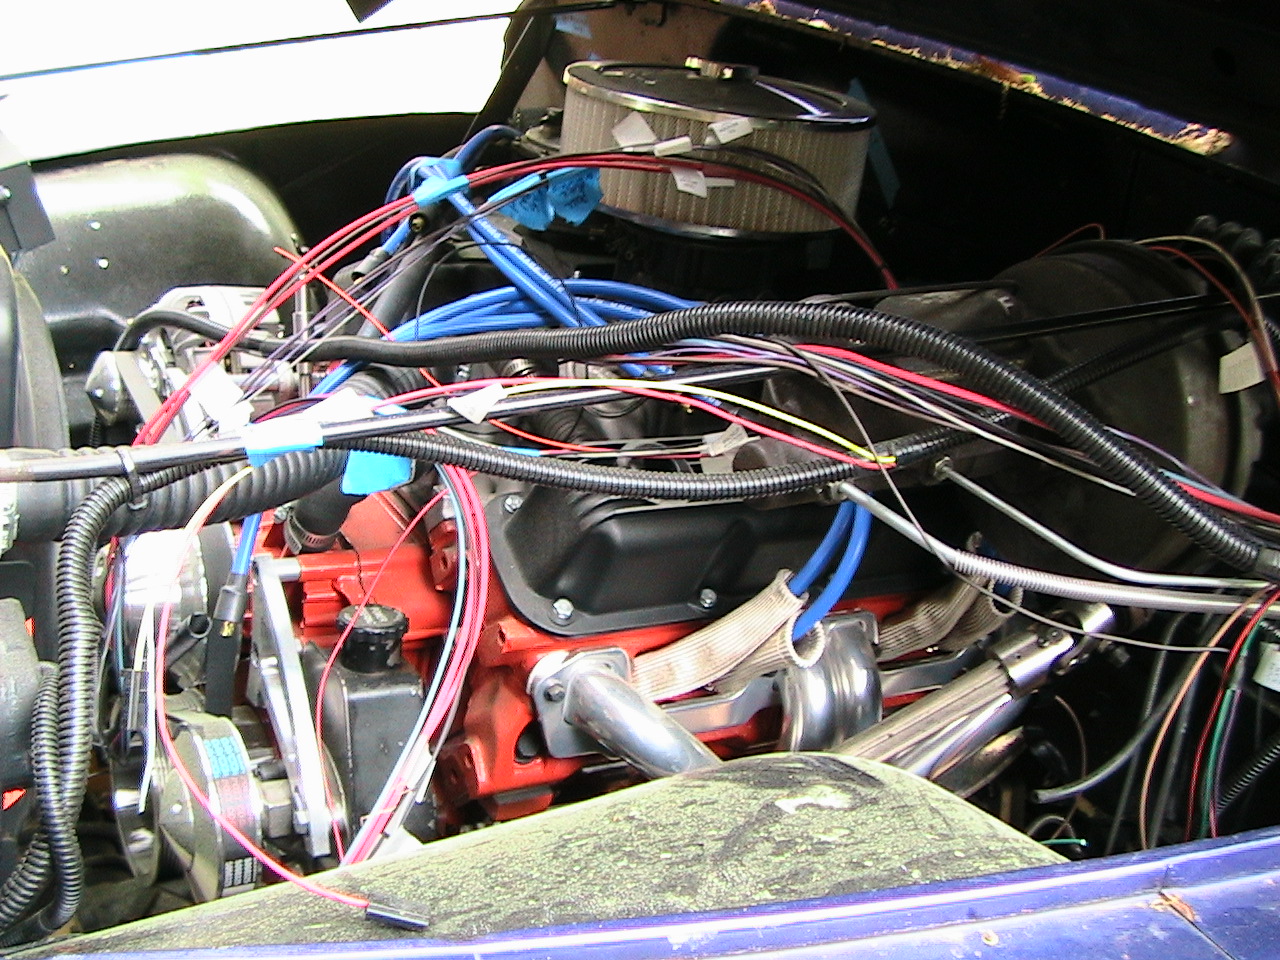
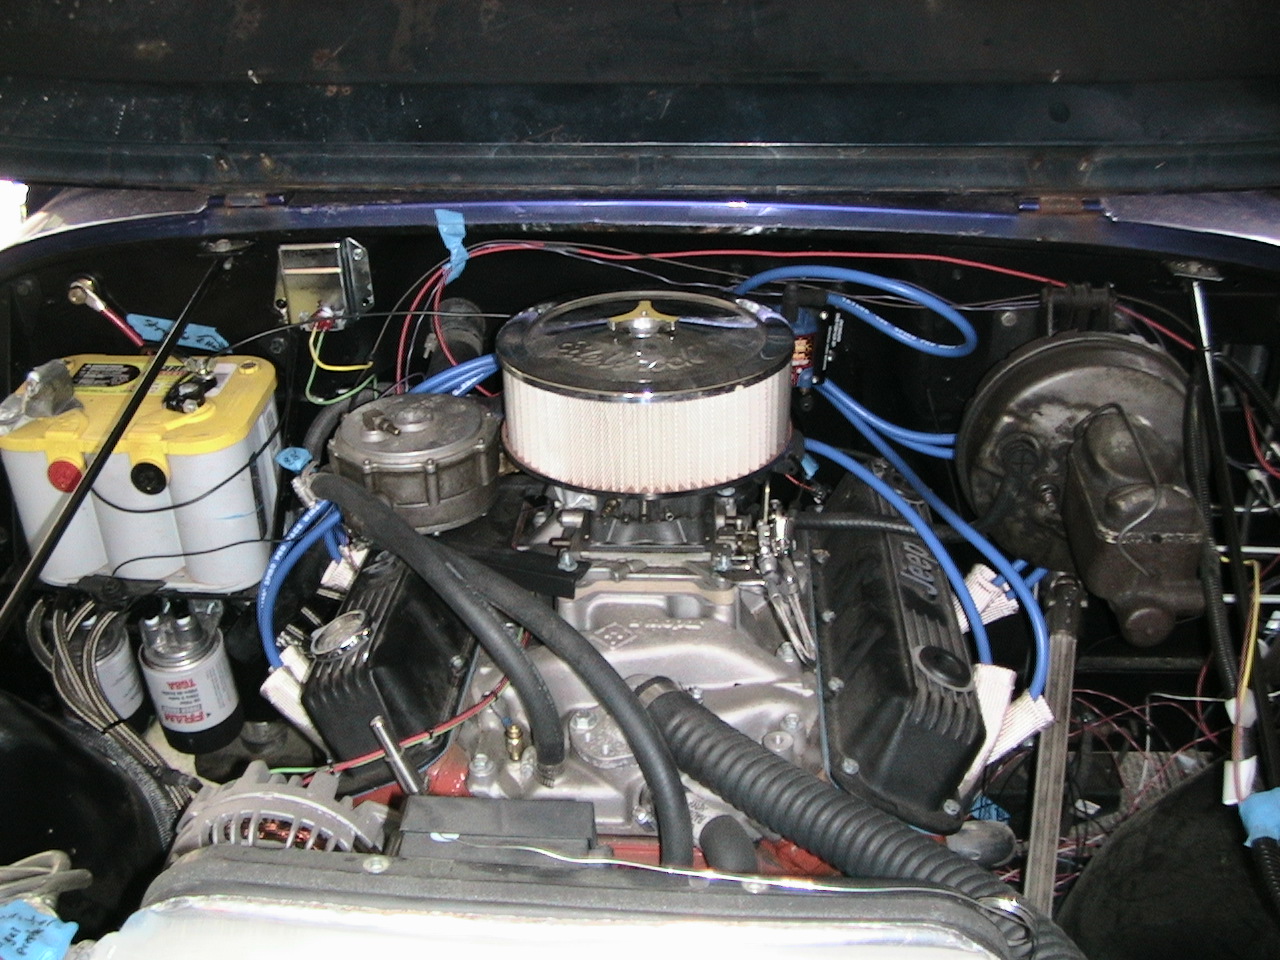
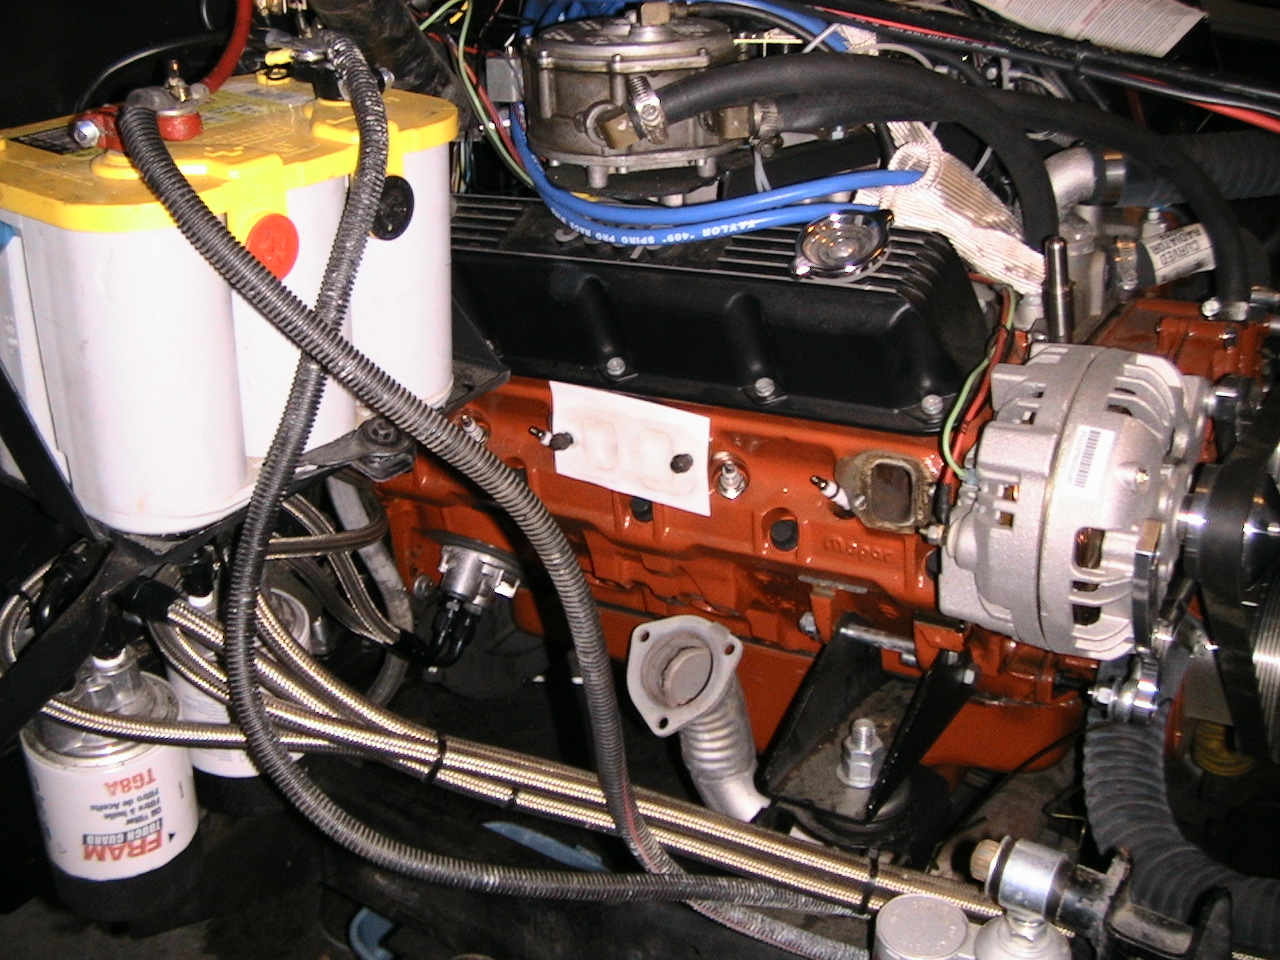
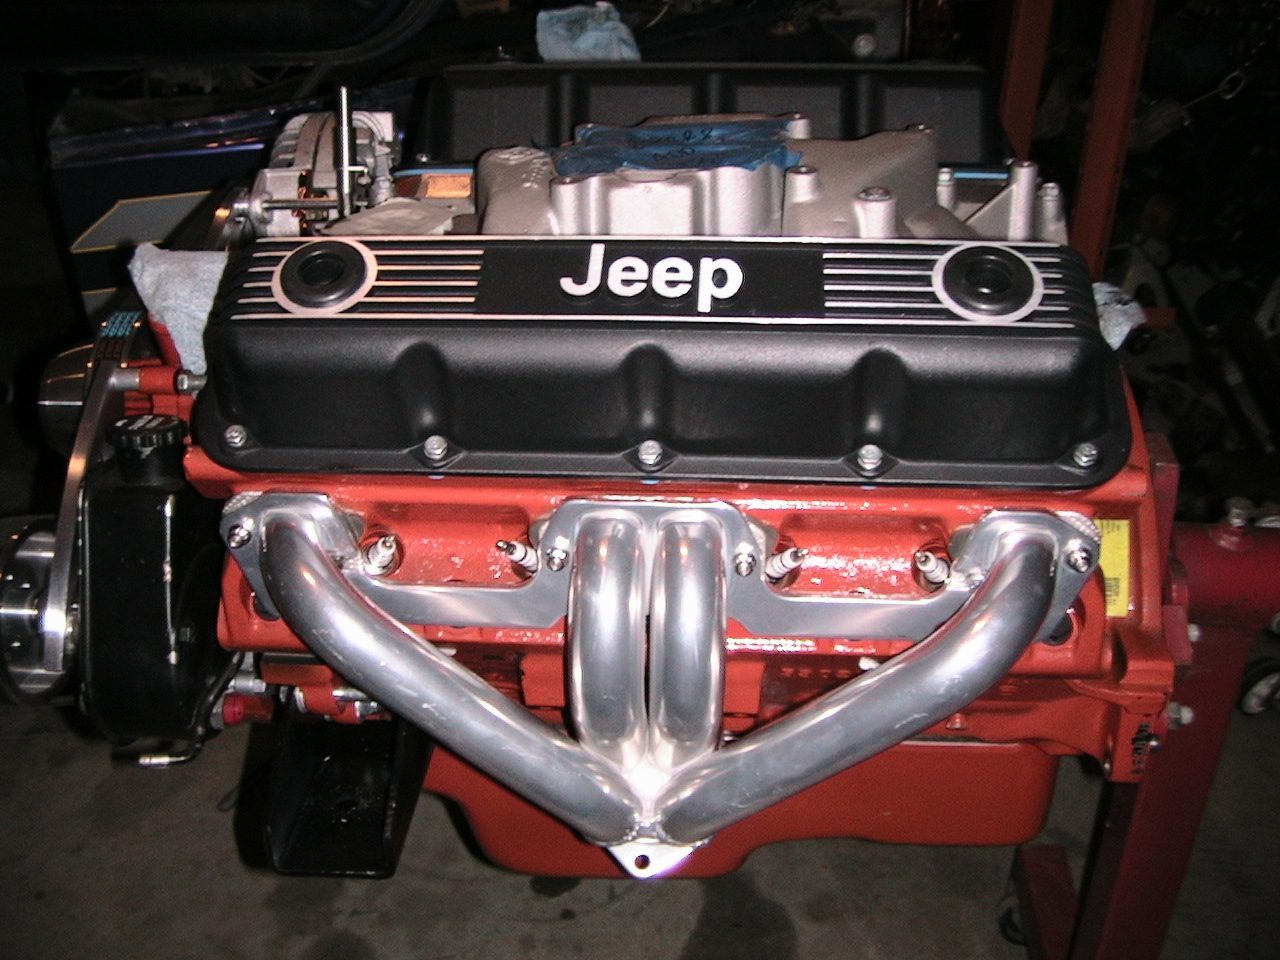 I figured it's worth $100 in valve covers to "Keep it Jeep"
Since they offered the 5.9 Magnum in the '98 Grand Cherokee, it's actually a
Jeep motor. This picture is really the ONLY reason I didn't go with a Chevy crate
motor. Can't call it Jeep, no matter how hard you try.
I figured it's worth $100 in valve covers to "Keep it Jeep"
Since they offered the 5.9 Magnum in the '98 Grand Cherokee, it's actually a
Jeep motor. This picture is really the ONLY reason I didn't go with a Chevy crate
motor. Can't call it Jeep, no matter how hard you try.
The headers look hot rod, don't they? Kool.
 It's going to take a pretty big dent in the reservoir to get the pump to swing
up enough to allow the ps belt to slip on. I'll have to ask March about
this one, why their bracket isn't just a touch longer, then I could use the
5060330 (6rib, 33.0" long) instead of the 5060325 (6-rib, 32.5" long)
they recommended. If I can find another brand that is 32.75" long I'm
all set. I ended up smacking the side of the power steering reservoir with
a BFH and now it fits. Beating the snot out of your pump wasn't in the March instruction book, by the
way.
It's going to take a pretty big dent in the reservoir to get the pump to swing
up enough to allow the ps belt to slip on. I'll have to ask March about
this one, why their bracket isn't just a touch longer, then I could use the
5060330 (6rib, 33.0" long) instead of the 5060325 (6-rib, 32.5" long)
they recommended. If I can find another brand that is 32.75" long I'm
all set. I ended up smacking the side of the power steering reservoir with
a BFH and now it fits. Beating the snot out of your pump wasn't in the March instruction book, by the
way.
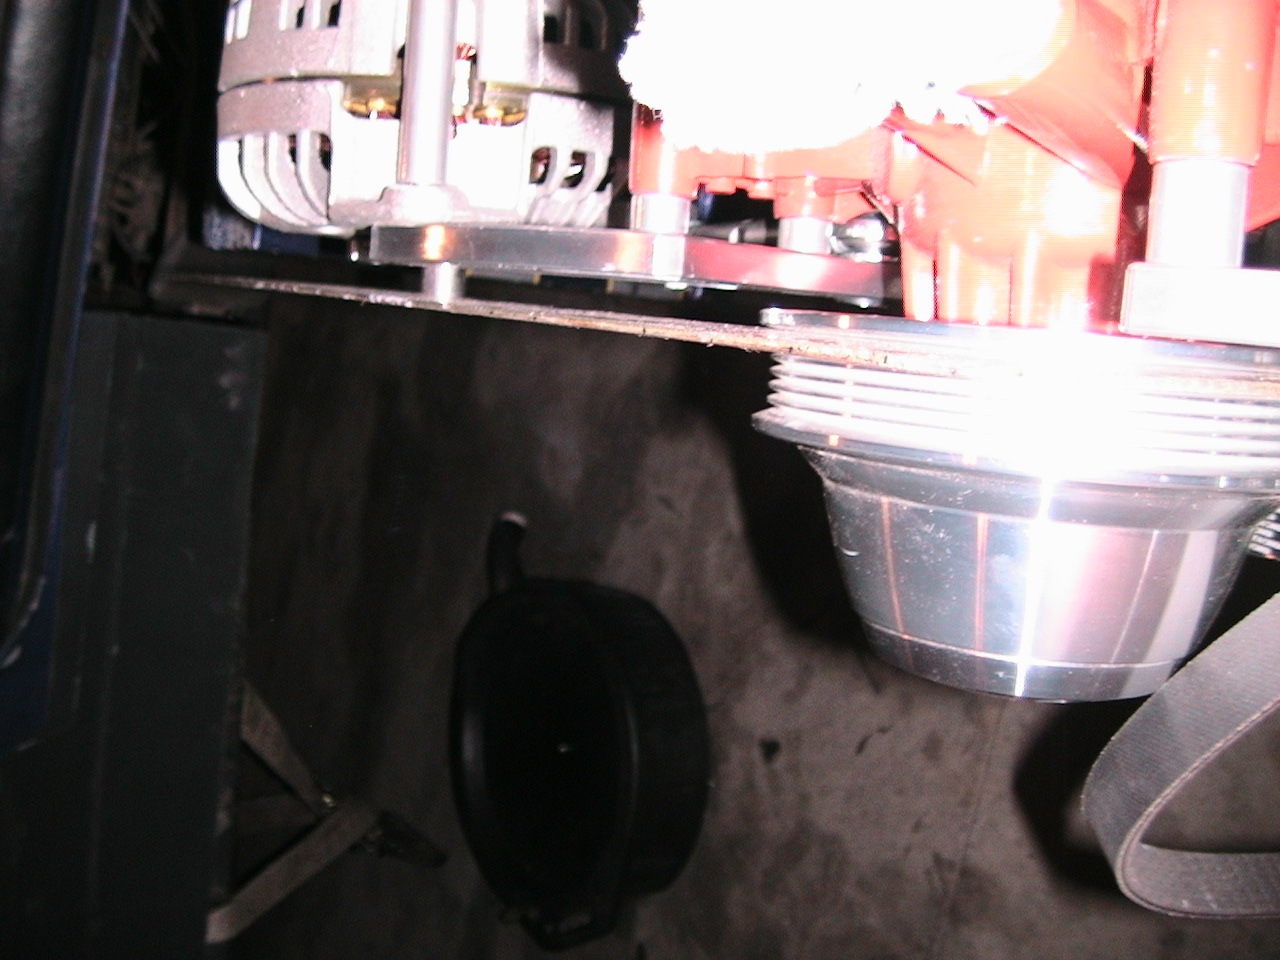 Here's how I determined the depth of press on the alternator pulley: I set a
square on the water pump down to the crank in the first belt groove. The
outside edge of the square landed flush with the end of the alternator pulley
shaft. So, the centerline of the alternator pulley's inside groove is 1/2
the square's width in from the end of the shaft. So a couple of
measurements on the pulley and I knew how far into the pulley the shaft should
be. Turns out the pulley won't go on that far, so I had to stack two
spacers to set the alternator back, then press the pulley to the new
depth. It worked out great, once I remembered to stack two washers under
the back of the alternator shaft. When I started pressing the shaft, it
tried to push out the back of the case. Duh. Check where the force
is going to go when you're using a press. Preferably before you
squish something you don't want flat.
Here's how I determined the depth of press on the alternator pulley: I set a
square on the water pump down to the crank in the first belt groove. The
outside edge of the square landed flush with the end of the alternator pulley
shaft. So, the centerline of the alternator pulley's inside groove is 1/2
the square's width in from the end of the shaft. So a couple of
measurements on the pulley and I knew how far into the pulley the shaft should
be. Turns out the pulley won't go on that far, so I had to stack two
spacers to set the alternator back, then press the pulley to the new
depth. It worked out great, once I remembered to stack two washers under
the back of the alternator shaft. When I started pressing the shaft, it
tried to push out the back of the case. Duh. Check where the force
is going to go when you're using a press. Preferably before you
squish something you don't want flat.
Anyway, it was a long drawn out process, but the reward will be starting the engine and not flinging belts all over the place because they're not aligned properly.
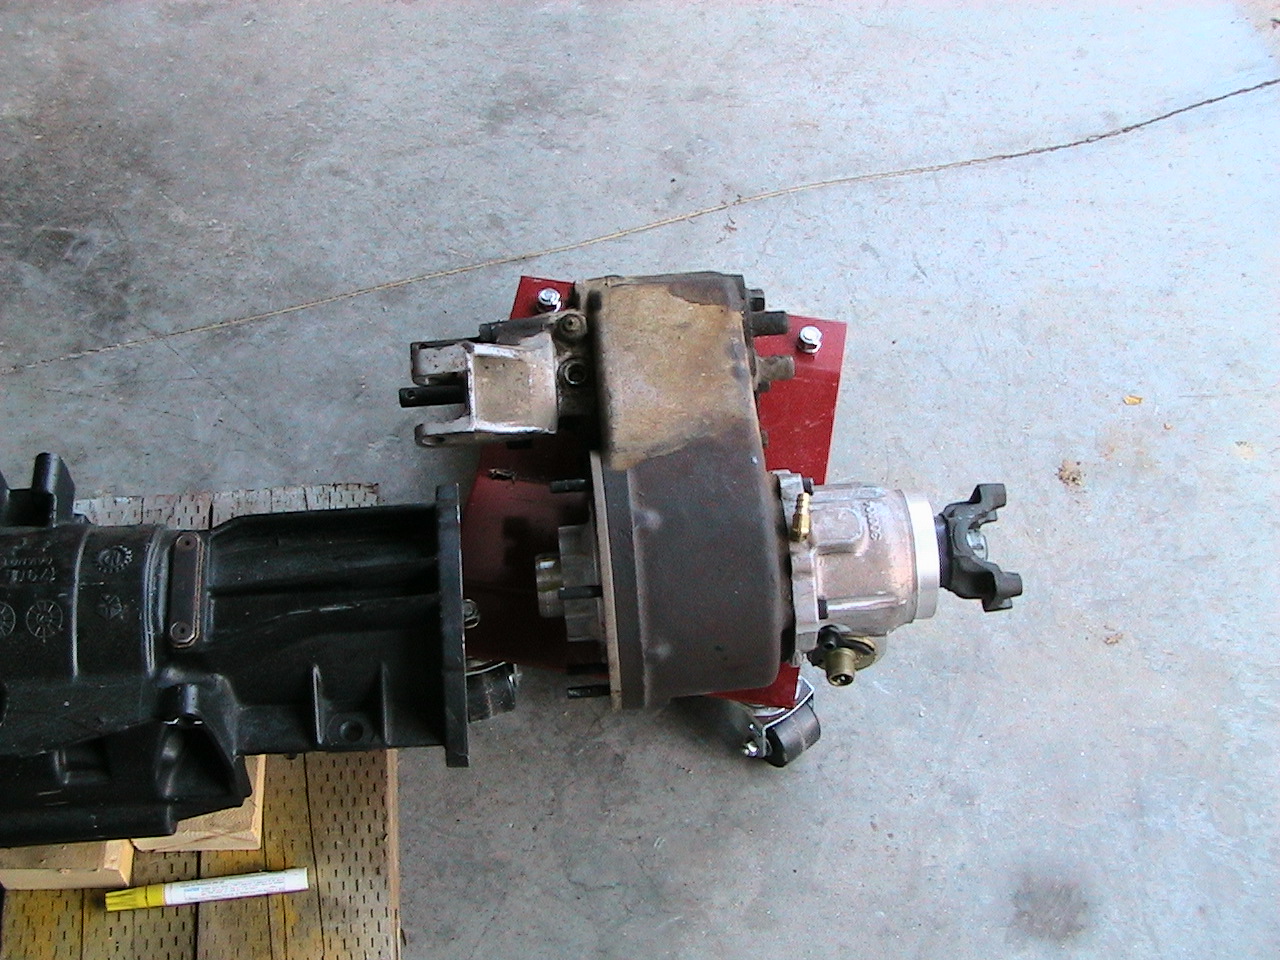
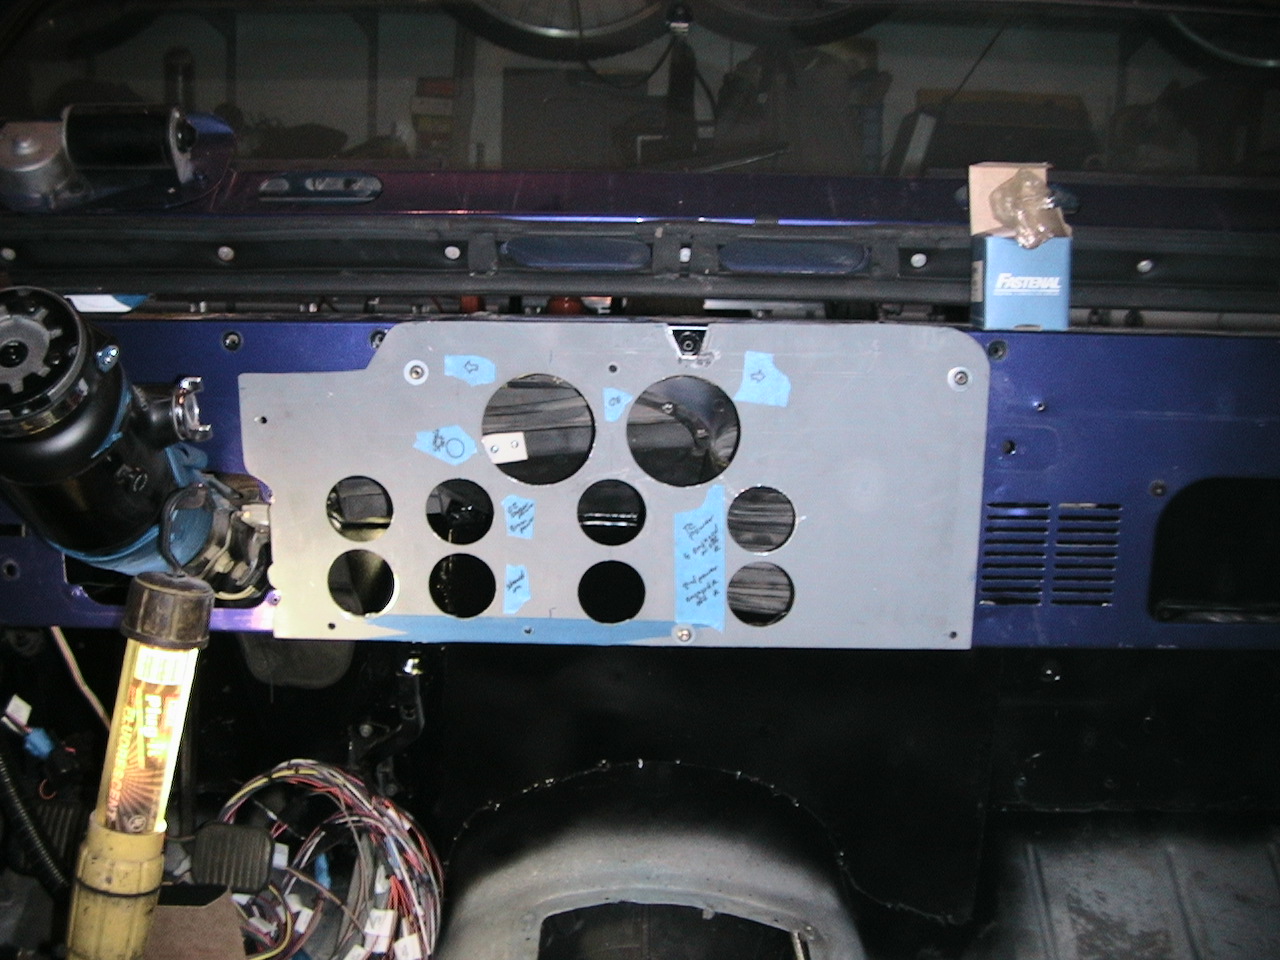
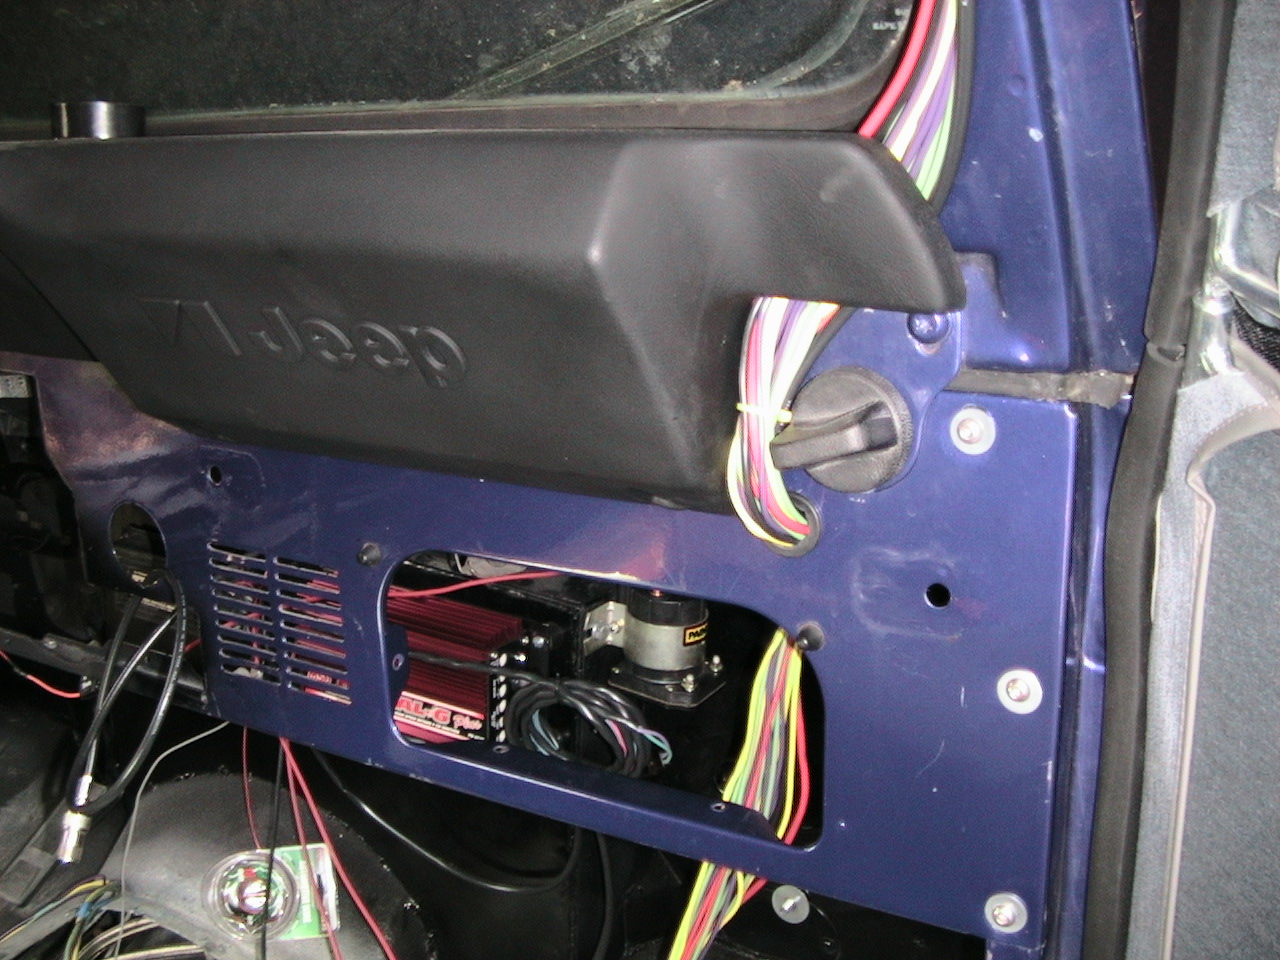
So now the engine, transmission and transfer case are bolted together and in the Jeep for good. I've got a temporary crossmember under the tranny to hold up the back until I get ready to fab the skid plate. The cooler stack is put together. Because the cooler is so #$%^ing big I had to buy -6 AN fittings so I could make the elbows fit, so then I needed -6 AN line for the engine and transmission. That cost me about $300 that I didn't want to spend. I found some universal hoses for the radiator which fit with just a little trimming. I'll post all of the part numbers later. Email me if you need them now. I'm currently cutting the dashboard to clear it for the gauges, because I didn't consider the defrost duct and bulkhead seam when I decided where to mount my gauges. I cut a big hole in my dash, then made a plate for mounting all of my gauges. This way if I want to change them I just have to make a new plate. Basically it'll take less time to cut the bulkhead and duct than make a new gauge plate. this later ended up being a big mistake. Later I'll make a new dash plate dropping the tach and speedo, then I can actually run a defrost duct.


It looks like I can retain the function of the fresh air duct but making a new bracket and then running the control cable somewhere. I'm not too worried about it right now so I'm not going to waste a lot of time on it. The right side, it looks like, I can turn 90 degrees, punch through the firewall and force-feed air to the mixer. Again, not a lot of time so that'll wait for another day (see below).
We've decided that we're going to move after Christmas 06, and our new house is very cool but it will not have a garage! So some things are going to be delayed indefinitely ... mostly the full cage. It'll take too long to make so I'll have to wait.
I've got the power steering pump hose fab'd, pump is on, steering shaft is mostly installed (I dropped one of the #$%*ing set screws, now I've gotta find another one). With that, I was able to put on the grille. Pics to follow. Need a new radiator hose, I SWAG'd it and missed by 3". Dash is coming along nicely. I've got LEDs for the power indicators for the ignition, brain box, 3/4 and TC to the tranny, left/right turn signal and a "High Beam" lamp from a Harley Davidson :) I'll get those holes punched then wire up the whole mess. Then it's mount the heater, ignition and brain box, wire it up then run the wires for the switches up into the overhead console. Then wire the engine, run the cooler lines, finish up the crossmember and exhaust underneath, then top off the fluids, hit the key & pray.

Here's what I'm planning for the dash and the overhead console. I'm using a double-radio Tuffy console and cutting out one of the drop downs for the switch panel - easy access, keeps the rain off the switches and I can reach them with the 5-point harness on. I don't need the space for the radio because I'm running an amplifier and an MP3 player w/ an FM radio in it. I don't like commercials anyway.
Here's another "current condition", this one as of
January 7th. 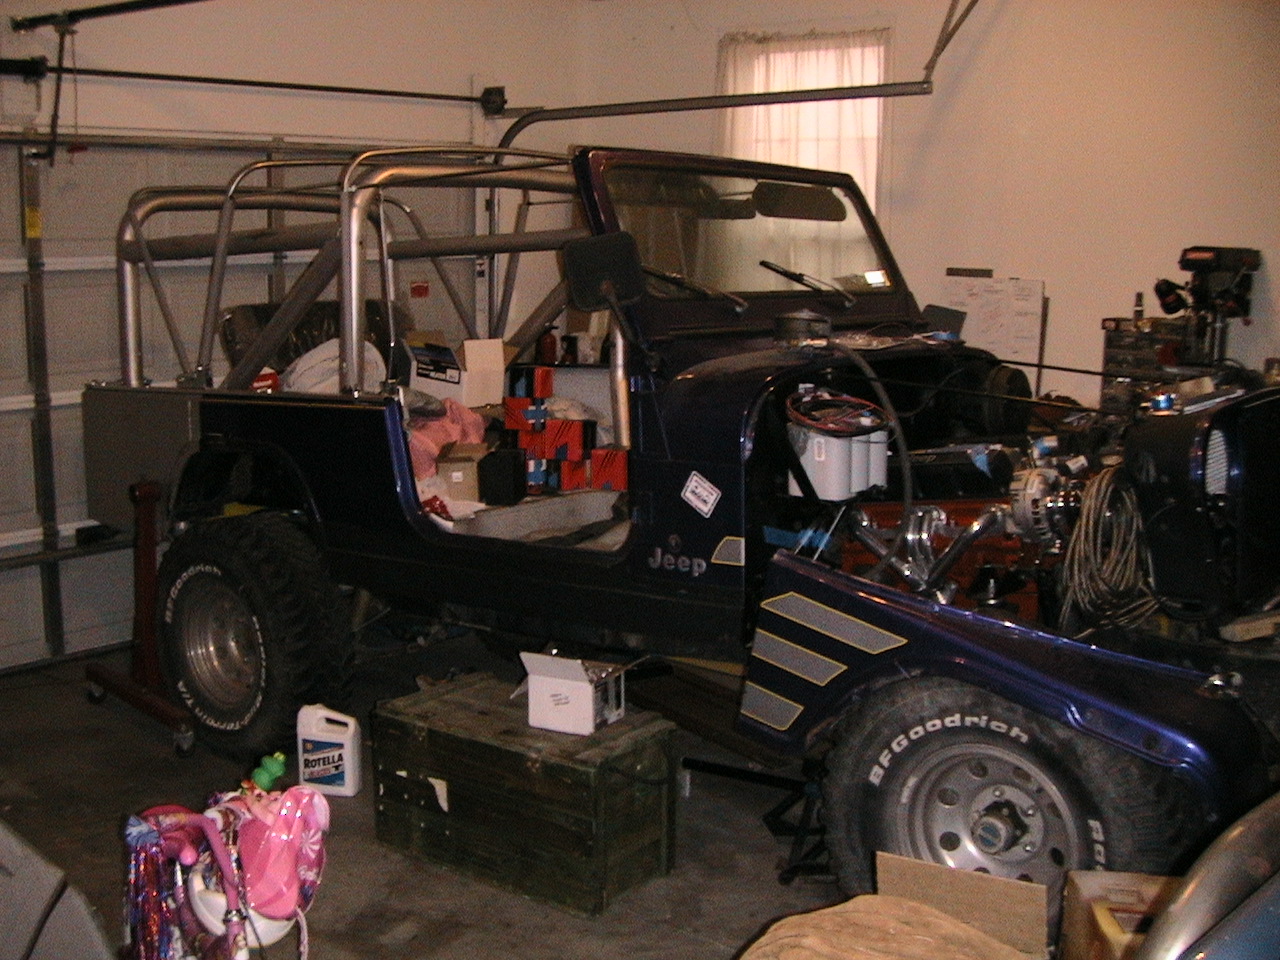 Gettin' there, slowly.
Had some trouble with the pipe plugs in the Crate motor's M-1 manifold - they're 5/16 inch square sockets. What a deal. Luckily, a guy from my Jeep club (with whom I've yet to 'wheel) had one that I could borrow. The front one is the heater hose out and the back is the manifold vacuum source for the power brakes. Both kinda necessary. Ya think?
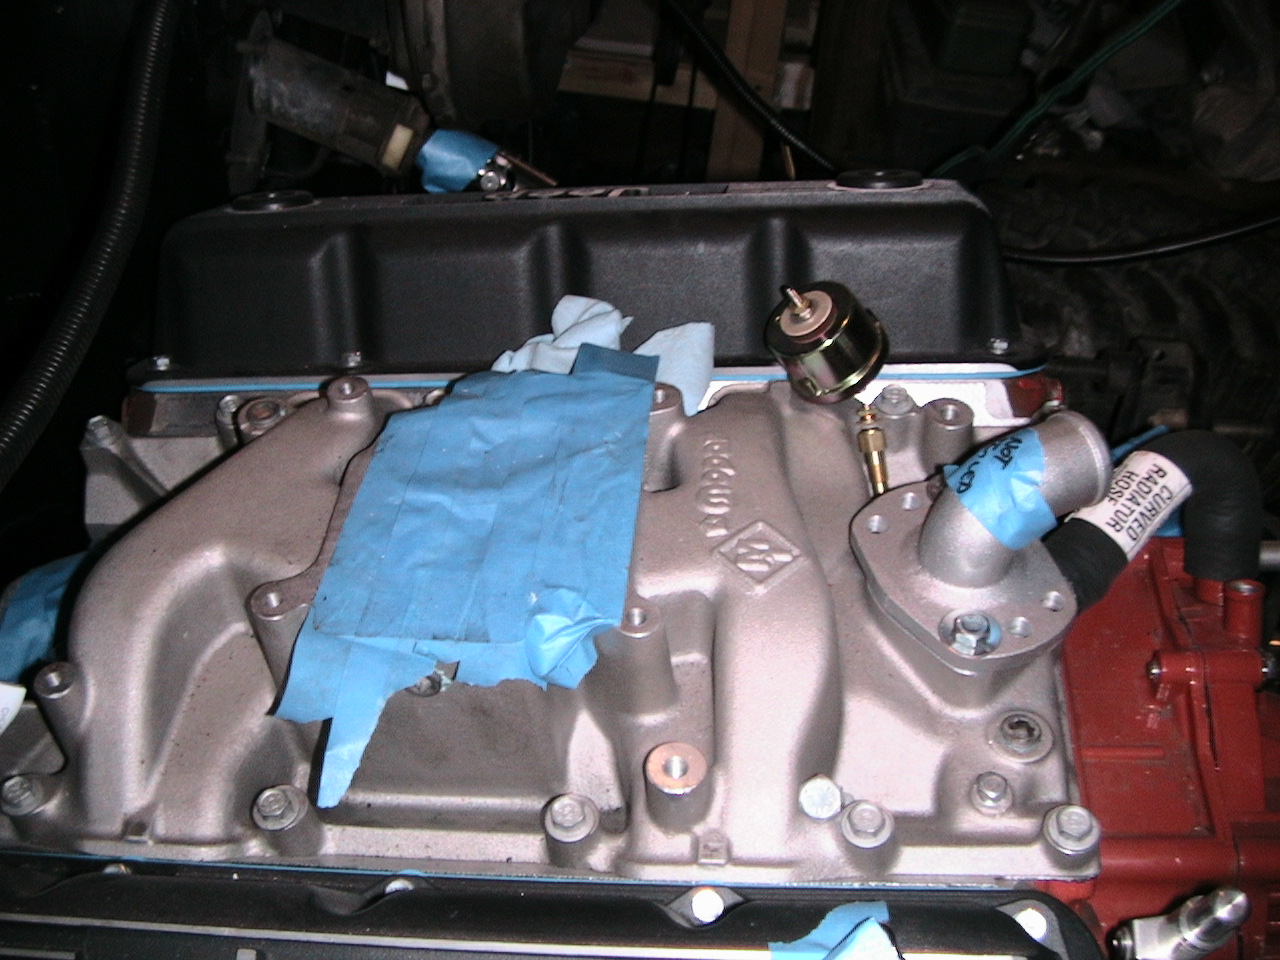
 I got an adjustable 90 degree water neck from Mancini Racing. This makes
finding a radiator hose MUCH easier. The bypass hose is for a 1979 Dodge
Ram pickup with a 360, as is most of the stuff on the front of the motor.
I cut about 1/2" off of it to soften the 90 degree turn it makes.
I got an adjustable 90 degree water neck from Mancini Racing. This makes
finding a radiator hose MUCH easier. The bypass hose is for a 1979 Dodge
Ram pickup with a 360, as is most of the stuff on the front of the motor.
I cut about 1/2" off of it to soften the 90 degree turn it makes.
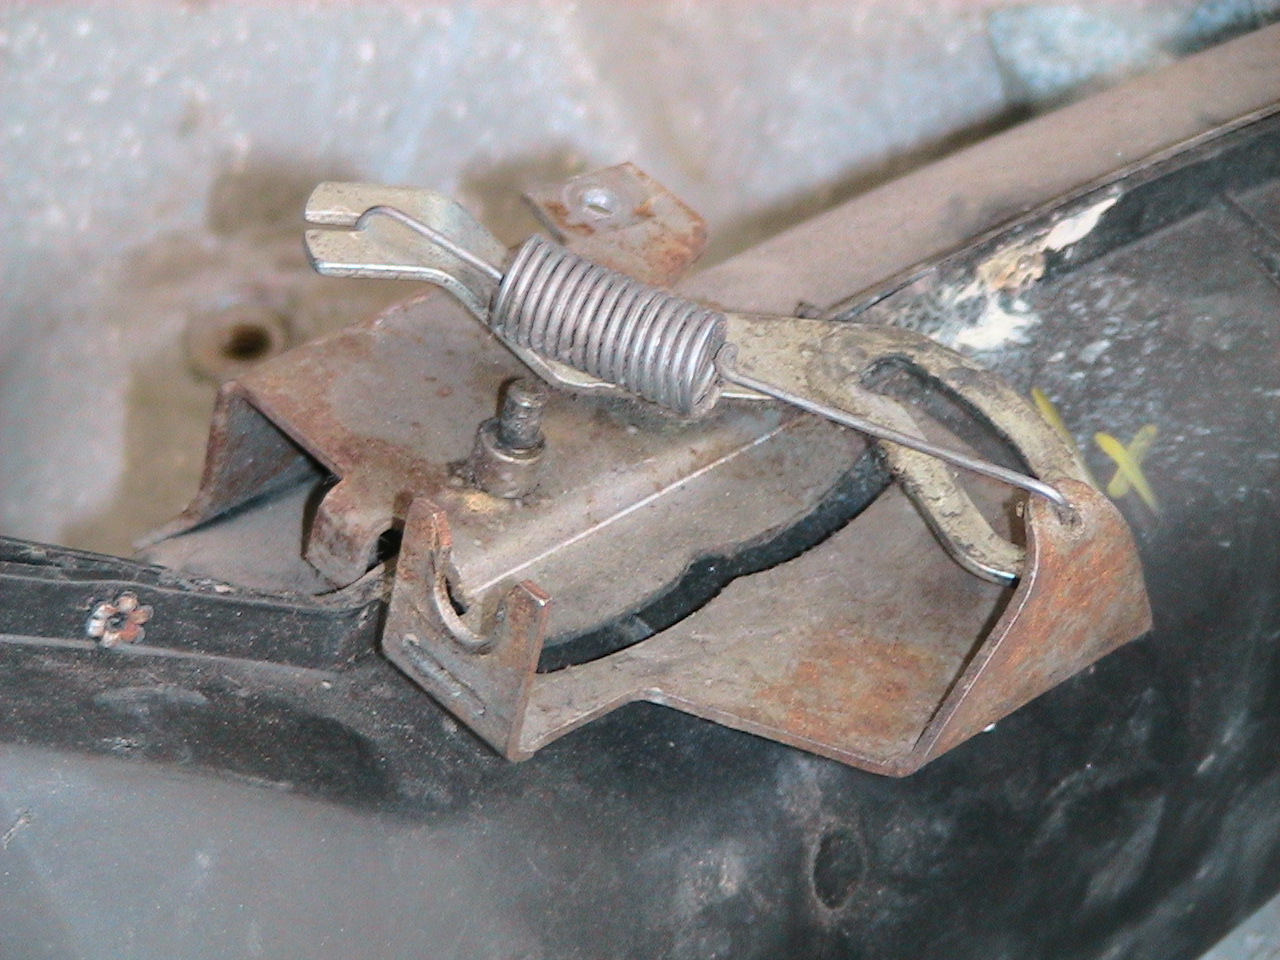
I attempted to modify my B&M truck shifter so I could go from Drive to Reverse without pulling up on the handle, no luck. I finally found where I saw it done - 4-wheeler's Teal-J. But they used a Street Bandit. I called B&M and asked for help or an exploded diagram. A very curt "No" was the reply. I'll call again, maybe he was having a case of the Mondays. If I get that again, they go on the list of "folks who's crap I don't want in my Jeep" along with Jegs and Quadratec. I'm probably in the market for an Art Carr.
The crossmember for the tranny is in. I'll have to modify it so I can put in the front driveshaft at some point, but I just want to get it running right now.
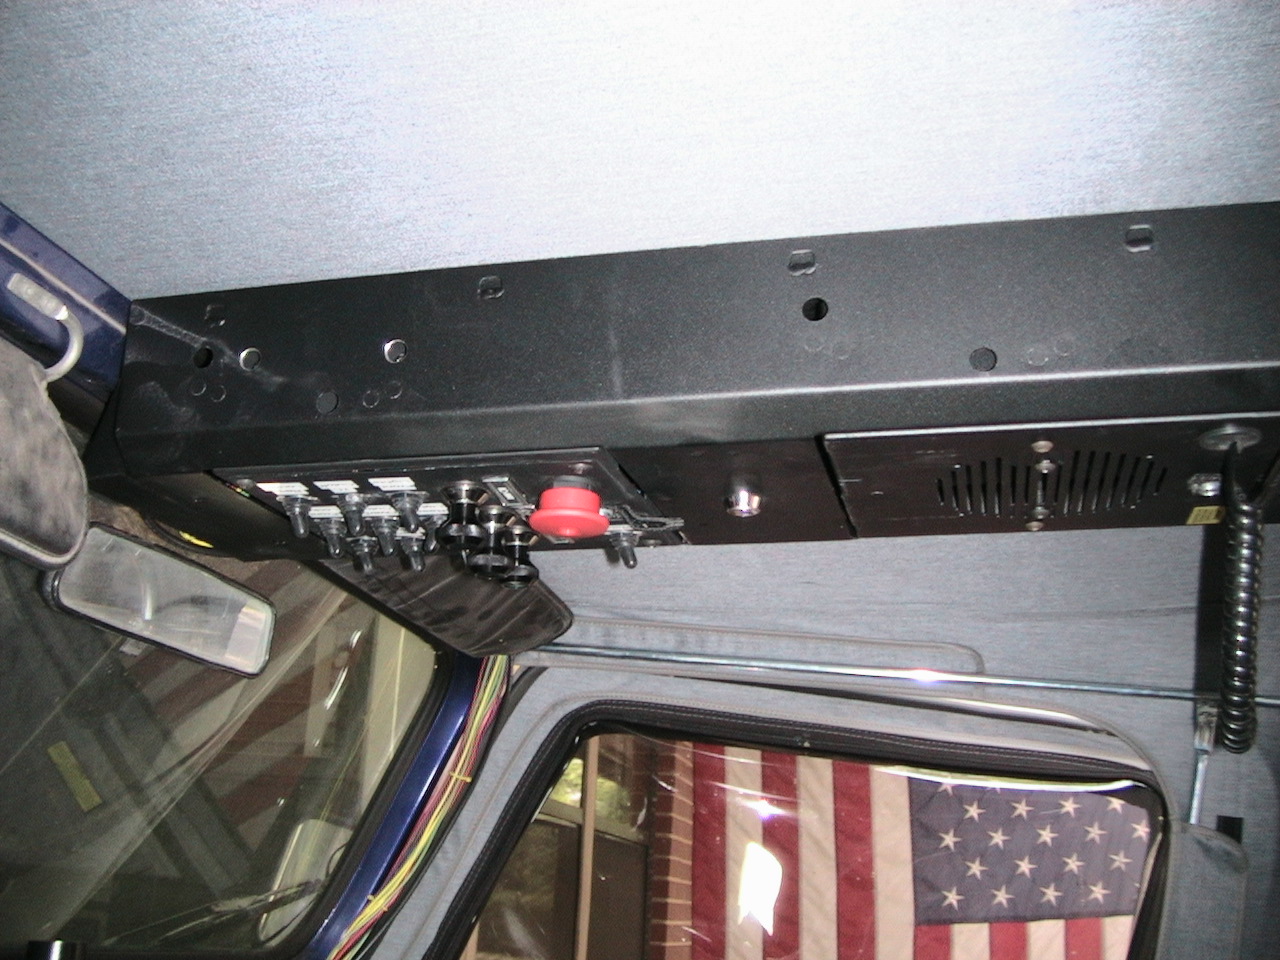
I had to install the new soft top enough to know where the bow would be so I could install the console so I could install the wiring. I had to modify the install of the Tuffy Overhead Console. It's designed to U-bolt to 2" CJ-7 rollbars, not 3" CJ-8s. And I didn't want 1" hanging down for someone to hit their head. So I welded a ledge and bolted it down from the bottom instead. More to follow on this when I get the switches put in. Oh, and they don't bother to tell you how to mount your CB in there, I had to fab some brackets, so be forewarned. Otherwise it's a good product and I couldn't have made anything like it myself, so overall I guess it's OK <grin>


Finally figured out the fitting sizes on the tranny cooler lines: 1/4"NPT. Just need the 90degree AN -6 fittings & the tranny is connected. Engine oil system is done. Filter mount is fabbed. Need to move the battery support now. Switches, wire and exhaust elbows are in from Summit Racing, just need to run it all the electrical and fab a mounting plate in the console. Exhaust can wait, not really necessary once you get the fire pointed at the ground! ha ha.
Since we're on the topic, my biggest challenge that I know of right now is the exhaust. Jesse James is my inspiration, I'm going to try to make it myself. Right side will go around in front of the oil pan and link up with the left side and go from 2 1/4 into adapters into a flowmaster Y pipe with 3" outlet. Then some 3" pipe to the Random Technologies high flow catalytic converter, then the Flowmaster muffler, then across and dump out in the right rear fender well (or cut out through the body, haven't decided). Anyway, running that is going to be a challenge, never done anything like that before. And if I really screw it up, I'll take it to a local shop or something. Or just run it with 3" of exhaust pipe on the headers. That ought to drown out the local Harleys :)
22 Jan 07: The weekend included - moving the battery tray support to clear the filters, fill and prime the engine oil (trick: use needle nose pliers to lift the intermediate shaft up 1" or so, then slip string or fishing line under the drive gear and lift it out. Then use the Mopar priming shaft to spin the oil pump. Remove the left valve cover to see when the oil's up, then you can also watch the #1 rockers while you spin the crank to find TDC. Note the approximate direction of the distributor drive slot when you pull out the intermediate gear). Ordered the fittings from Summit to finish the tranny, then I'll put in the temp sender and fill it. I jumpered the starter to spin the engine to get TDC and set up the distributor. Working on the switch panel. The headlight switch is too long to fit, so I'll have to use a heater switch instead & run it through a relay. Fittings and 3" exhaust pipe is inbound, next is finish the switch panel, run the exhaust, finish the tranny lines, temp sender and fill it.
29 Jan: exhaust pipes are here. Tranny pan is down waiting for me to put in the temp sensor. I filled the radiator only to have the @#$ing stuff run out the locking header bolts. A note "hey, by the way, the exhaust bolt holes go into the water jacket" would have been nice. So there's $60 wasted. Good news is that the switch panel is done, waiting for the last 3 switches to arrive then I can wire the whole mess. That will be a few hours' work!
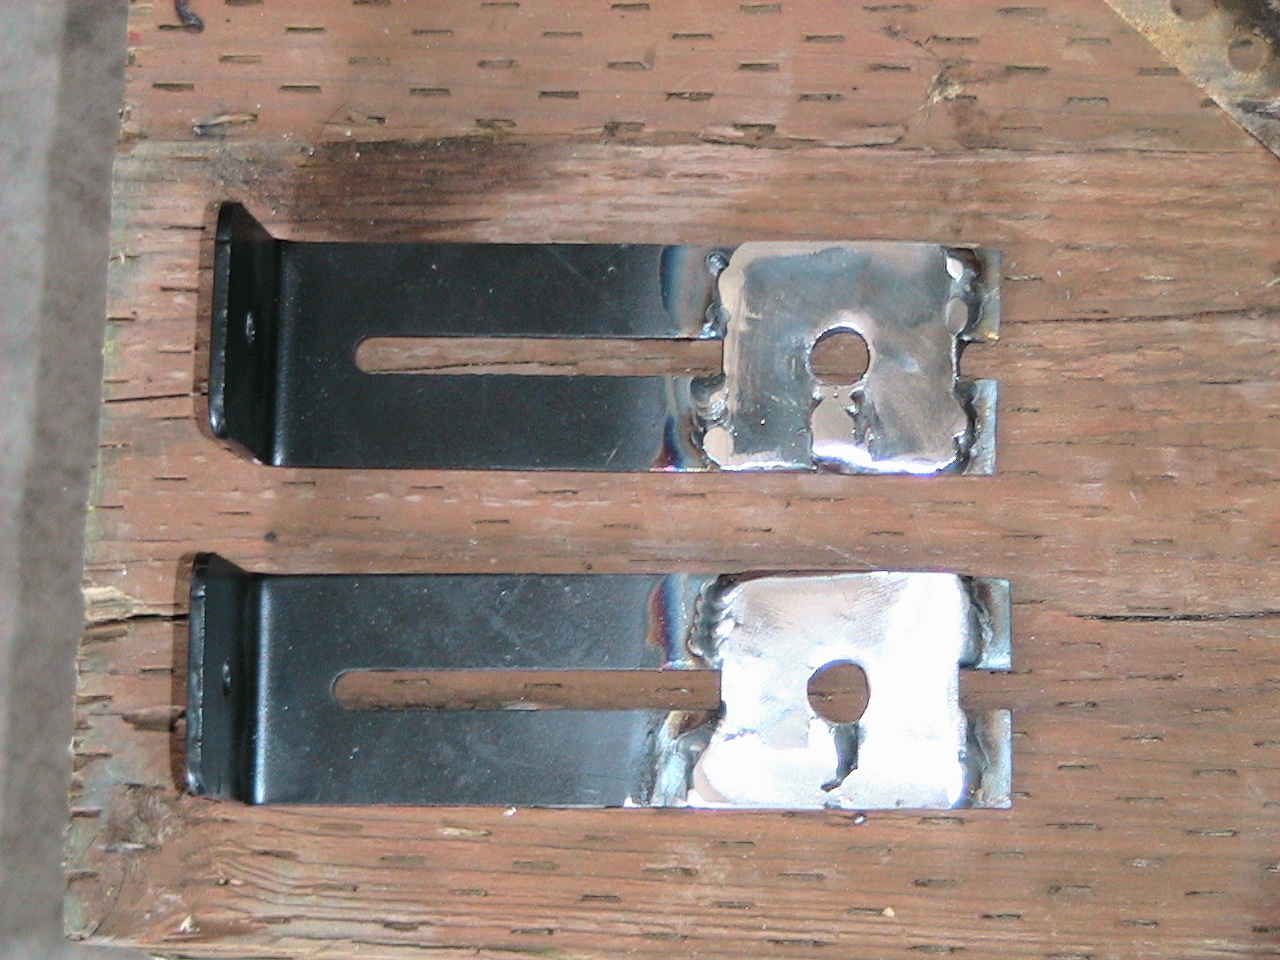
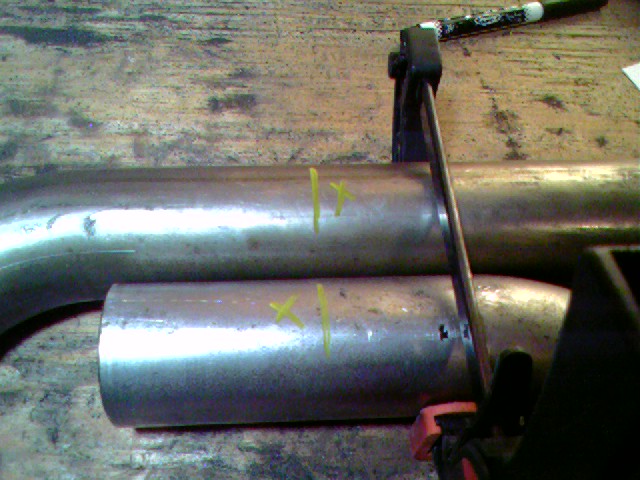
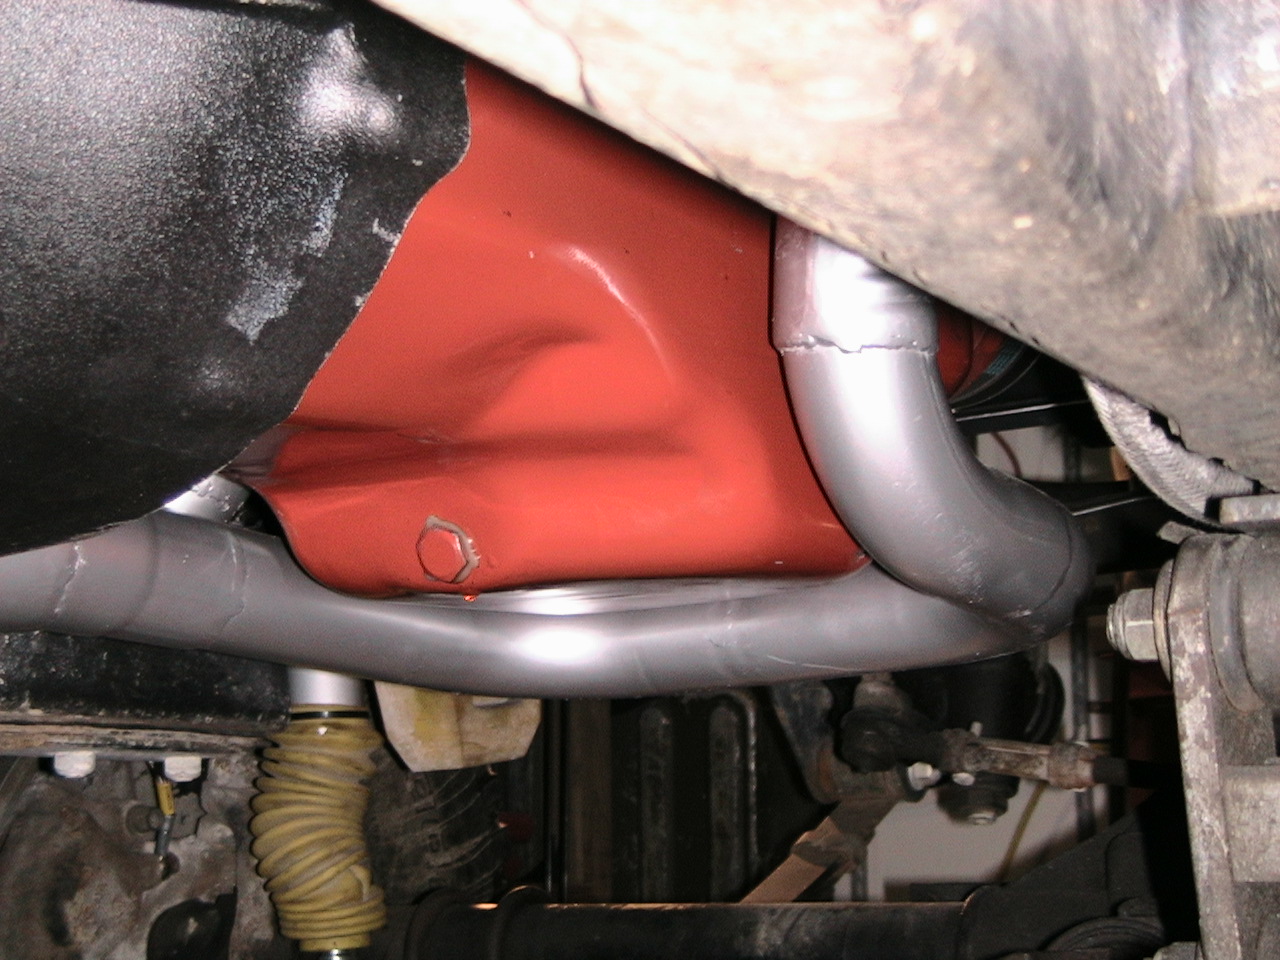
2 Feb: right side exhaust is welded and goes forward around the oil pan to below the left side. Both are 2 1/4" pipes. There, they'll hit a 2 1/4 to 2 3/8 adapter into the 2x2.5 to 1x3" flowmaster Y pipe, vicinity of the starter. That's as far as I got. Here are some pics. First one is drawing the cut line. I knew I needed 12.5" on center to get around the oil pan. So I set them on the table, clamped them together and drew the line (pic2) and cut them with the chop saw. I only have two hands, so I welded little tabs on the downtube (pic3) to hold up the end of the pipe while I held the far end with one arm, leaving the other hand free to tack the pipe together. Then I took the pipe off the jeep, got it on the table, cut the tabs off and finished the weld.
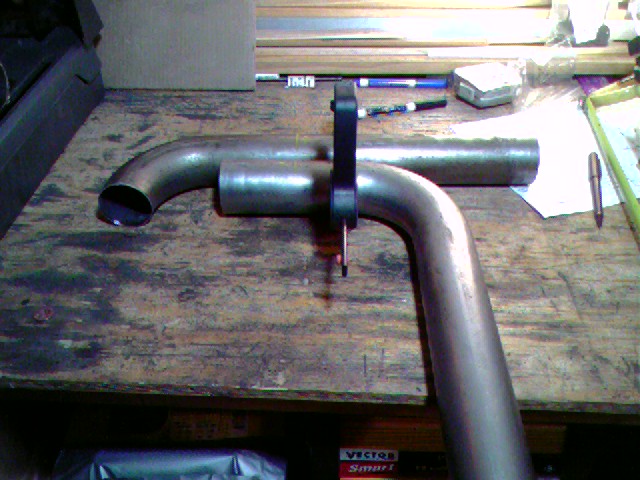
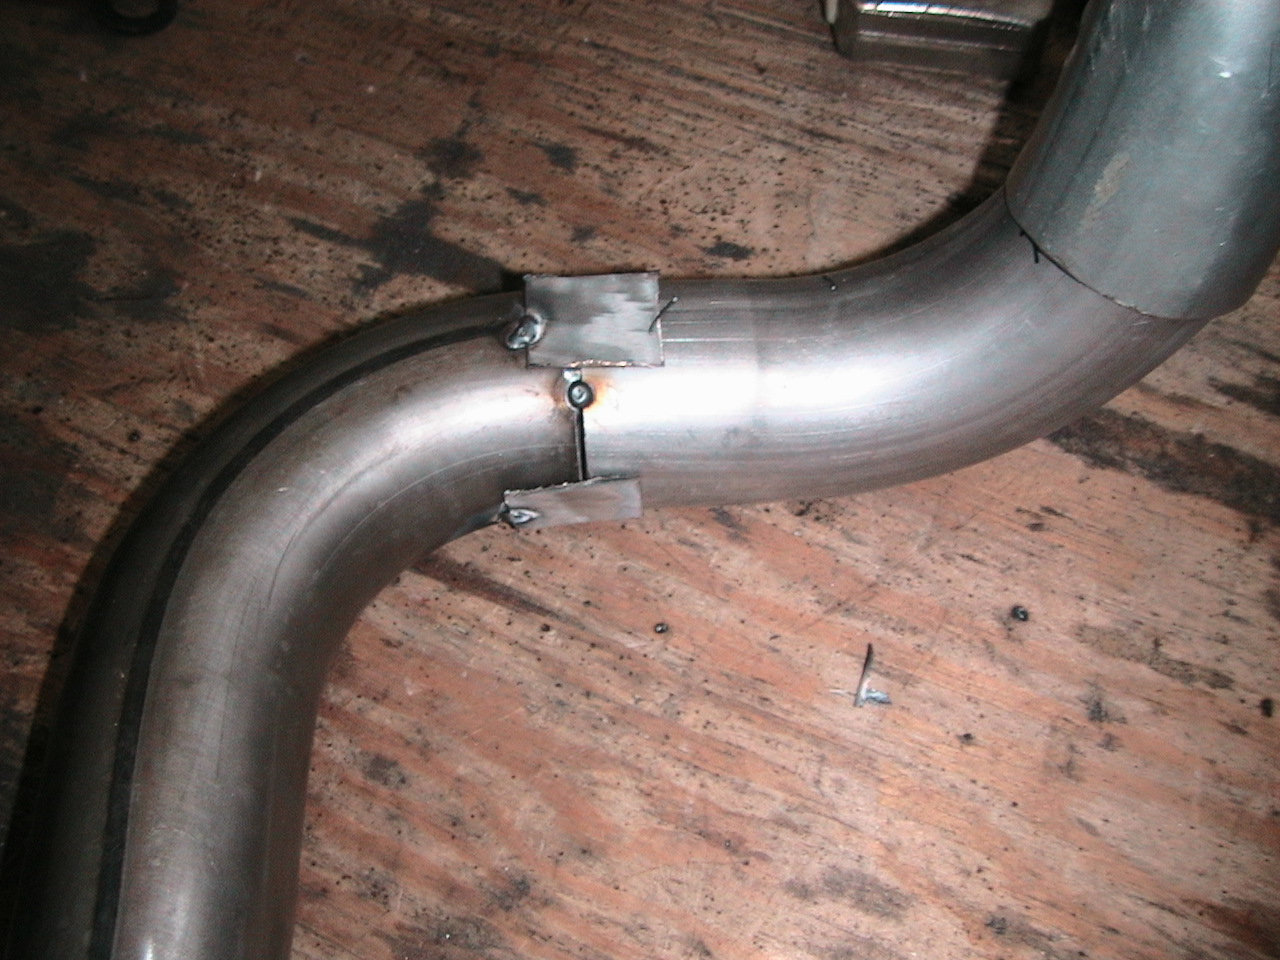
Here's the finished product. After doing this, the rest of the pipe should be easy. This took me about 5 hours total, and I put each side on and off about 1/2 dozen times or more. Be patient, make those welds count. If you don't like it, cut it apart and do it again. It's not "chromeable" but it's pretty good. I'm happy with it.
15 Feb: I've got the exhaust run back to the muffler, good enough. There was a compound angle after the Y-pipe that I hadn't anticipated, it gave me some serious headaches for an hour or so. I haven't connected the trans kickdown cable yet, though. I'm betting that when I do, I'm going to be cussing myself for finishing the exhaust and putting those pipes up in the frame so tight. I also have a bunch of exhaust head shielding so I don't melt the jeep down.
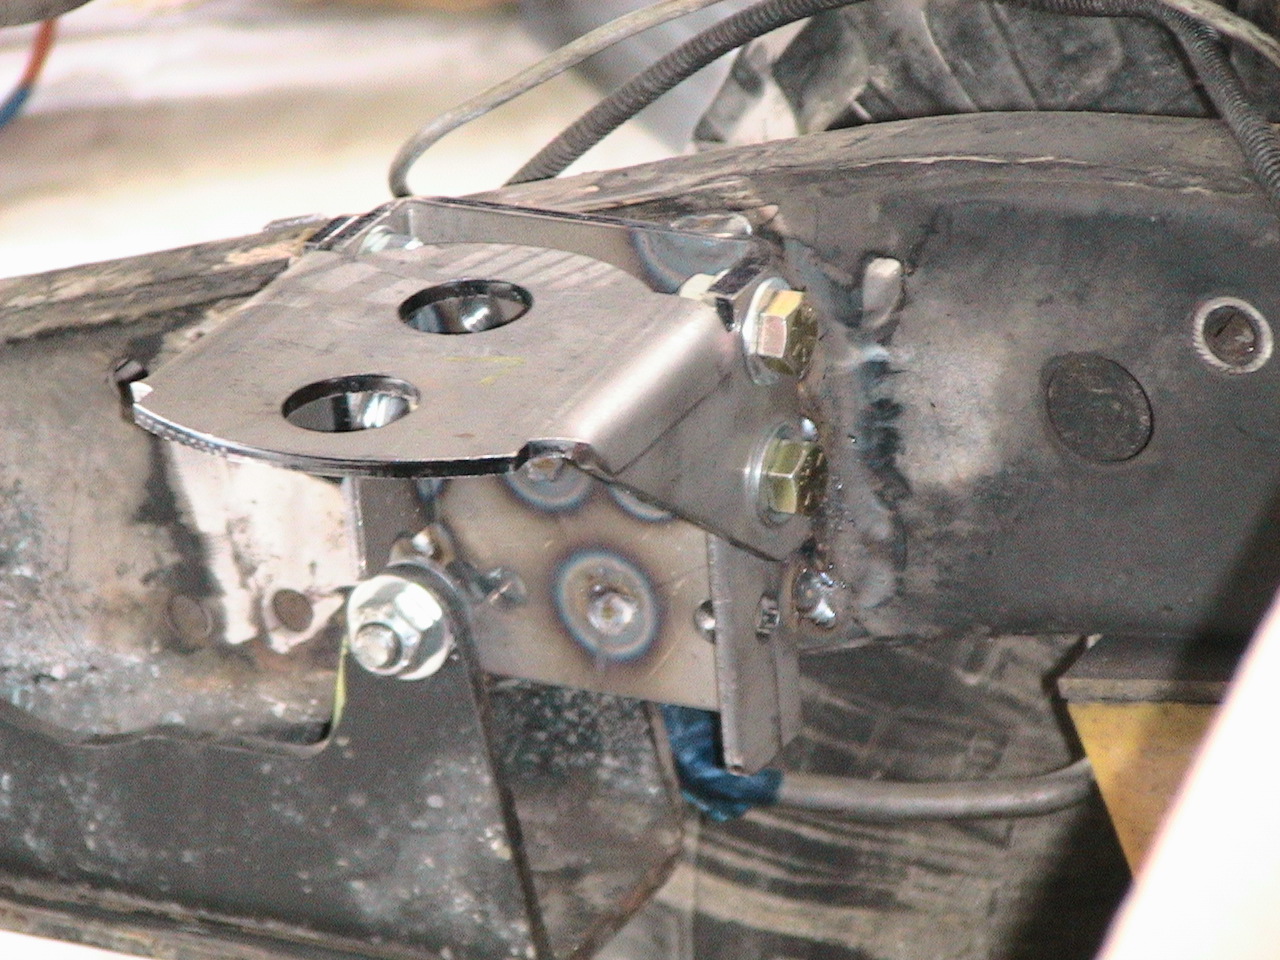
The Currie TwinStick is finished - there are three bolt holes in the side of the Dodge transmission that are in the perfect spot for a bracket to hold those shifters. Pics will follow. I just had to fab a bracket, find some spacers, make some longer actuating arms, and I'm done. Easy! Didn't even have to cut the floorboard!
I need to finish the brakes, then it's pretty much electrical. I'm not scared but it's going to take some careful planning. I'm resisting the urge to gator-clip the ignition, starter and propane solenoid to start the thing. If I do it right the first time then I can actually drive it when it starts. :O
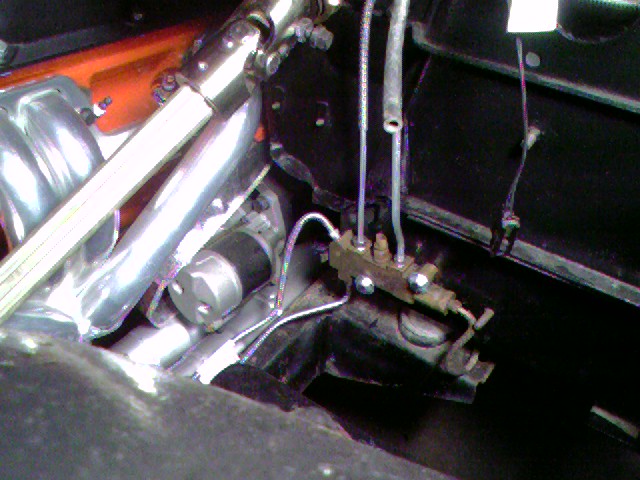
I ripped the brake lines out. Probably should have done that before I put the grille back on, but I should be able to snake the lines in there. I've modified the front holding brackets for the lines to go under the frame instead of through it, should give me another 2 inches of droop. Proportioning valve is going on the outside of the frame rail, no room on the inside. I'll weld some protection underneath it so a rock doesn't take it out. Change 3: it went on the firewall below the floorplate:

I've cut the emergency brake lines, they were in the way. Later I'll put in two TJ parking brakes, one for each rear wheel.
I finally got the switch panel modified to keep the wiper and heater switches from spinning (welded a little piece of steel across to make that D shape). Here's the finished product, as well as the gauge panel:
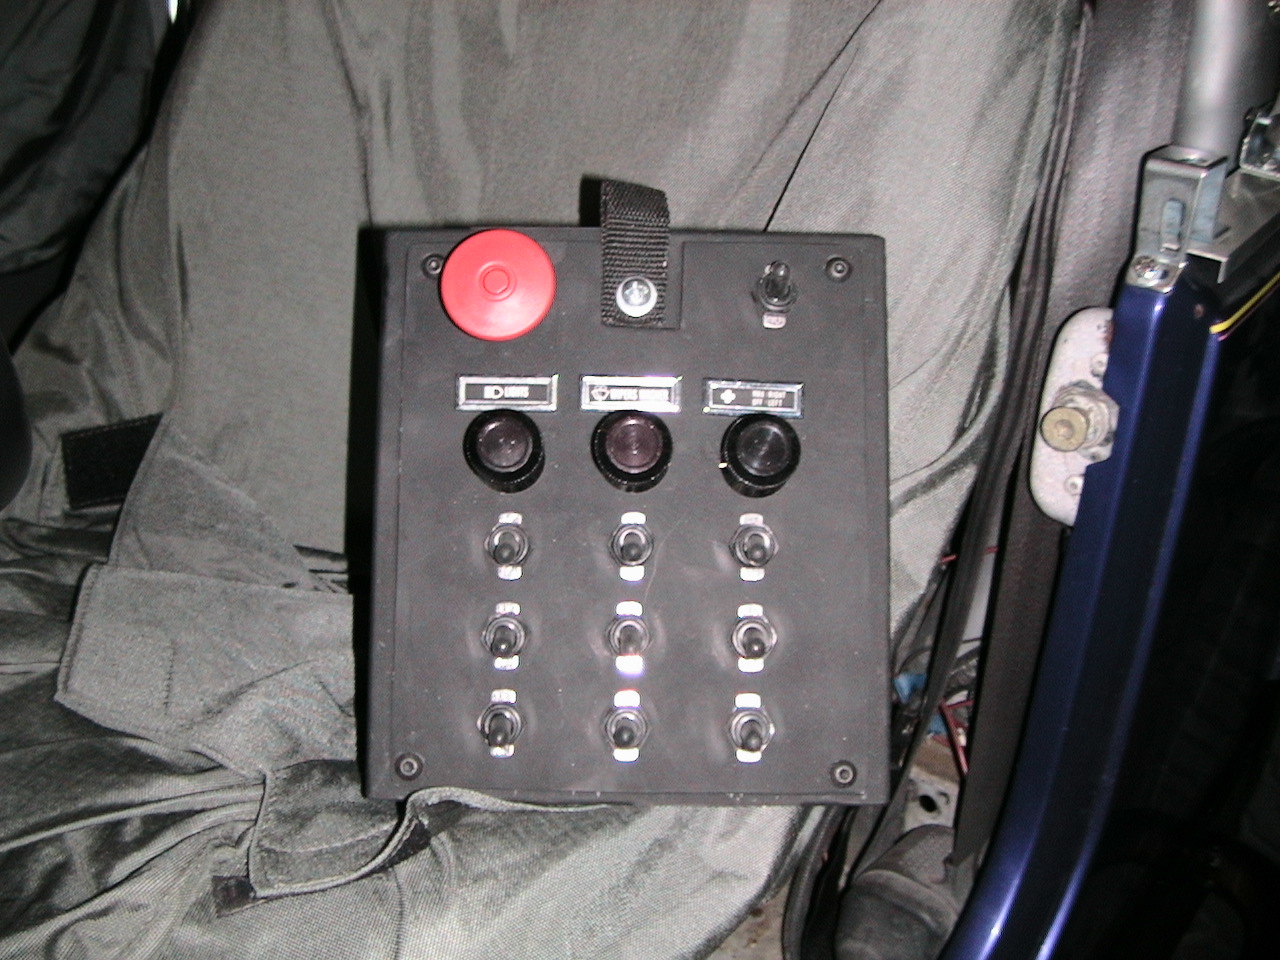
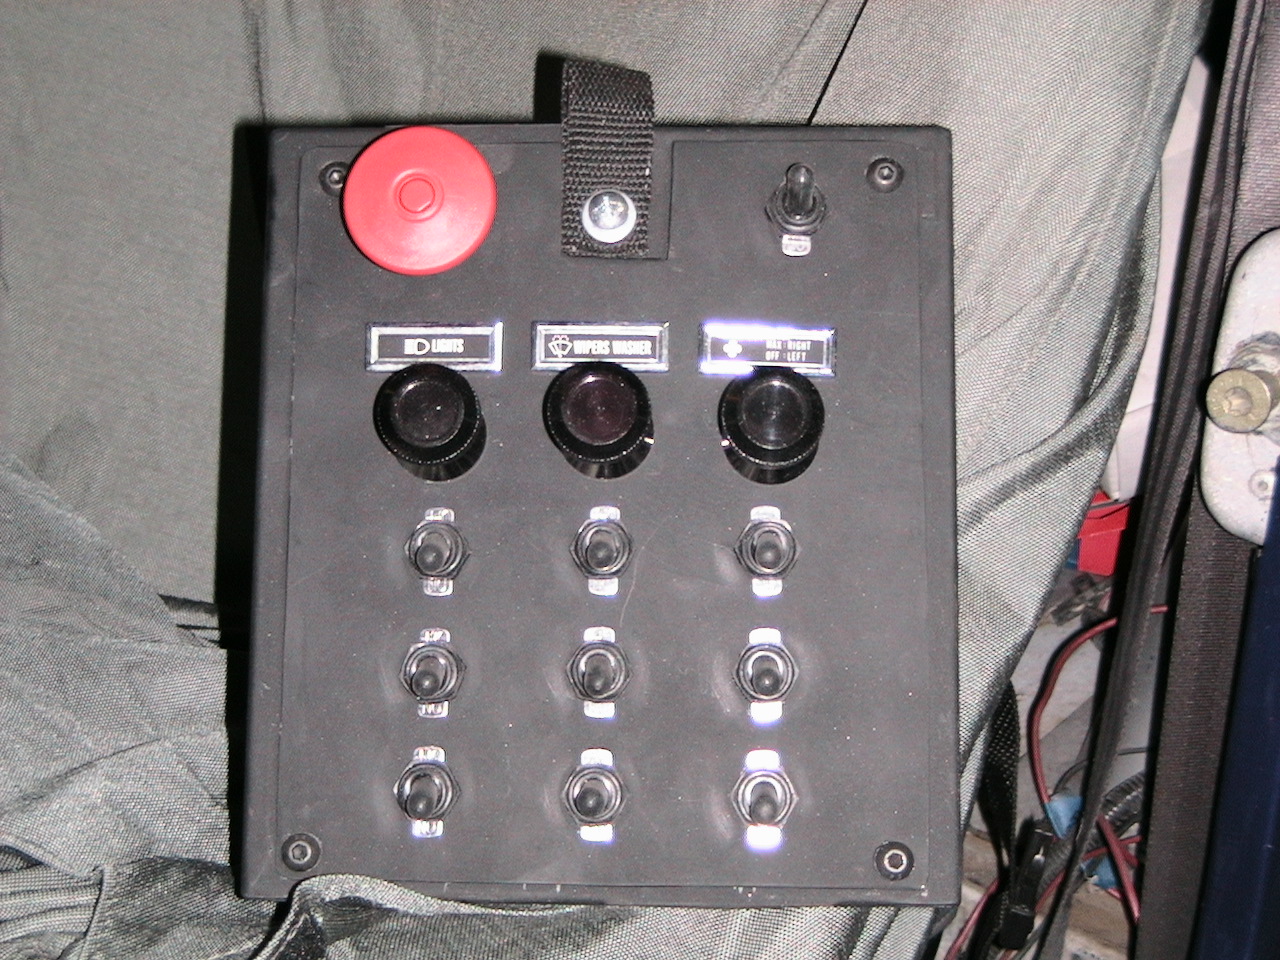

One thing I should mention here: when these drawers open, they will not allow the use of the first row of switches. The installation requires them being installed in the open position. I just redrilled the holes in the sides of the console and installed the drawer while in the closed position. Not a big deal but figured I should mention it in case anyone else is contemplating the same solution but wants to be able to open the drawer.
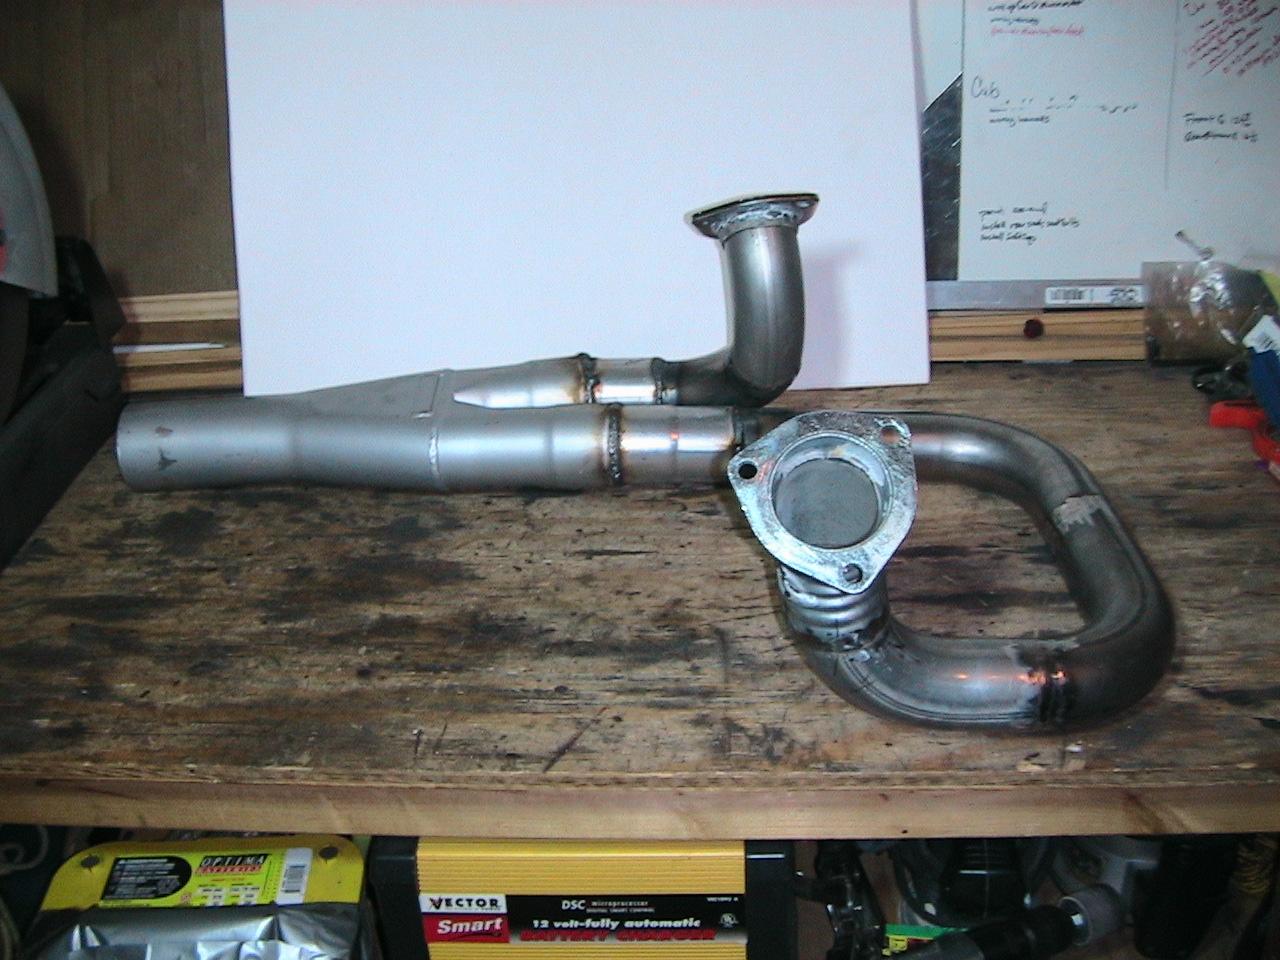
Here's a peep at the exhaust. Note the drip of oil on the pan, remnants of the thing getting bashed in shipment. I'll change out the drain plug during the first oil change.
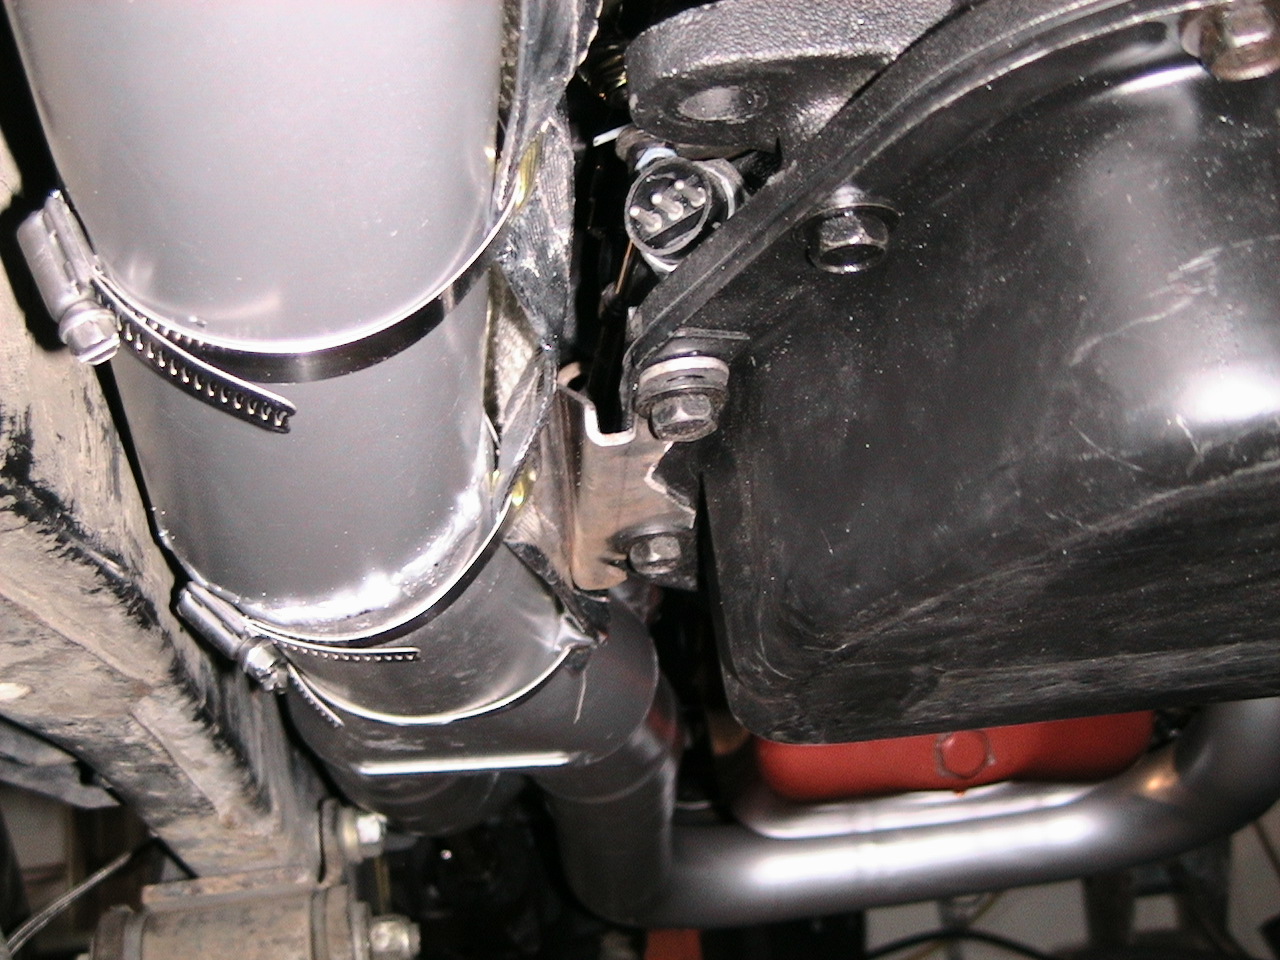 I tucked that puppy right up in there. Made it really tough to hook up the
shifter and kickdown, and may end up melting my shifter cable. The cable's
in a heat sheath and I've got heat shield on the pipe. Hopefully that's
enough.
I tucked that puppy right up in there. Made it really tough to hook up the
shifter and kickdown, and may end up melting my shifter cable. The cable's
in a heat sheath and I've got heat shield on the pipe. Hopefully that's
enough.
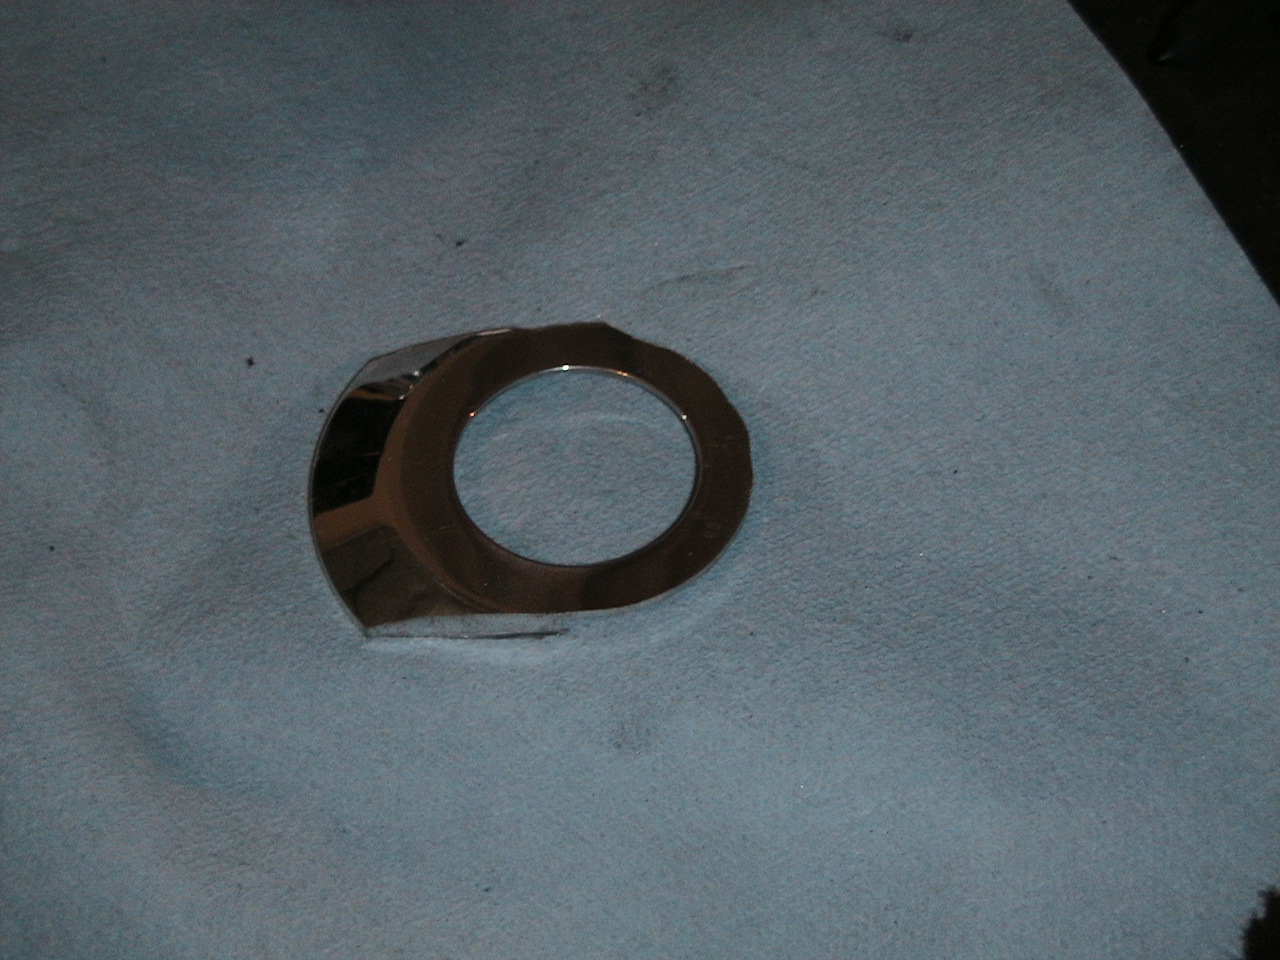
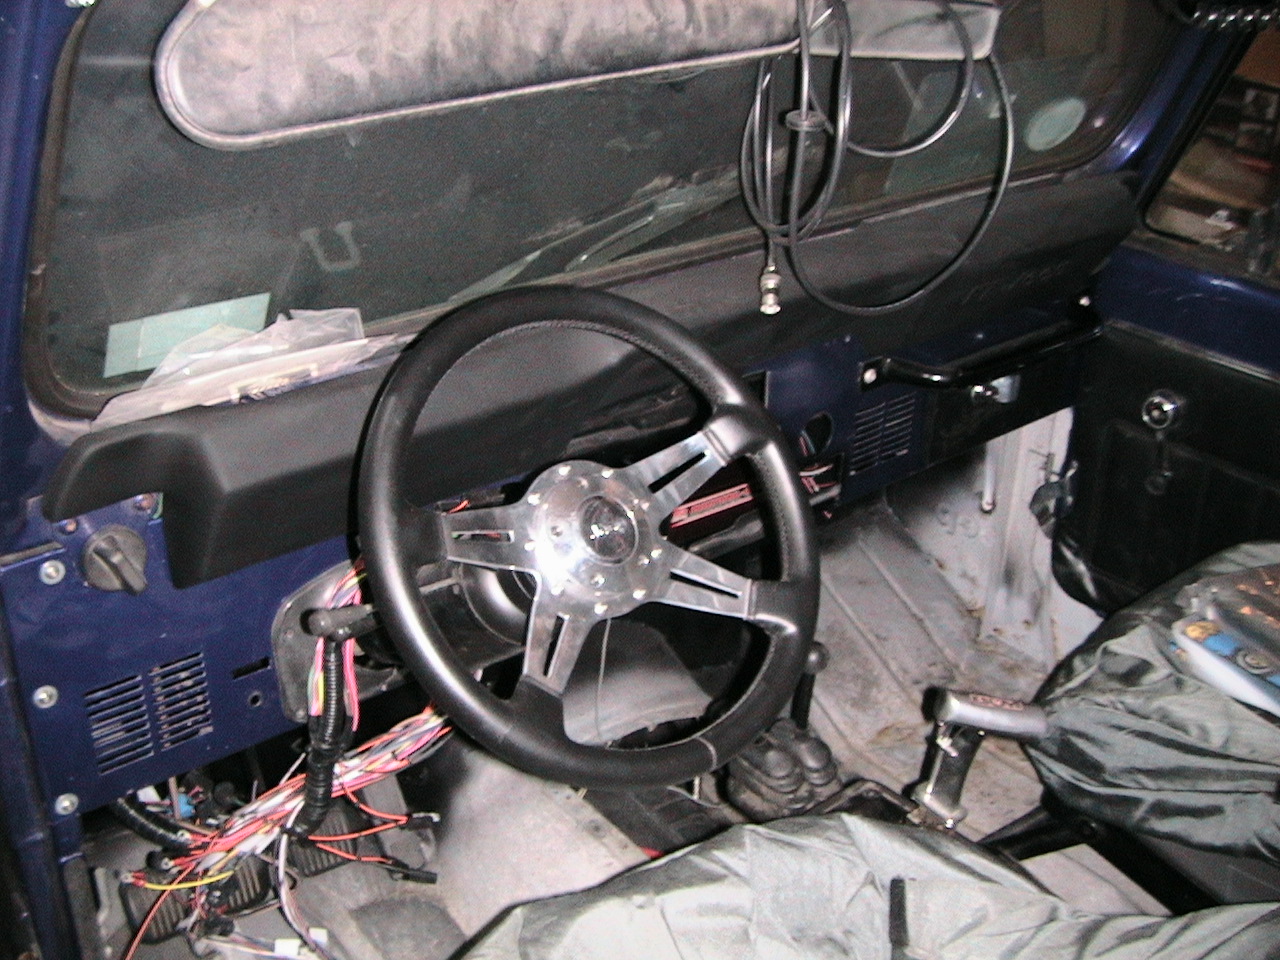 This is another "bolt on" that took over an hour: the billet
"Jeep" horn button. I was supposed to be able to remove the horn
button assembly from the assembly that came with the wheel. What actually
happened is I blew up a fiber cutting wheel trying to cut the aluminum away, and
ended up using a scroll saw to get the horn button out, then still had to shave
1/16" off the button to get it to fit. We'll see if it works when I
put the juice to the circuit later. Not exactly how the instructions said
it should go. I'll drop Grant a line on that one soon.
This is another "bolt on" that took over an hour: the billet
"Jeep" horn button. I was supposed to be able to remove the horn
button assembly from the assembly that came with the wheel. What actually
happened is I blew up a fiber cutting wheel trying to cut the aluminum away, and
ended up using a scroll saw to get the horn button out, then still had to shave
1/16" off the button to get it to fit. We'll see if it works when I
put the juice to the circuit later. Not exactly how the instructions said
it should go. I'll drop Grant a line on that one soon.

 Here's what it looked like today when I dropped the tools. Not done but
closer than before <grin>
Here's what it looked like today when I dropped the tools. Not done but
closer than before <grin>
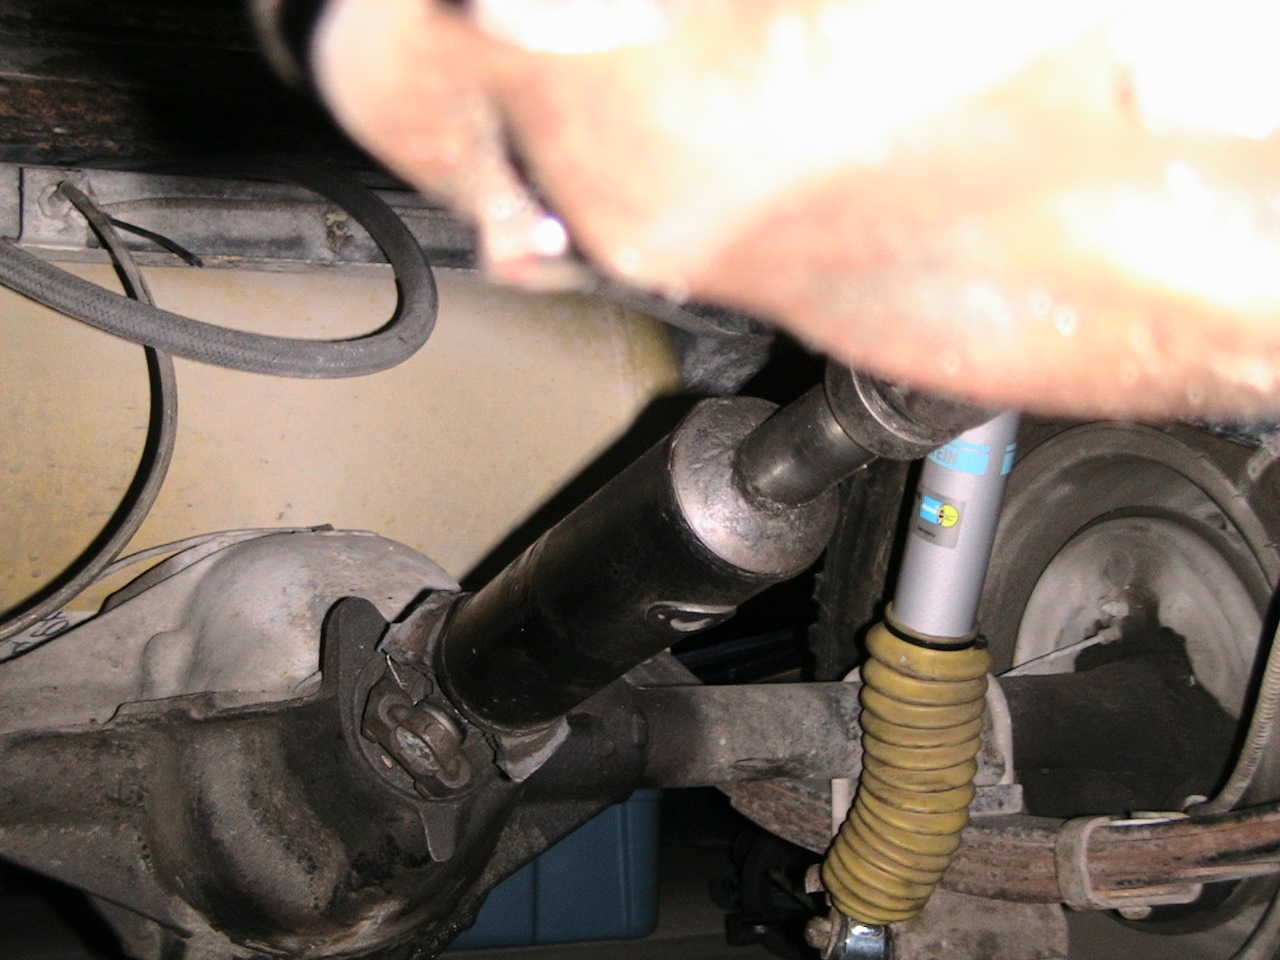 Here's a shot of my driveshaft, 22 1/2" at ride height if I remember right.
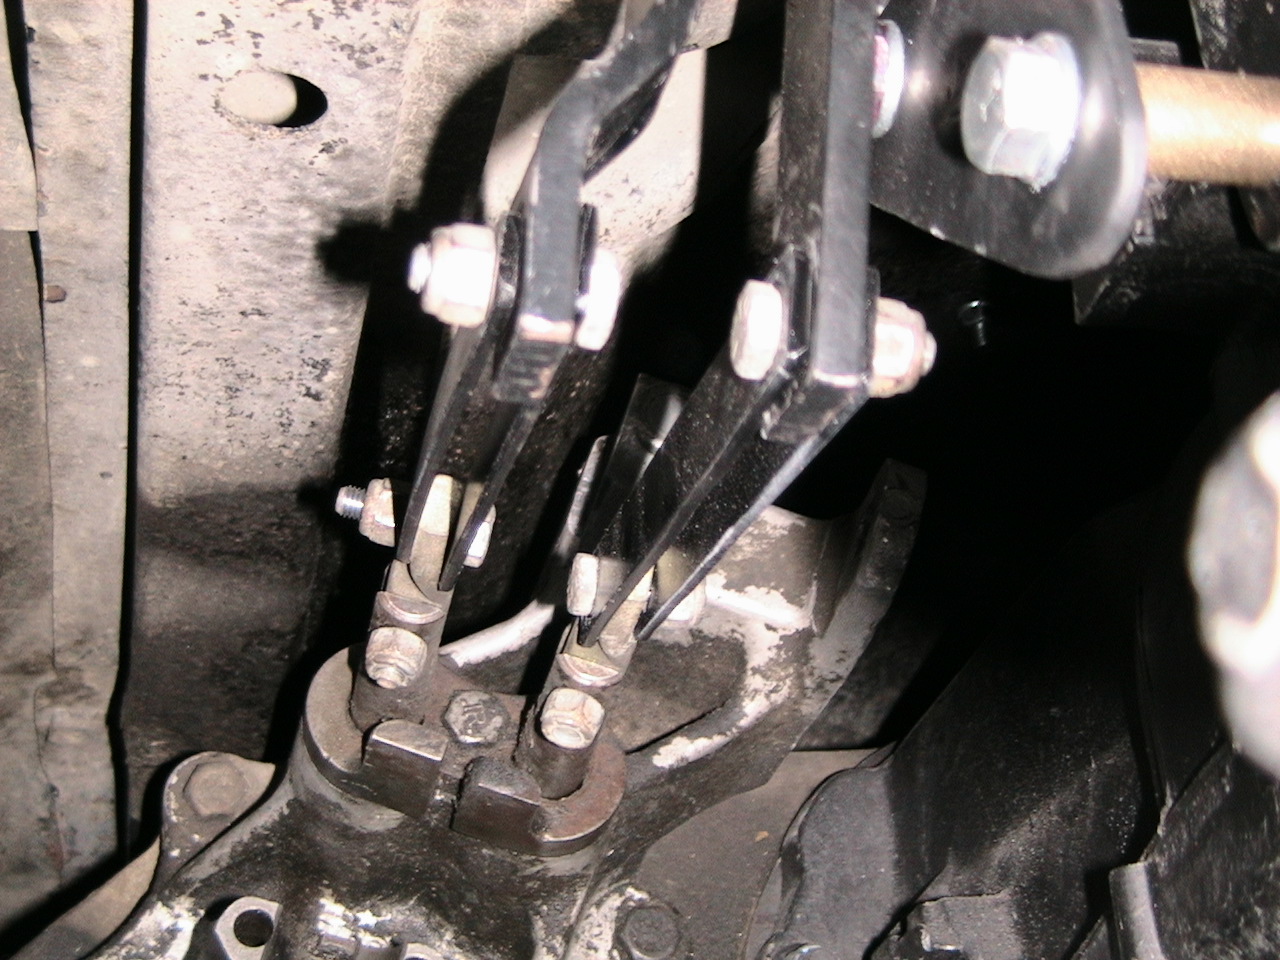 Here's the twin stick linkage mod, and the bracket w/ spacers is in the shot a
little bit. I'll get a better one of that. This kept me from having
to cut more floorboard.
Here's the twin stick linkage mod, and the bracket w/ spacers is in the shot a
little bit. I'll get a better one of that. This kept me from having
to cut more floorboard.
17 March: I've moved to the new house. The brakes are done, front bumper and winch are on, full soft top is on. No wires yet. I think I've got it all figured out on paper - you need to have a plan, don't just start running wires or you'll drive yourself crazy trying to figure out why you don't have spark. No real words of wisdom these days, just trying to get everything unpacked and pictures hung so my better half will let me go out into the carport to play. Sure wish I had a garage.
25 April: Quite a bit done since the move, so here's an update:
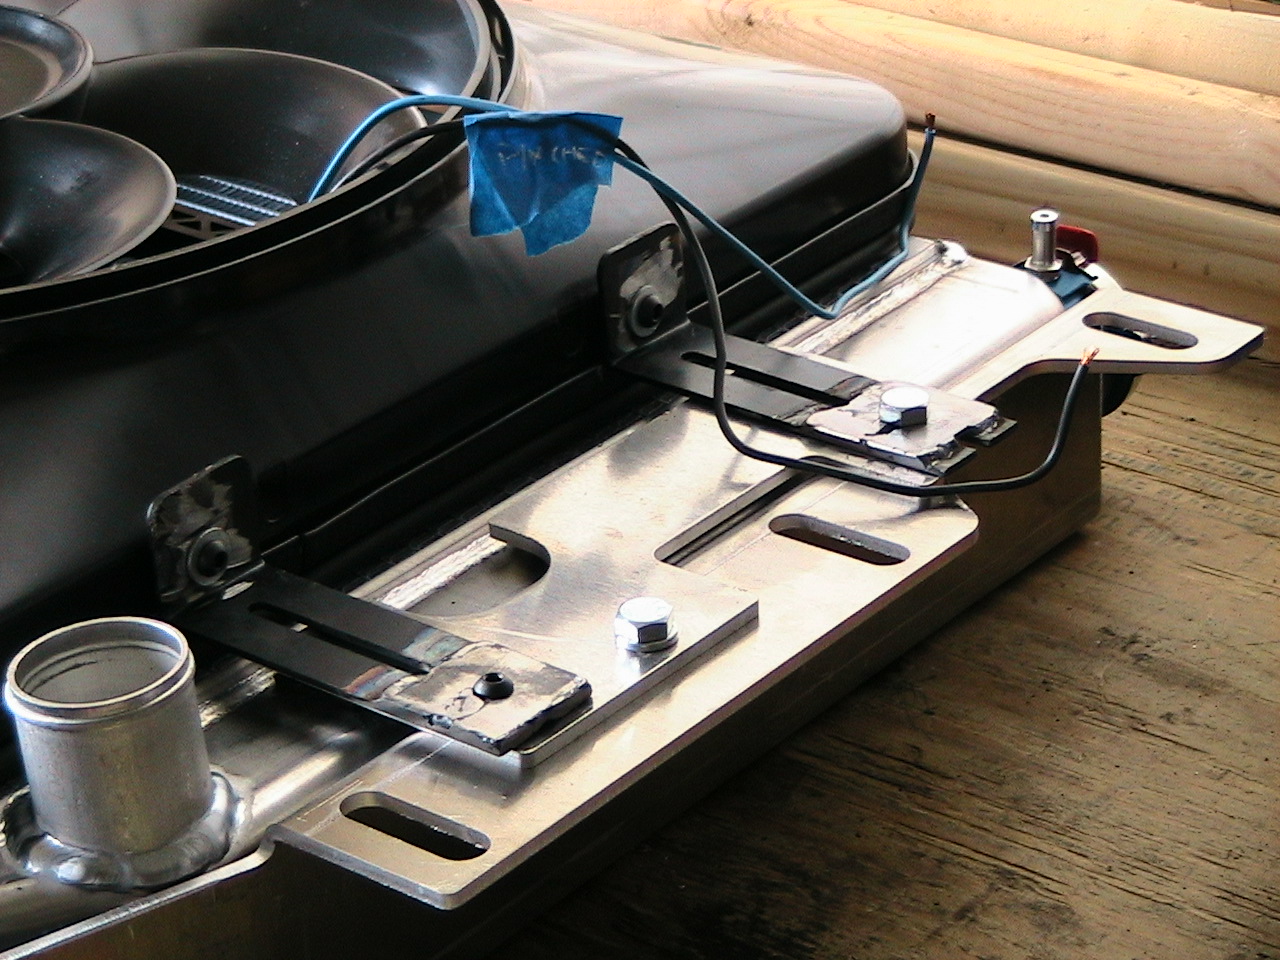
Switch panel is finished and installed. Here's what the back looks like:


Had to move the brake proportioning valve because the starter was in the way
Dash marked for the wires to come down from the overhead switch panel

Engine will get wired while I put the whole thing together. There are many wires that I won't need from the stock harness. For example, the ignition is in the cab, there's no heater, etc. So those wires can be either pulled back or reused for something else.

STC softtop is on, looks pretty different. Takes a little getting used to.

Final Touch powdercoating did my bumper for me, they did a great job especially considering the piece of junk that I brought them!
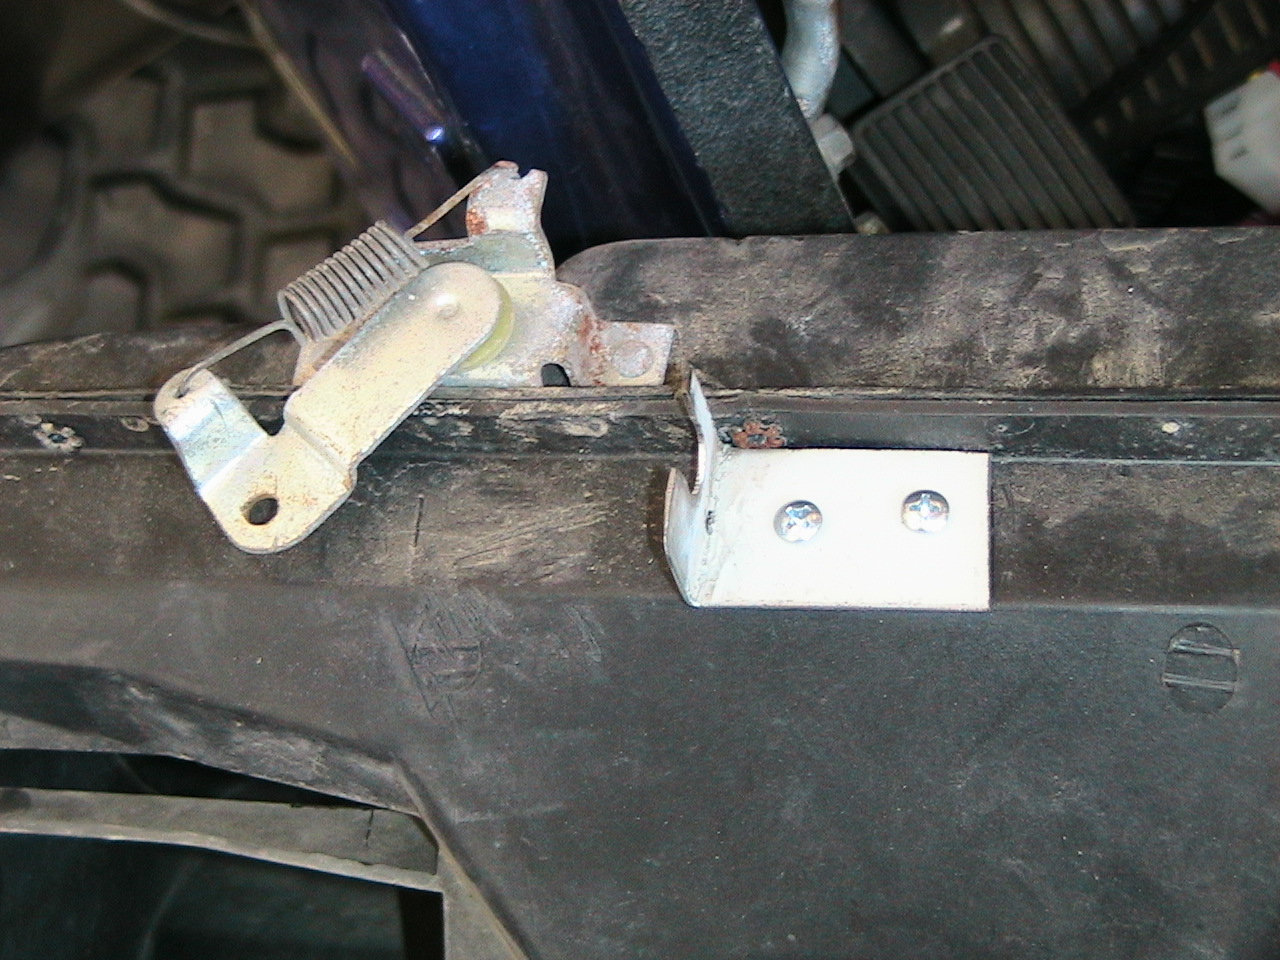
I moved the propane filler port up into the body to protect it from the rocks. There will be some plate across the bottom to protect the lines.

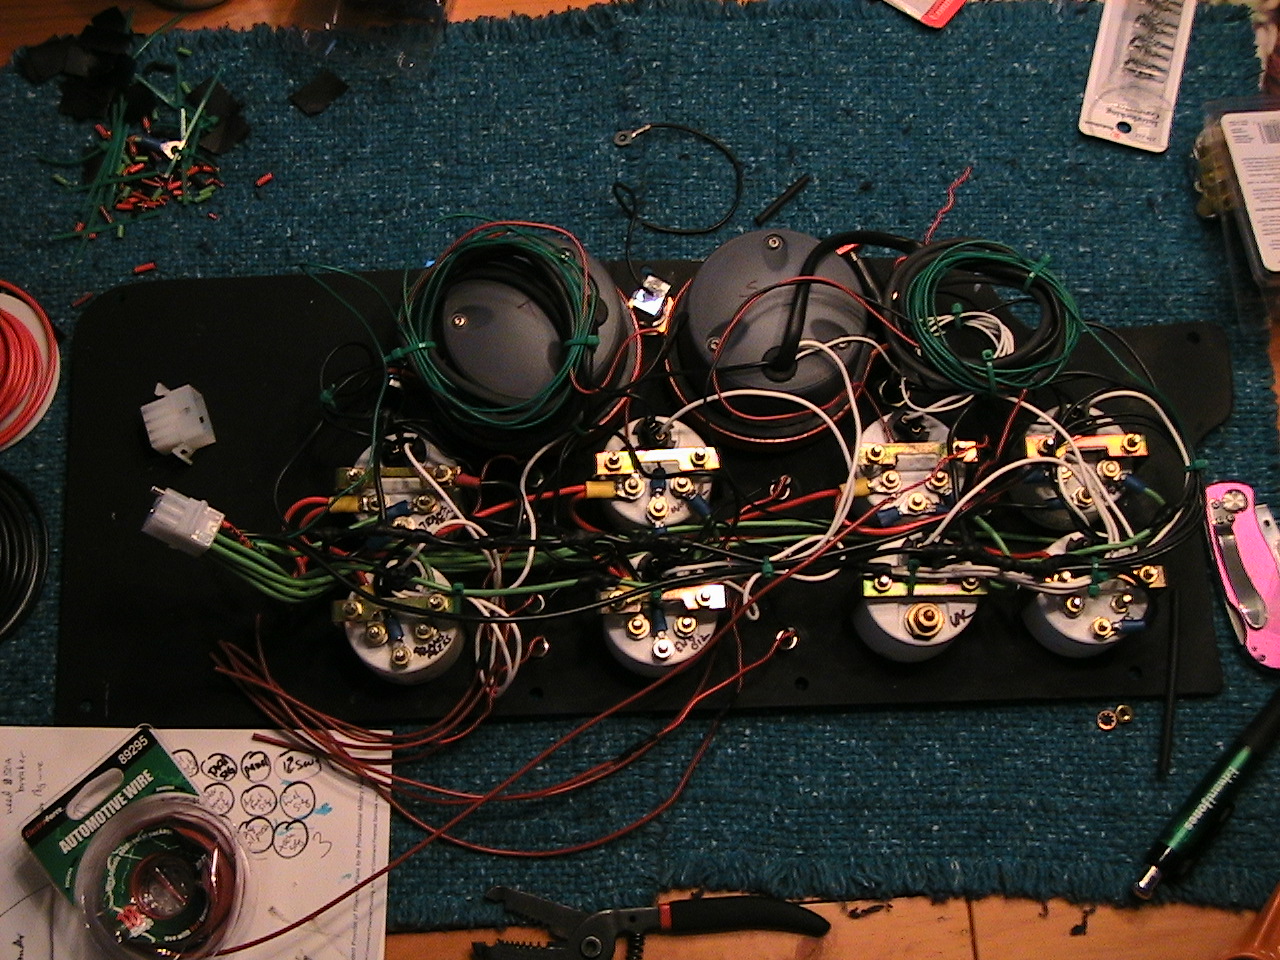
Here's the backside of the gauge panel, almost complete. Again, have a plan before you start and try to make this as organized as possible. I want to be able to rearrange the gauges later, so I didn't cut any wires short, and ran everything to two 12-pin plugs from Radio Shack so I can take out the entire panel together and not worry about crossing wires or anything.
7 May: switch panel is installed; engine compartment is wired, to include pulling back the wires that I don't need. Had I mapped out the wires that were in the painless kit, I could have planned ahead and used a couple of them, but no big deal. I'll find a use for them later. The hardest part of the wiring is figuring out how to make it work with the custom stuff I'm putting on. I'll post my schematics later, but bottom line is that I'm cutting into the main wire to the ignition circuit to run the master cutoff relay, then the switched side of that relay will go into the regular wiring harness. It's pretty scary cutting into a brand-new perfectly-good $400 wiring harness, but I've cut up more expensive brand-new stuff, so no time to get sentimental! Ha ha. Just the relay panel to mount about about two dozen wires to run, then I'm on the "pre-firing checklist" which is all the stuff I've written down and all the blue tape I've got all over the place "NoOil" or "Bolt Loose", etc. Anyway, won't be long now. Pictures will follow.
14 May: It STARTED! And I mean it started right up. Like on TV or something! So obviously, all the critical wiring systems are in place. There's an oil leak someplace that I need to track down, because it's leaking on the exhaust pipe and making a LOT of smoke, but macht nichts. It RUNS!


 Startup clip - Hear it start and see it
run!
Startup clip - Hear it start and see it
run!
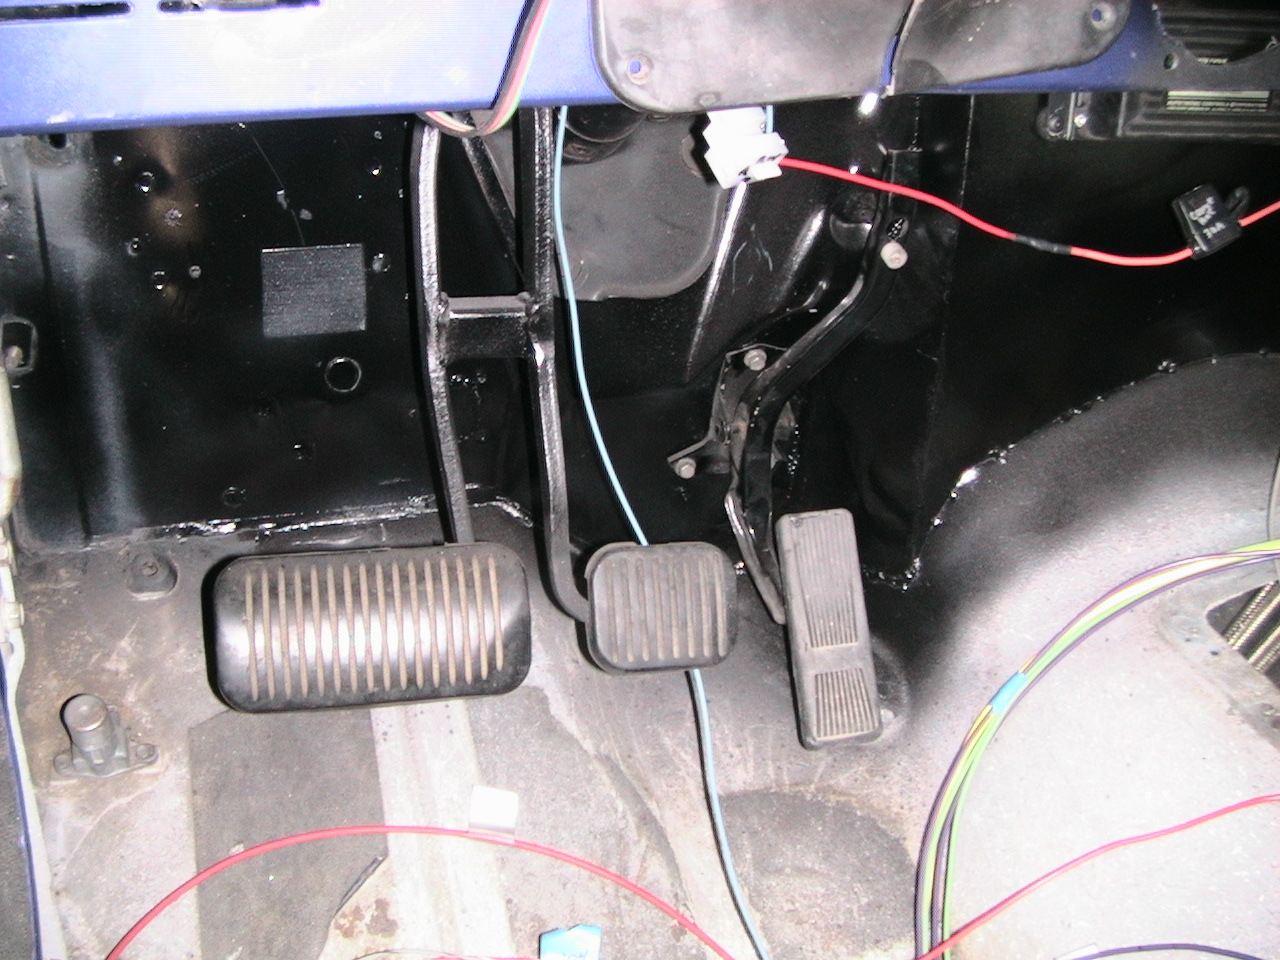 Since I'm running an automatic, I don't really need a clutch pedal, so a
little more brake pedal wouldn't hurt, right?
Since I'm running an automatic, I don't really need a clutch pedal, so a
little more brake pedal wouldn't hurt, right?
I found the oil leak, it was the holes in the oil pan meant to locate the 4-piece oil pan gasket ... but since I went with a one-piece, the holes just slopped out oil. I'd say "I can't believe I missed that" but ... well ... I can, 'cuz I did.
I've got a Lokar shifter installed now, no more cables. It was a little iffy getting it installed, but it seems to be working well.
I'm currently having charging problems - the problem is that it's not. The alternator checks out, and the wiring harness and voltage regulator are new. So I've either got something put together wrong or it wasn't meant to work like this. But I've got a couple ideas and will post the solution when I find it.
25 June 07: Got that one nailed down. It was a bad voltage regulator. Two of them. The third one is working still, knock on wood. Guess I'll have to buy a couple extra for my 'wheelin kit. Good thing they're only $14 each. Another twist is I put 15 ohms resistance in the wire running to the regulator (I think it was the "I" wire), I think that is what's keeping the regulator alive.
19 Jul 07: In the middle of welding the header ports so they provide more clamping surface on the heads. Then it's on to skid plates, front driveshaft, tranny cover and front roll cage.
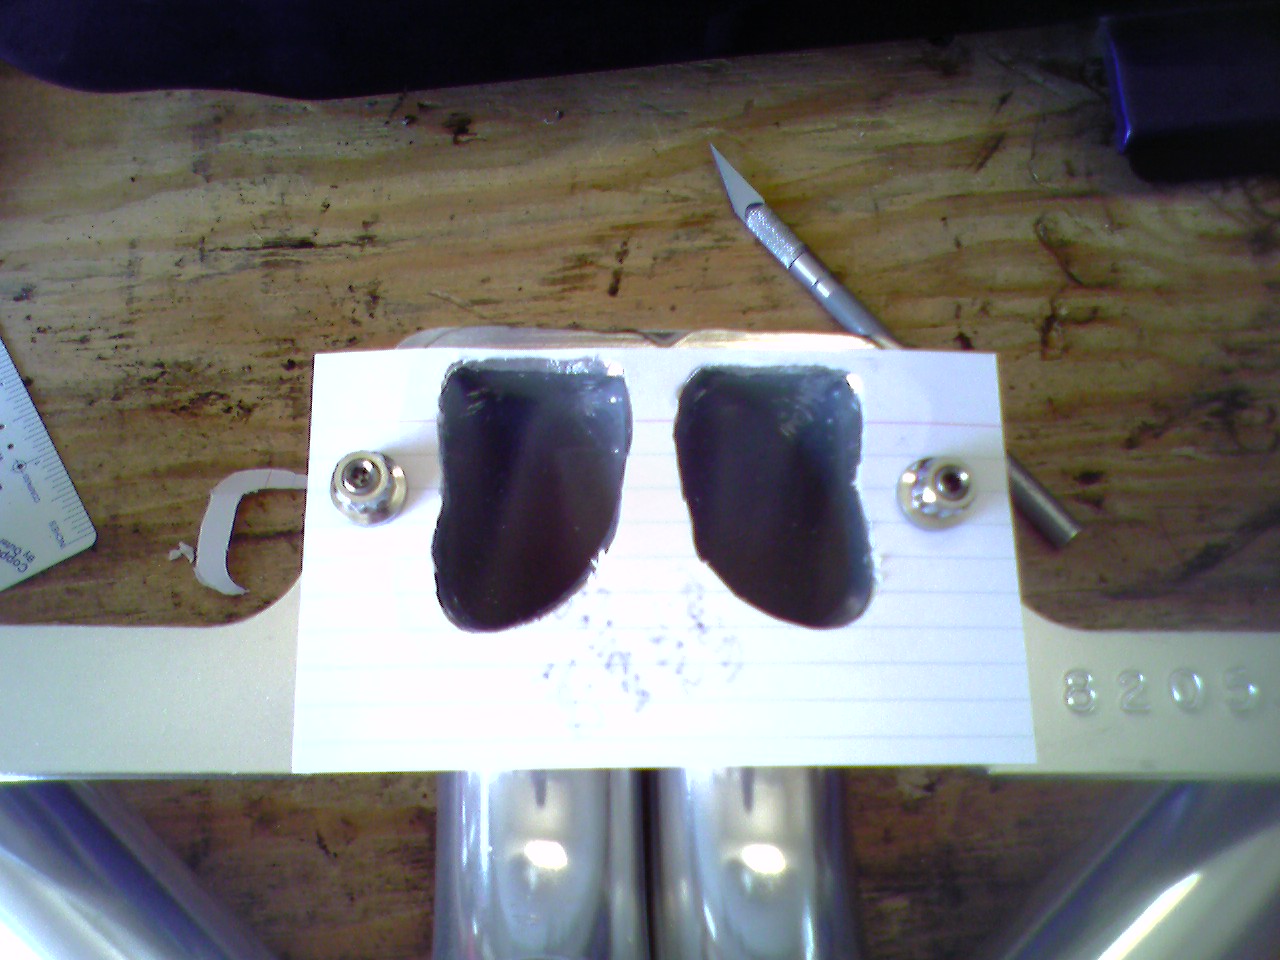
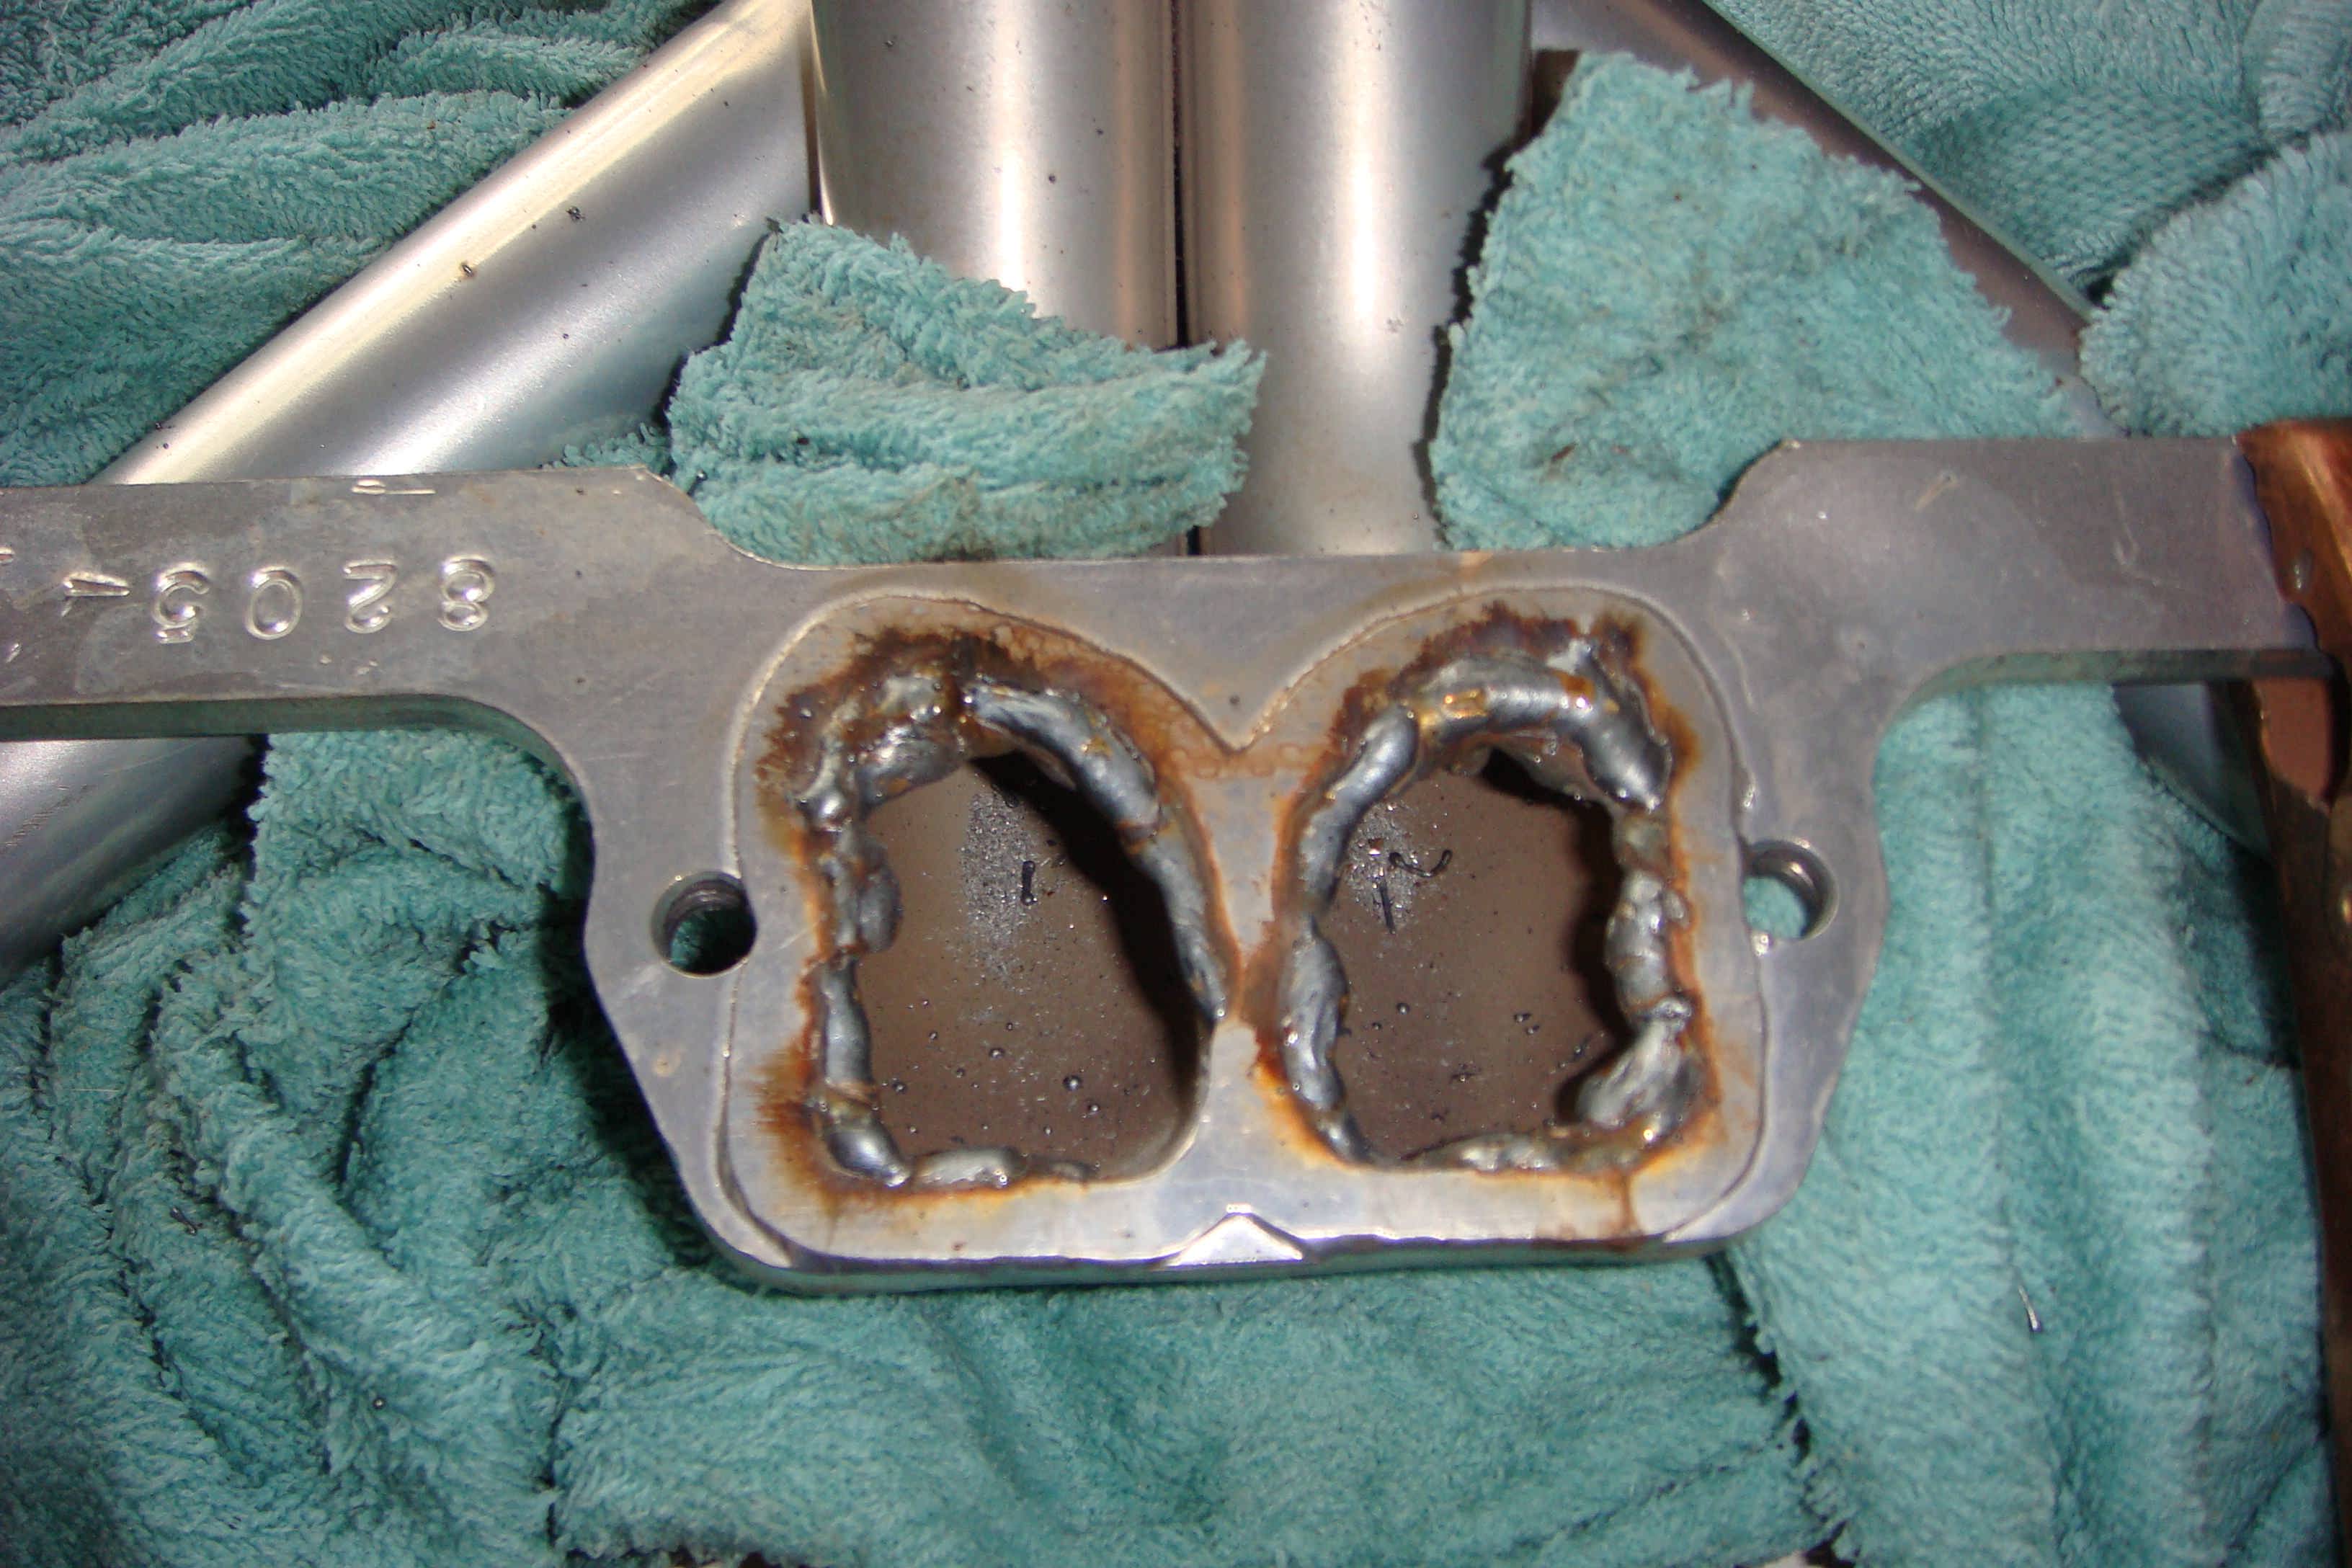
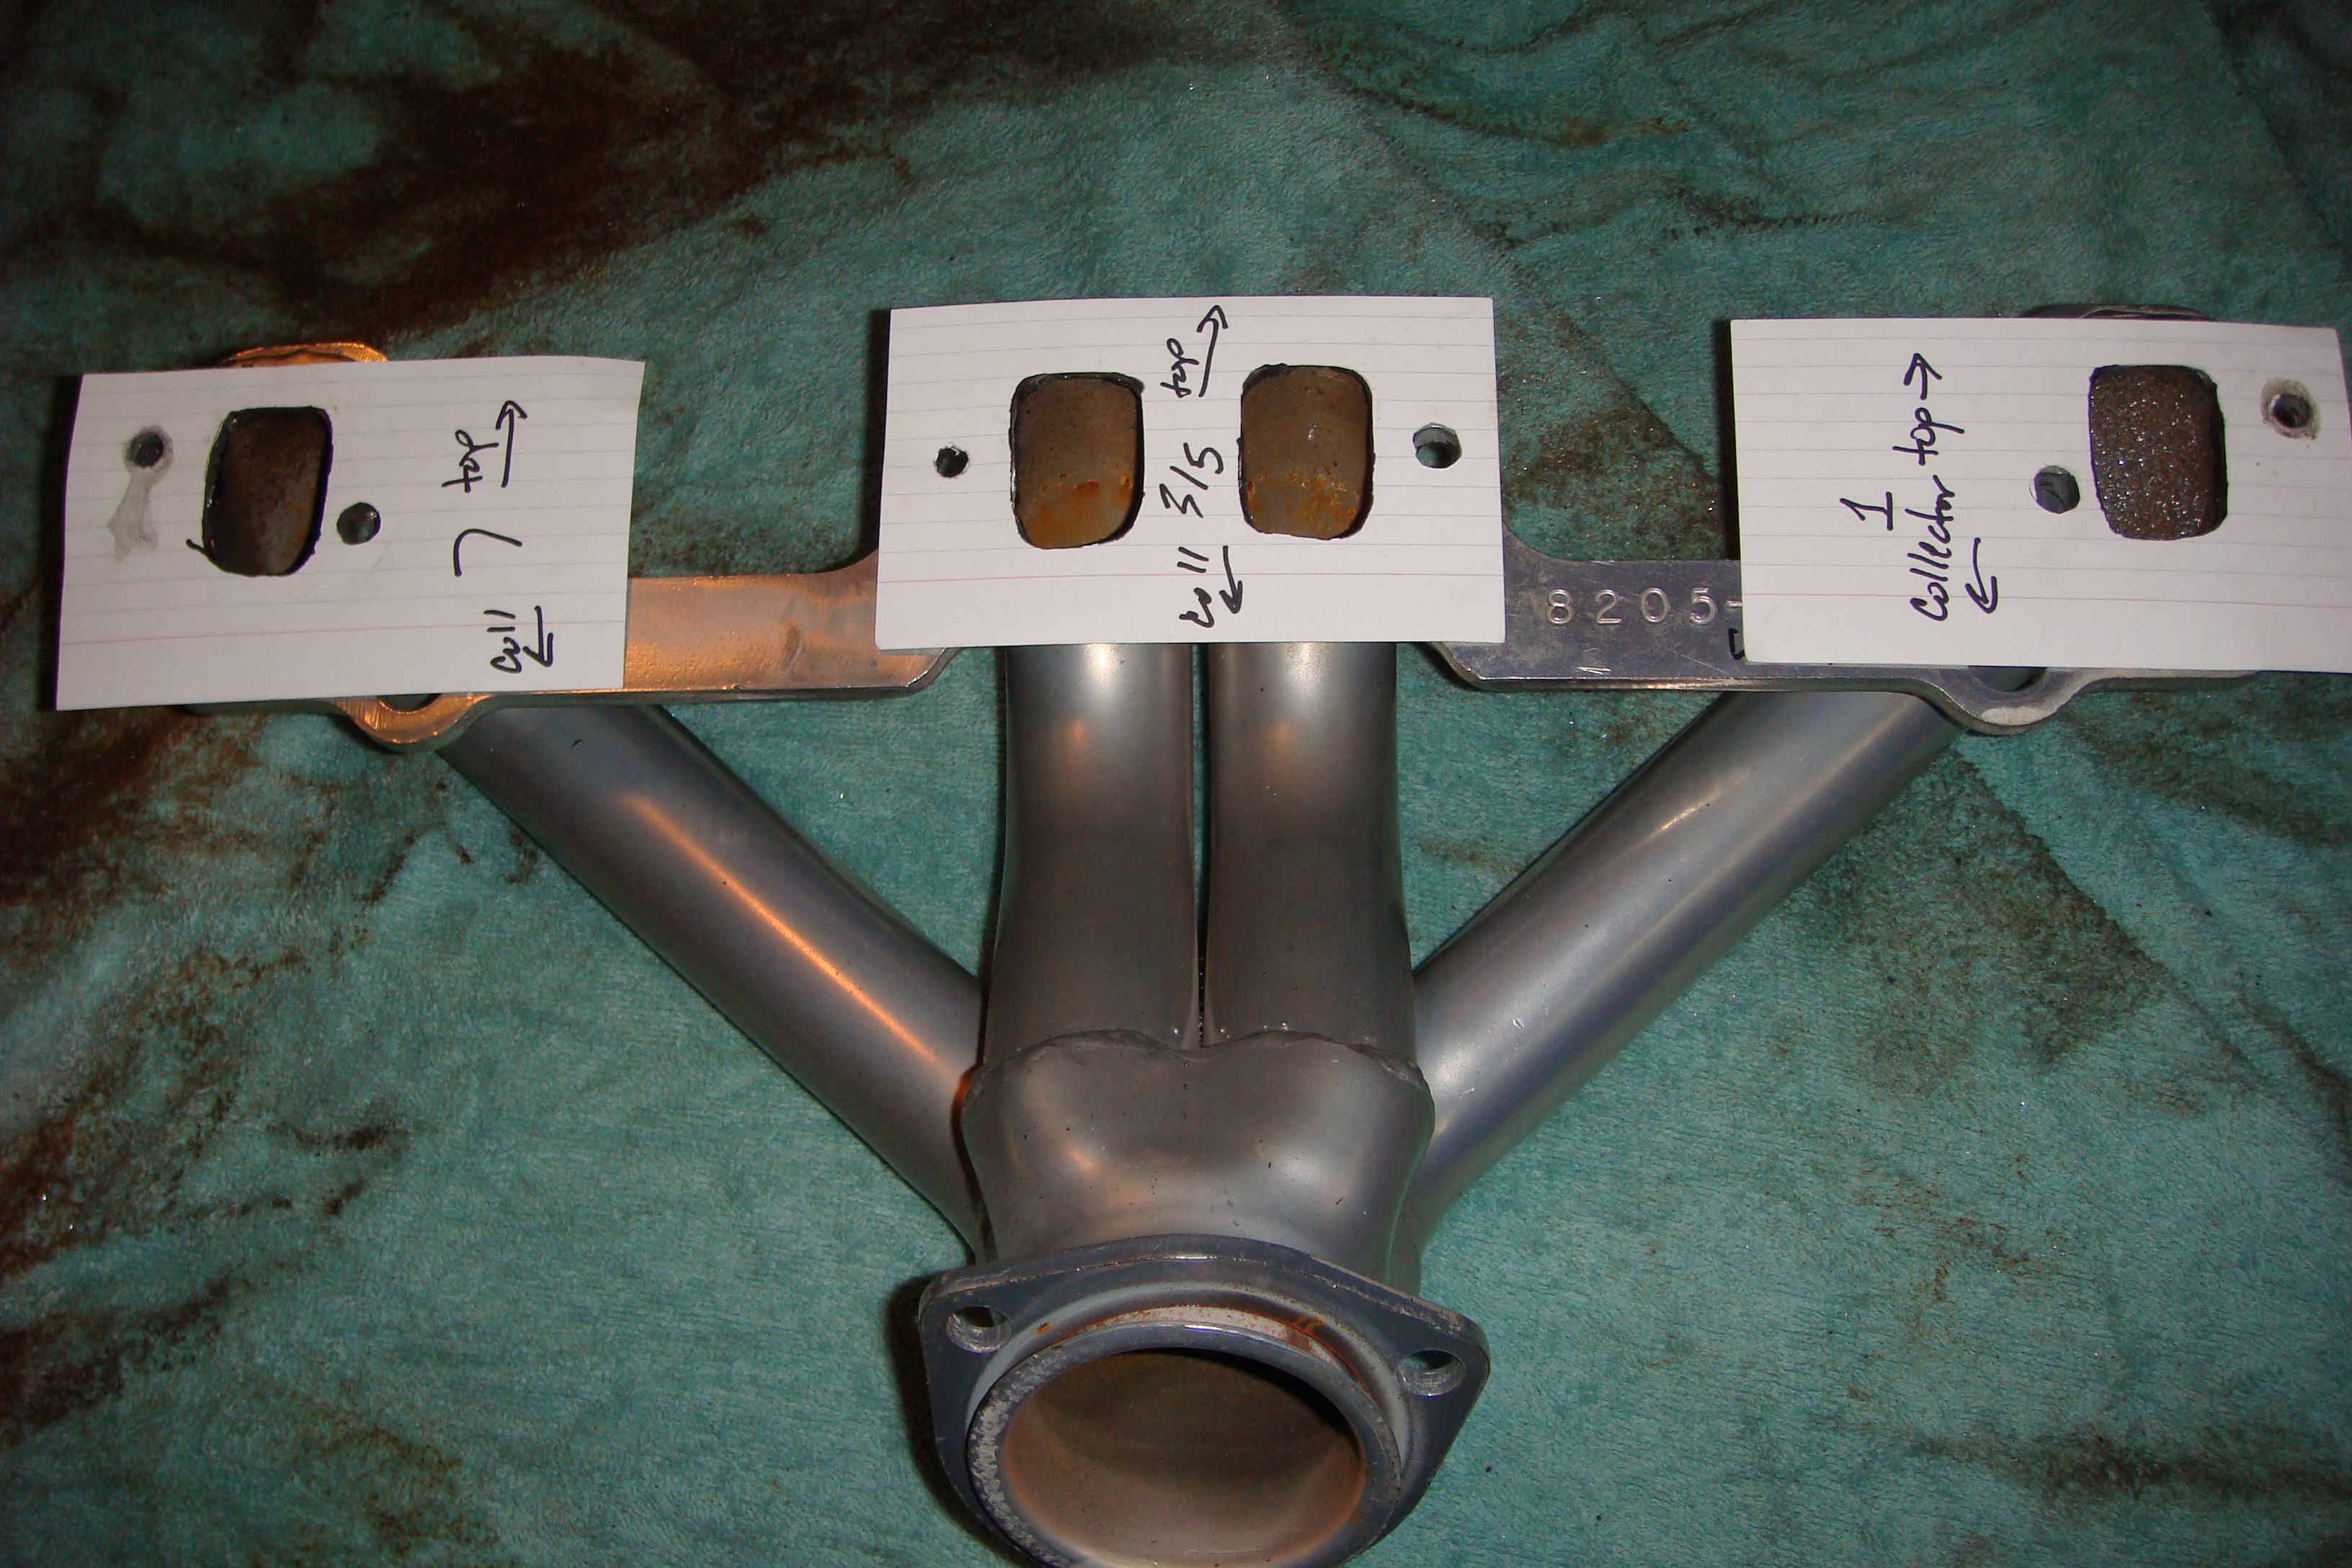
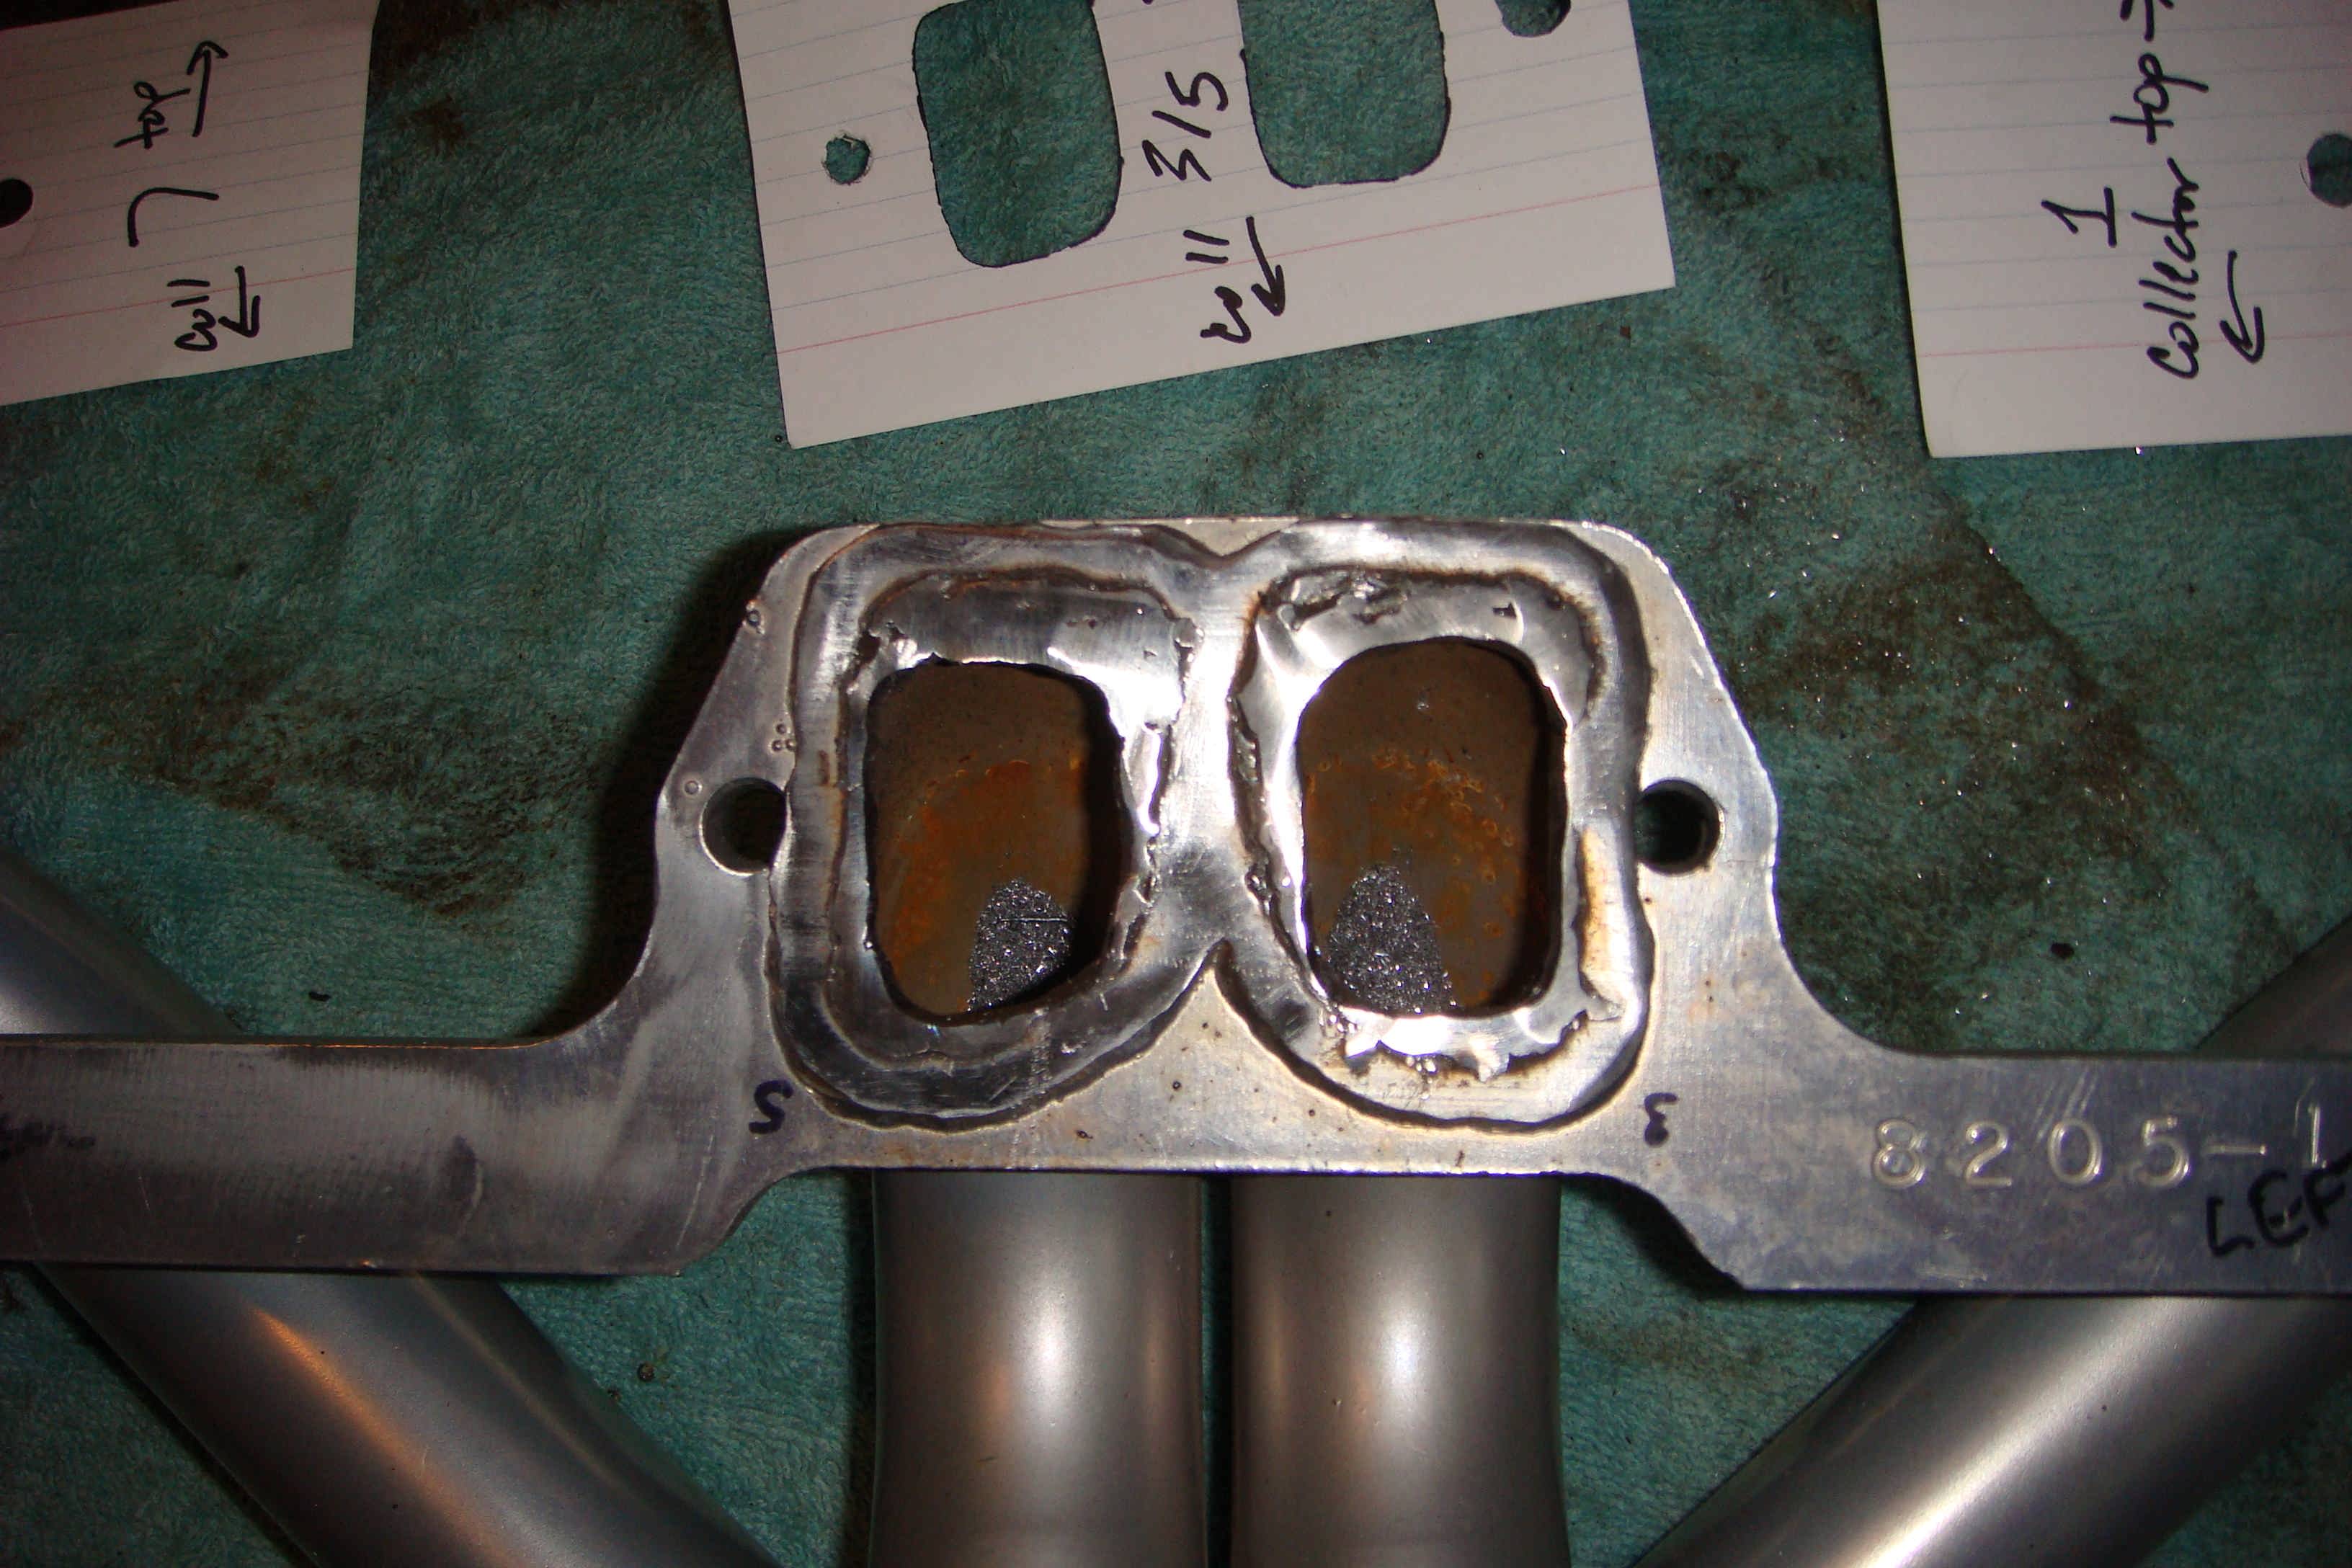
31 August: headers were done a while back. Here's how I did it. I removed the headers (which included draining the water jacket. Now there are studs in there so I can drop the exhaust with messing with the antifreeze). Then I used the bolts to attach a 3x5 card to the cylinder head. I rubbed some dirt from the axle on my finger then smeared it on the card, making a really nice outline.
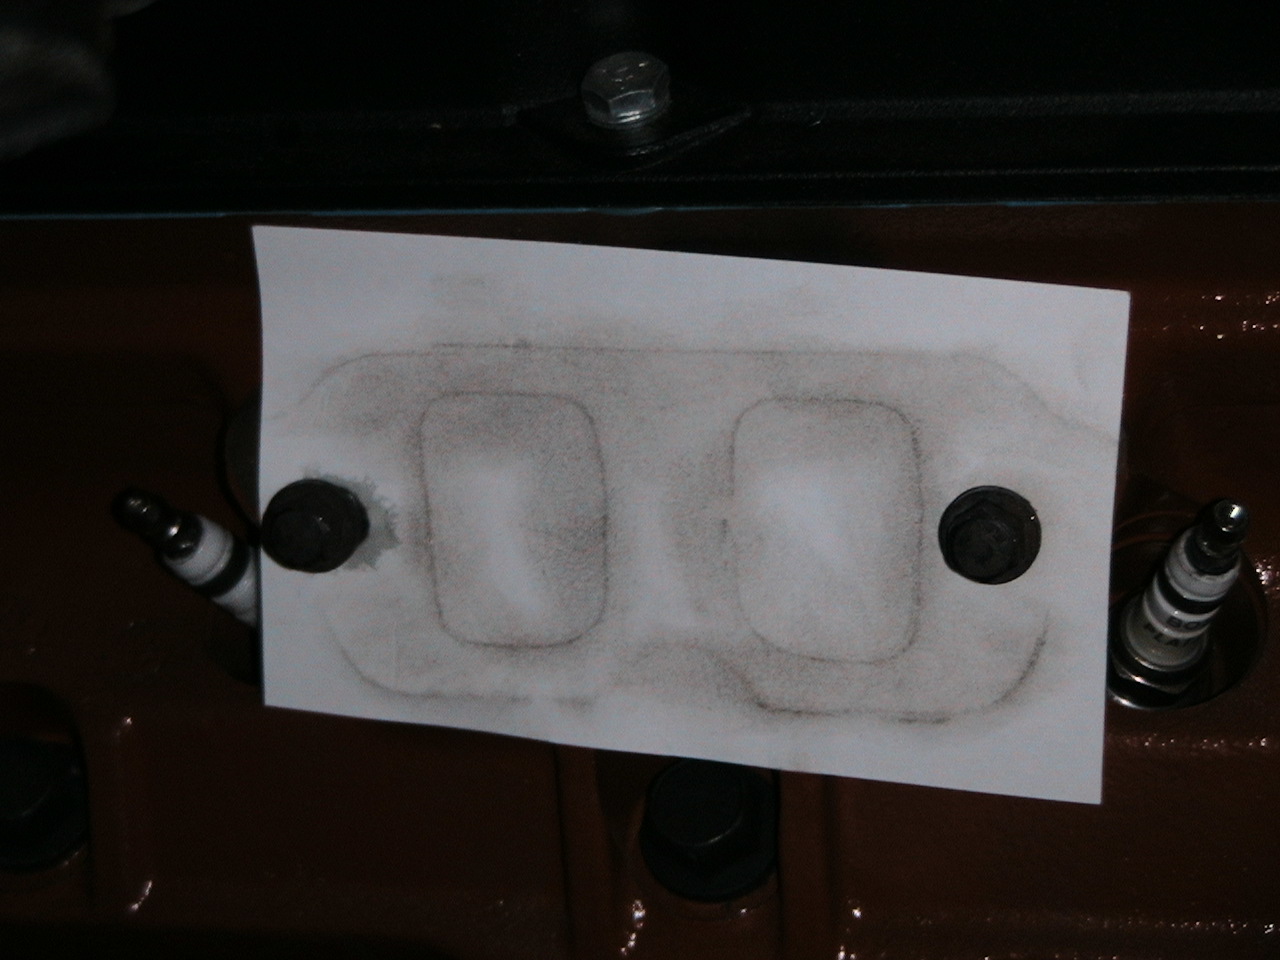 Make sure you label the engine side and manifold side, and which cylinder it
is. Then I welded the insides of the header ports until I had more
material than what I needed. I filled the header with water and kept the
towel wet to keep down heat warping. I only tweaked the header a little
bit making installation a challenge but not impossible. Then I used the
card to mark where I need to grind back to, and used a burr to grind it
back. Each one took maybe an hour to do.
Make sure you label the engine side and manifold side, and which cylinder it
is. Then I welded the insides of the header ports until I had more
material than what I needed. I filled the header with water and kept the
towel wet to keep down heat warping. I only tweaked the header a little
bit making installation a challenge but not impossible. Then I used the
card to mark where I need to grind back to, and used a burr to grind it
back. Each one took maybe an hour to do.


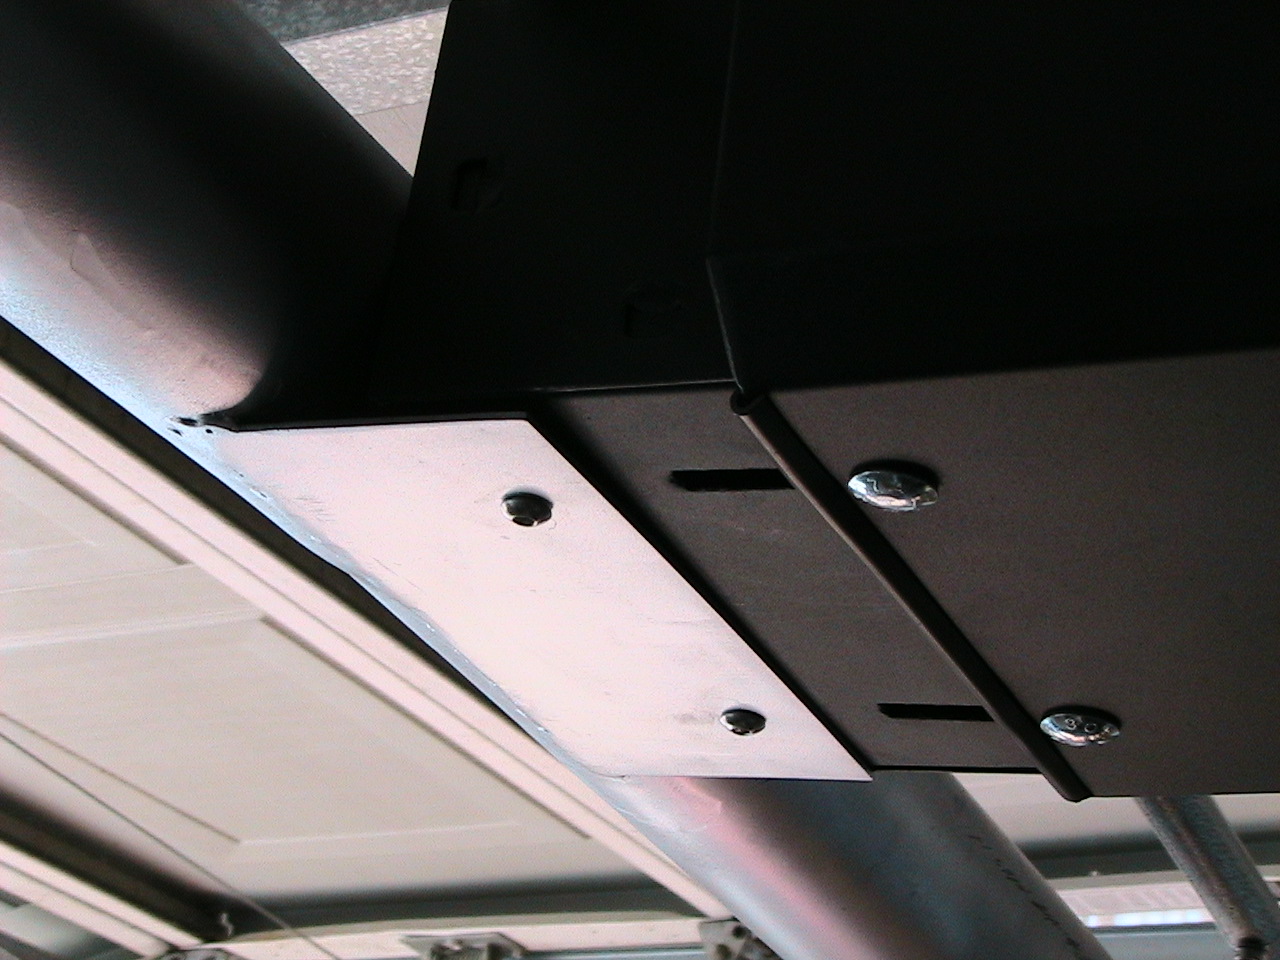
Current project is installing and modifying a Rockhard 4x4 Parts CJ-8 Sport Cage. It didn't fit very well, but I have no idea why. The guy at Rockhard was really great and sent me a new dash bar, and I used the original one to go up top. I'll be modifying my switch panel to fit in the cage, since I didn't plan on doing this at first. It'll all get powdercoated to match the bumper when it's finished.
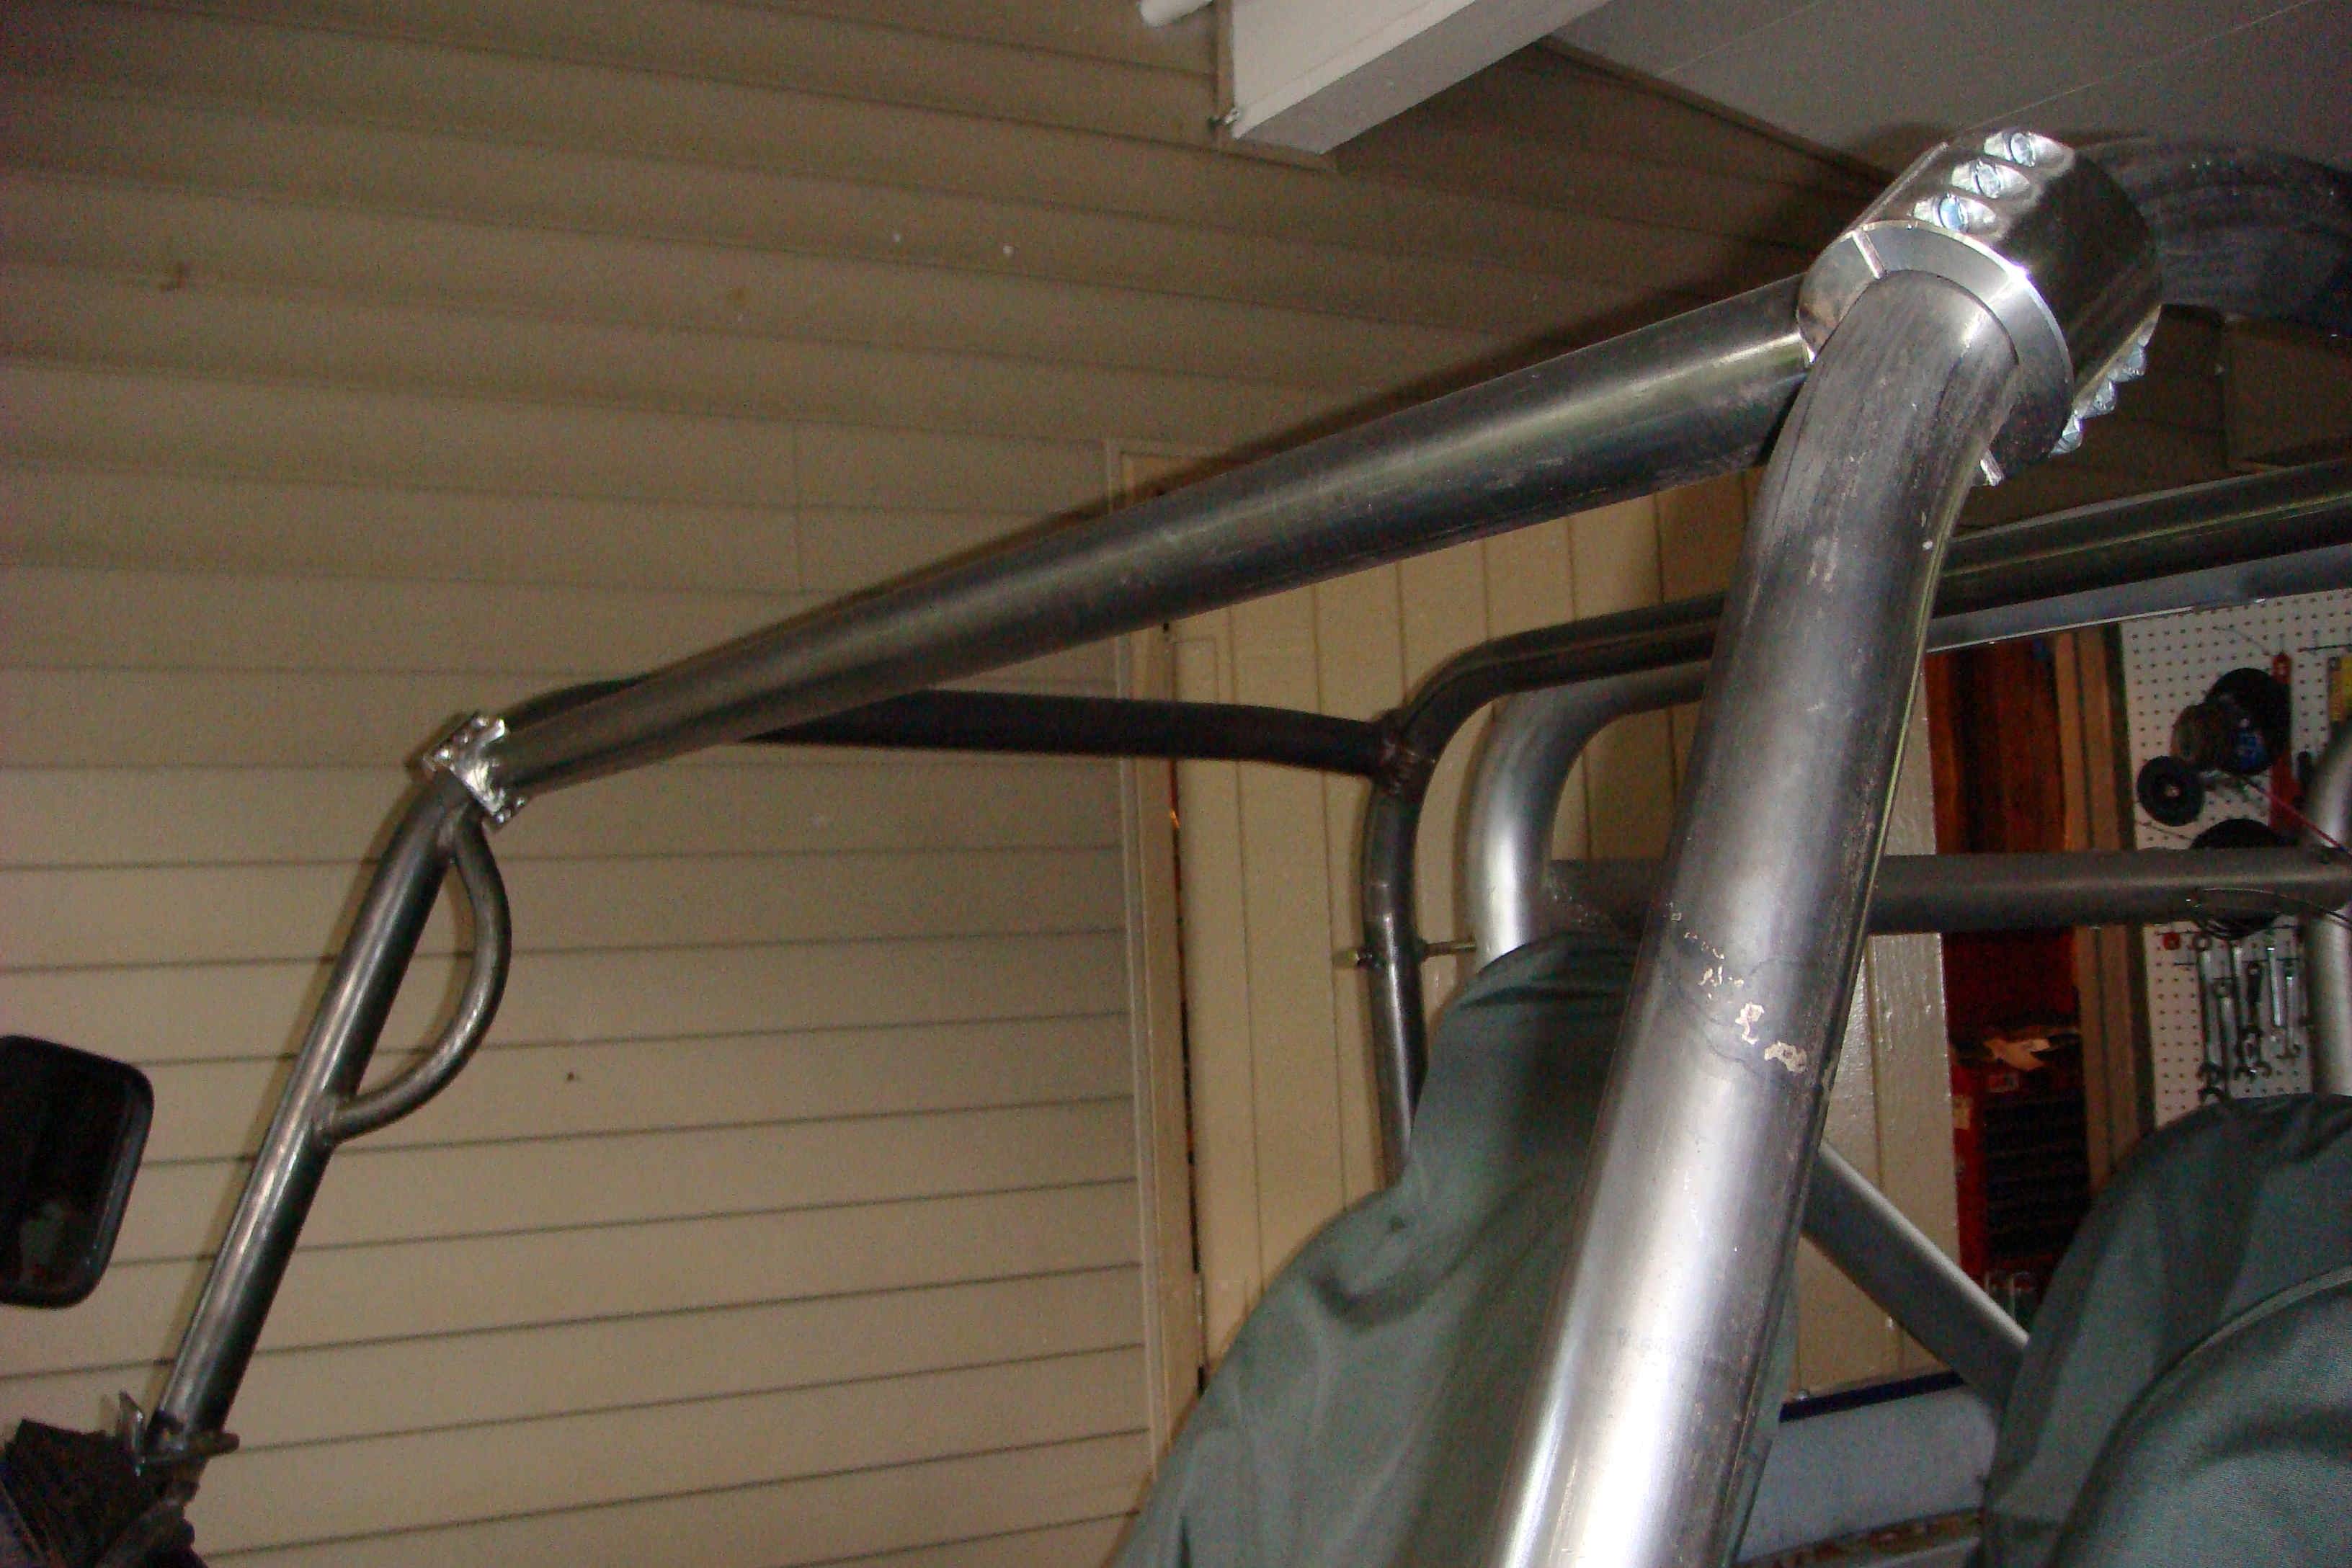


So here's the Rockhard 4x4 CJ-8 Sportcage after I got done killing it. For some reason, the crosspipes were too short by about 5/16". So I modified them along with the top part. They were good enough to send me another crosspipe even though he swore there was no way the first one was too short. I don't know what happened. I really don't. But he cut me some slack so I've got to be nice. Anyway, the first one is the dash during mockup. Second is the top bar before I mocked the spreaders and switchbox. Third is the back of the switchbox, mounting modified so I can remove it intact. The string over the top is the softtop (didn't want to rub a hole in the top with a box that was too high). You can also see that I doubled the spreaders, there's two pipes in there! Four 1/2" plug welds plus a seriously hot bead all the way around on both ends, I'm pretty sure it'll hold, and more sure I never want to test it! The fourth picture also shows the sleeve I had to put on the lower bar. There's only about a 1" gap in there and I welded the snot out of it, pretty sure it'll hold too.
At some point during this time my power steering box developed a leak. So I swapped in a slightly-less-broken Wagoneer steering box. The only difference is that the Waggie is a variable ratio box, the CJ isn't. The endstate here is a stronger J-20/AGR box. The reason I did it now is that aside from the non-leaking thing, I swapped in the 3/4x30 spline u-joint end on the flaming river shaft. The CJ PS end is 13/16. CJ manual is also 3/4. So since it was down for the roll cage I took the opportunity to order the u-joint end. Note that flaming river doesn't like folks swapping their own u-joint ends. I convinced them that I had sufficient skill to accomplish this task without putting them at risk. They prefer you mail the shaft in to them and they do the work, which I recommend to you as well.
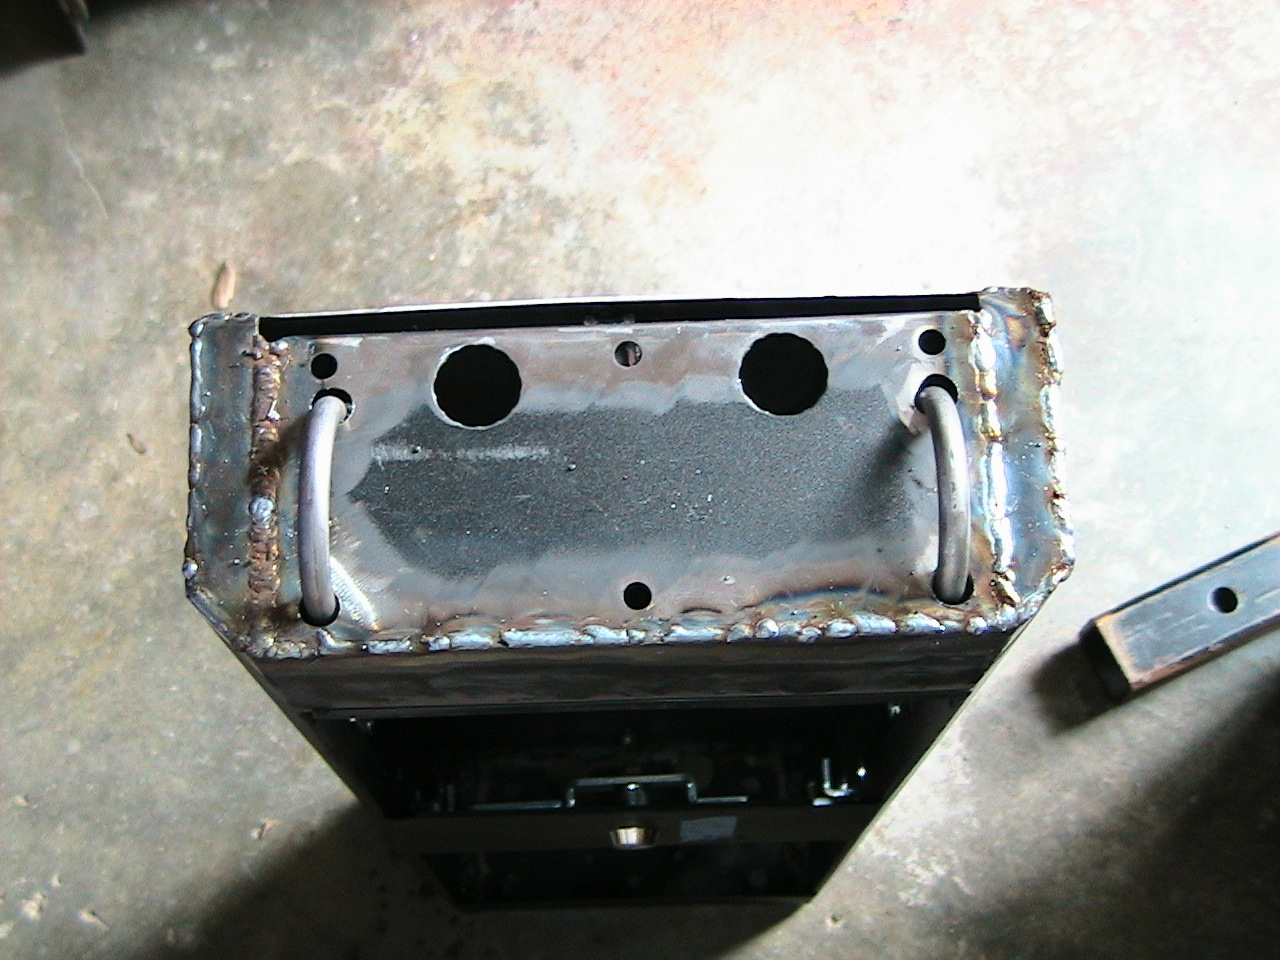
It's November, the front axle is now 4.56, and the rear is getting done now, complete with an Ected locker. Let's see if I can break it. This rear axle is getting a used Warn Full floater kit (so I have to put in all new bearings and seals), some kind of disc brake kit (doesn't look like SSBC, probably some fly-by-night company, so there's a challenge coming as I try to get replacement parts for it. I've also welded some bracing and welded the tubes to the pumpkin for additional strength. Time and welder I have, $$ for a Dana 60 I don't so we're making do. Pictures to follow.
I've smoked my fourth external voltage regulator, obviously I need more that 55 amps. So now I have to figure out some other alternator arrangement, preferably of the 100+ amp internally regulated variety. Looks like some phone calls to Mean Green and Powermaster are in my future. I shied away from this during the initial build, I didn't want to spend the time on it with so much to do and a home sale looming. So now I have to deal with it. And I must admit, my machining abilities have improved dramatically since then too.
Axle is shaping up nicely. Full set of new bearings for the full floater kit. Warn is sending me new spacer shims, as of a week ago. I flattened the old ones & will replace them if they show up. I also pressed in new wheel studs - rule of thumb is you must have the same amount of thread engagement as you do stud diameter. In this case it's 1/2". I only had .3". So my friends at Napa gave me their book and I found part number 641-3115, which presses into the Warn spindles, has a 19/32" shoulder which engages the disc brake, and is 2 3/16" long with a dog ear end to prevent crossthreading. I found some lug nuts that have enough depth that they will still engage the wheel properly. I will also flip the u-bolts. Rather than pay $350 for the dynatrac kit, I think I can make one that will work. Have welder, will modify <grin>
 Checking the axle left/right to locate the perch position
 |
 Old axle torn out, ready to get to work
 |
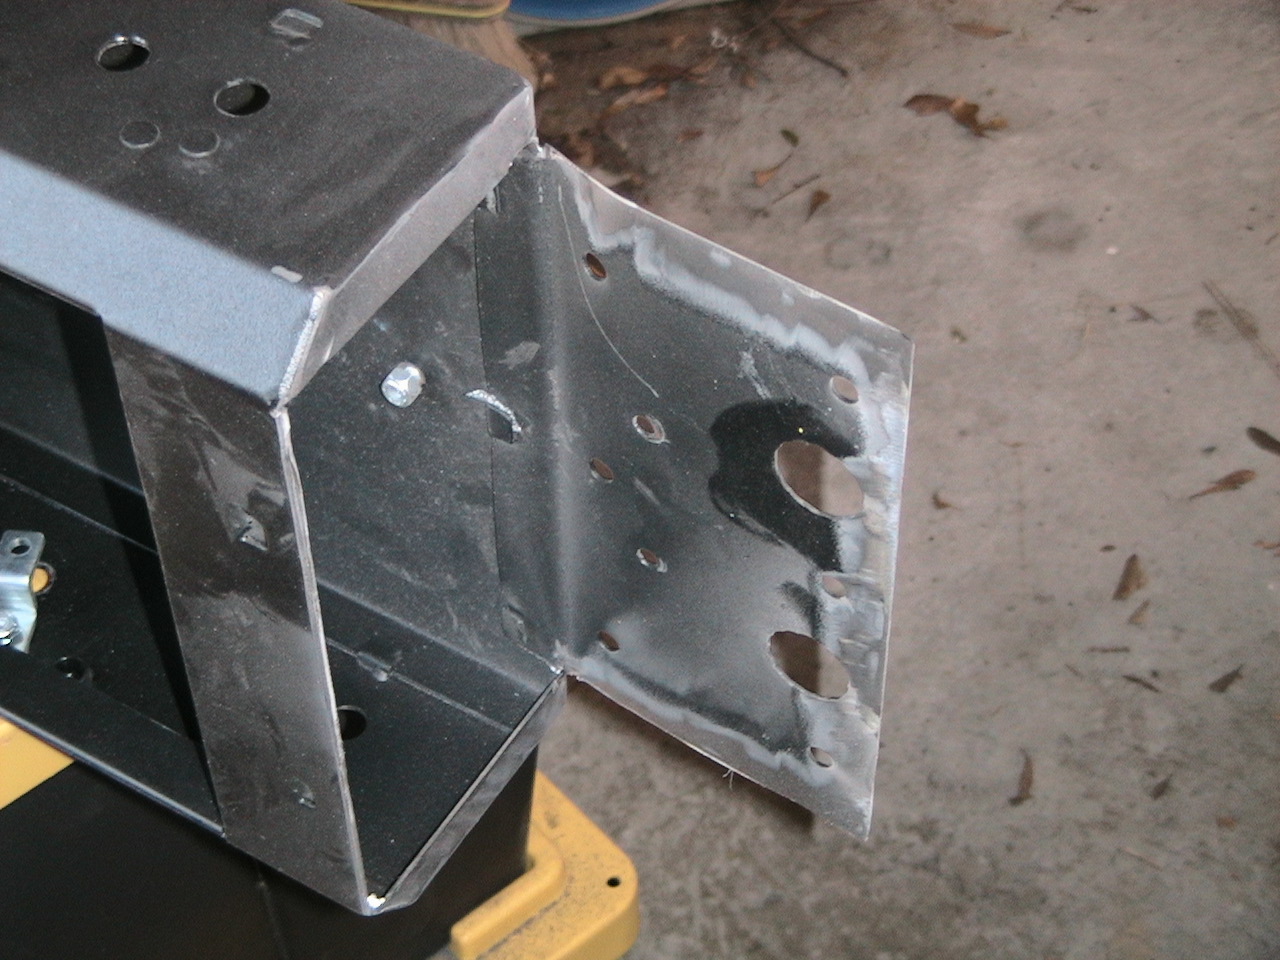
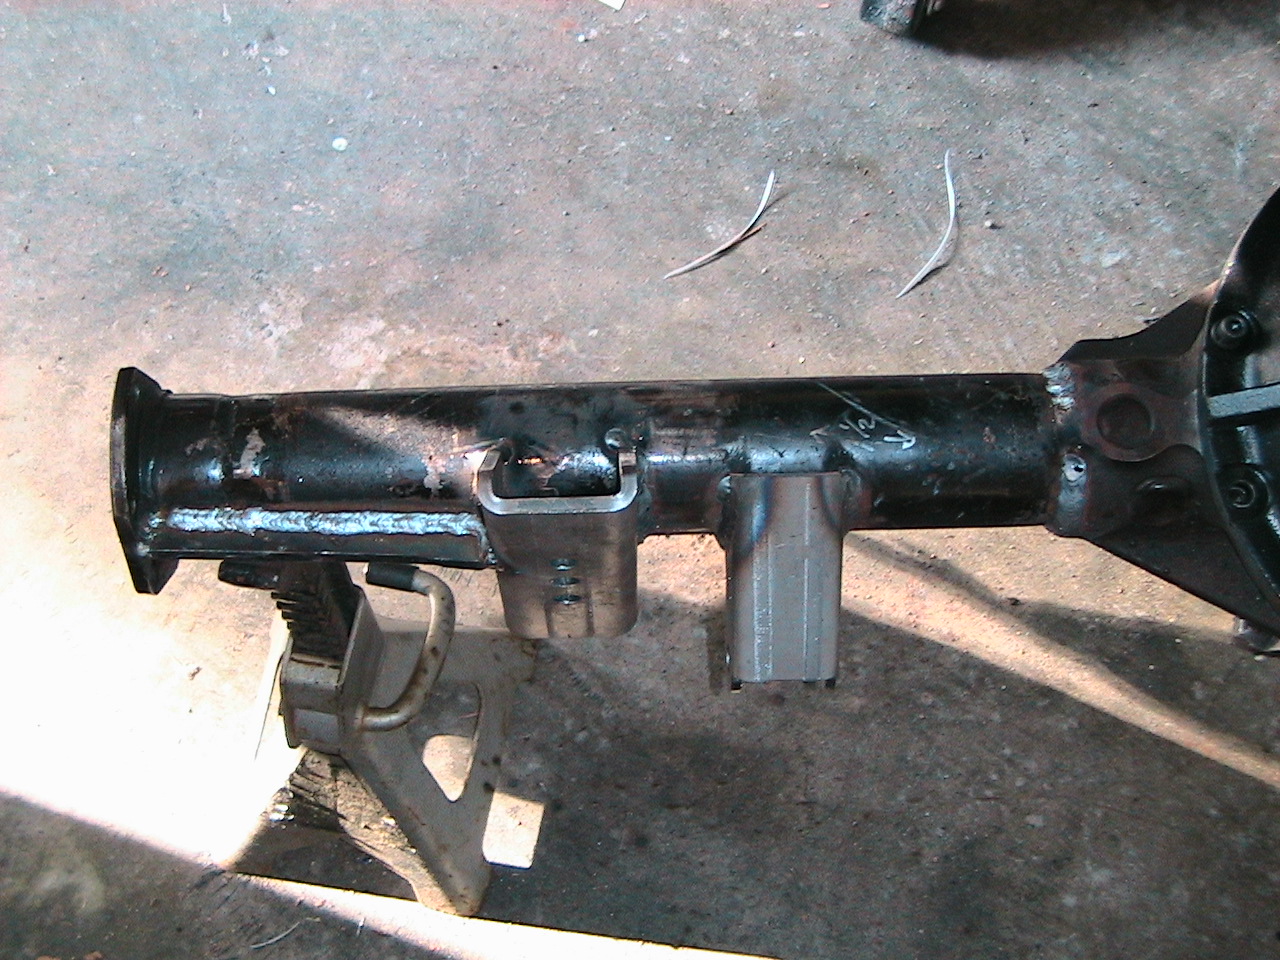
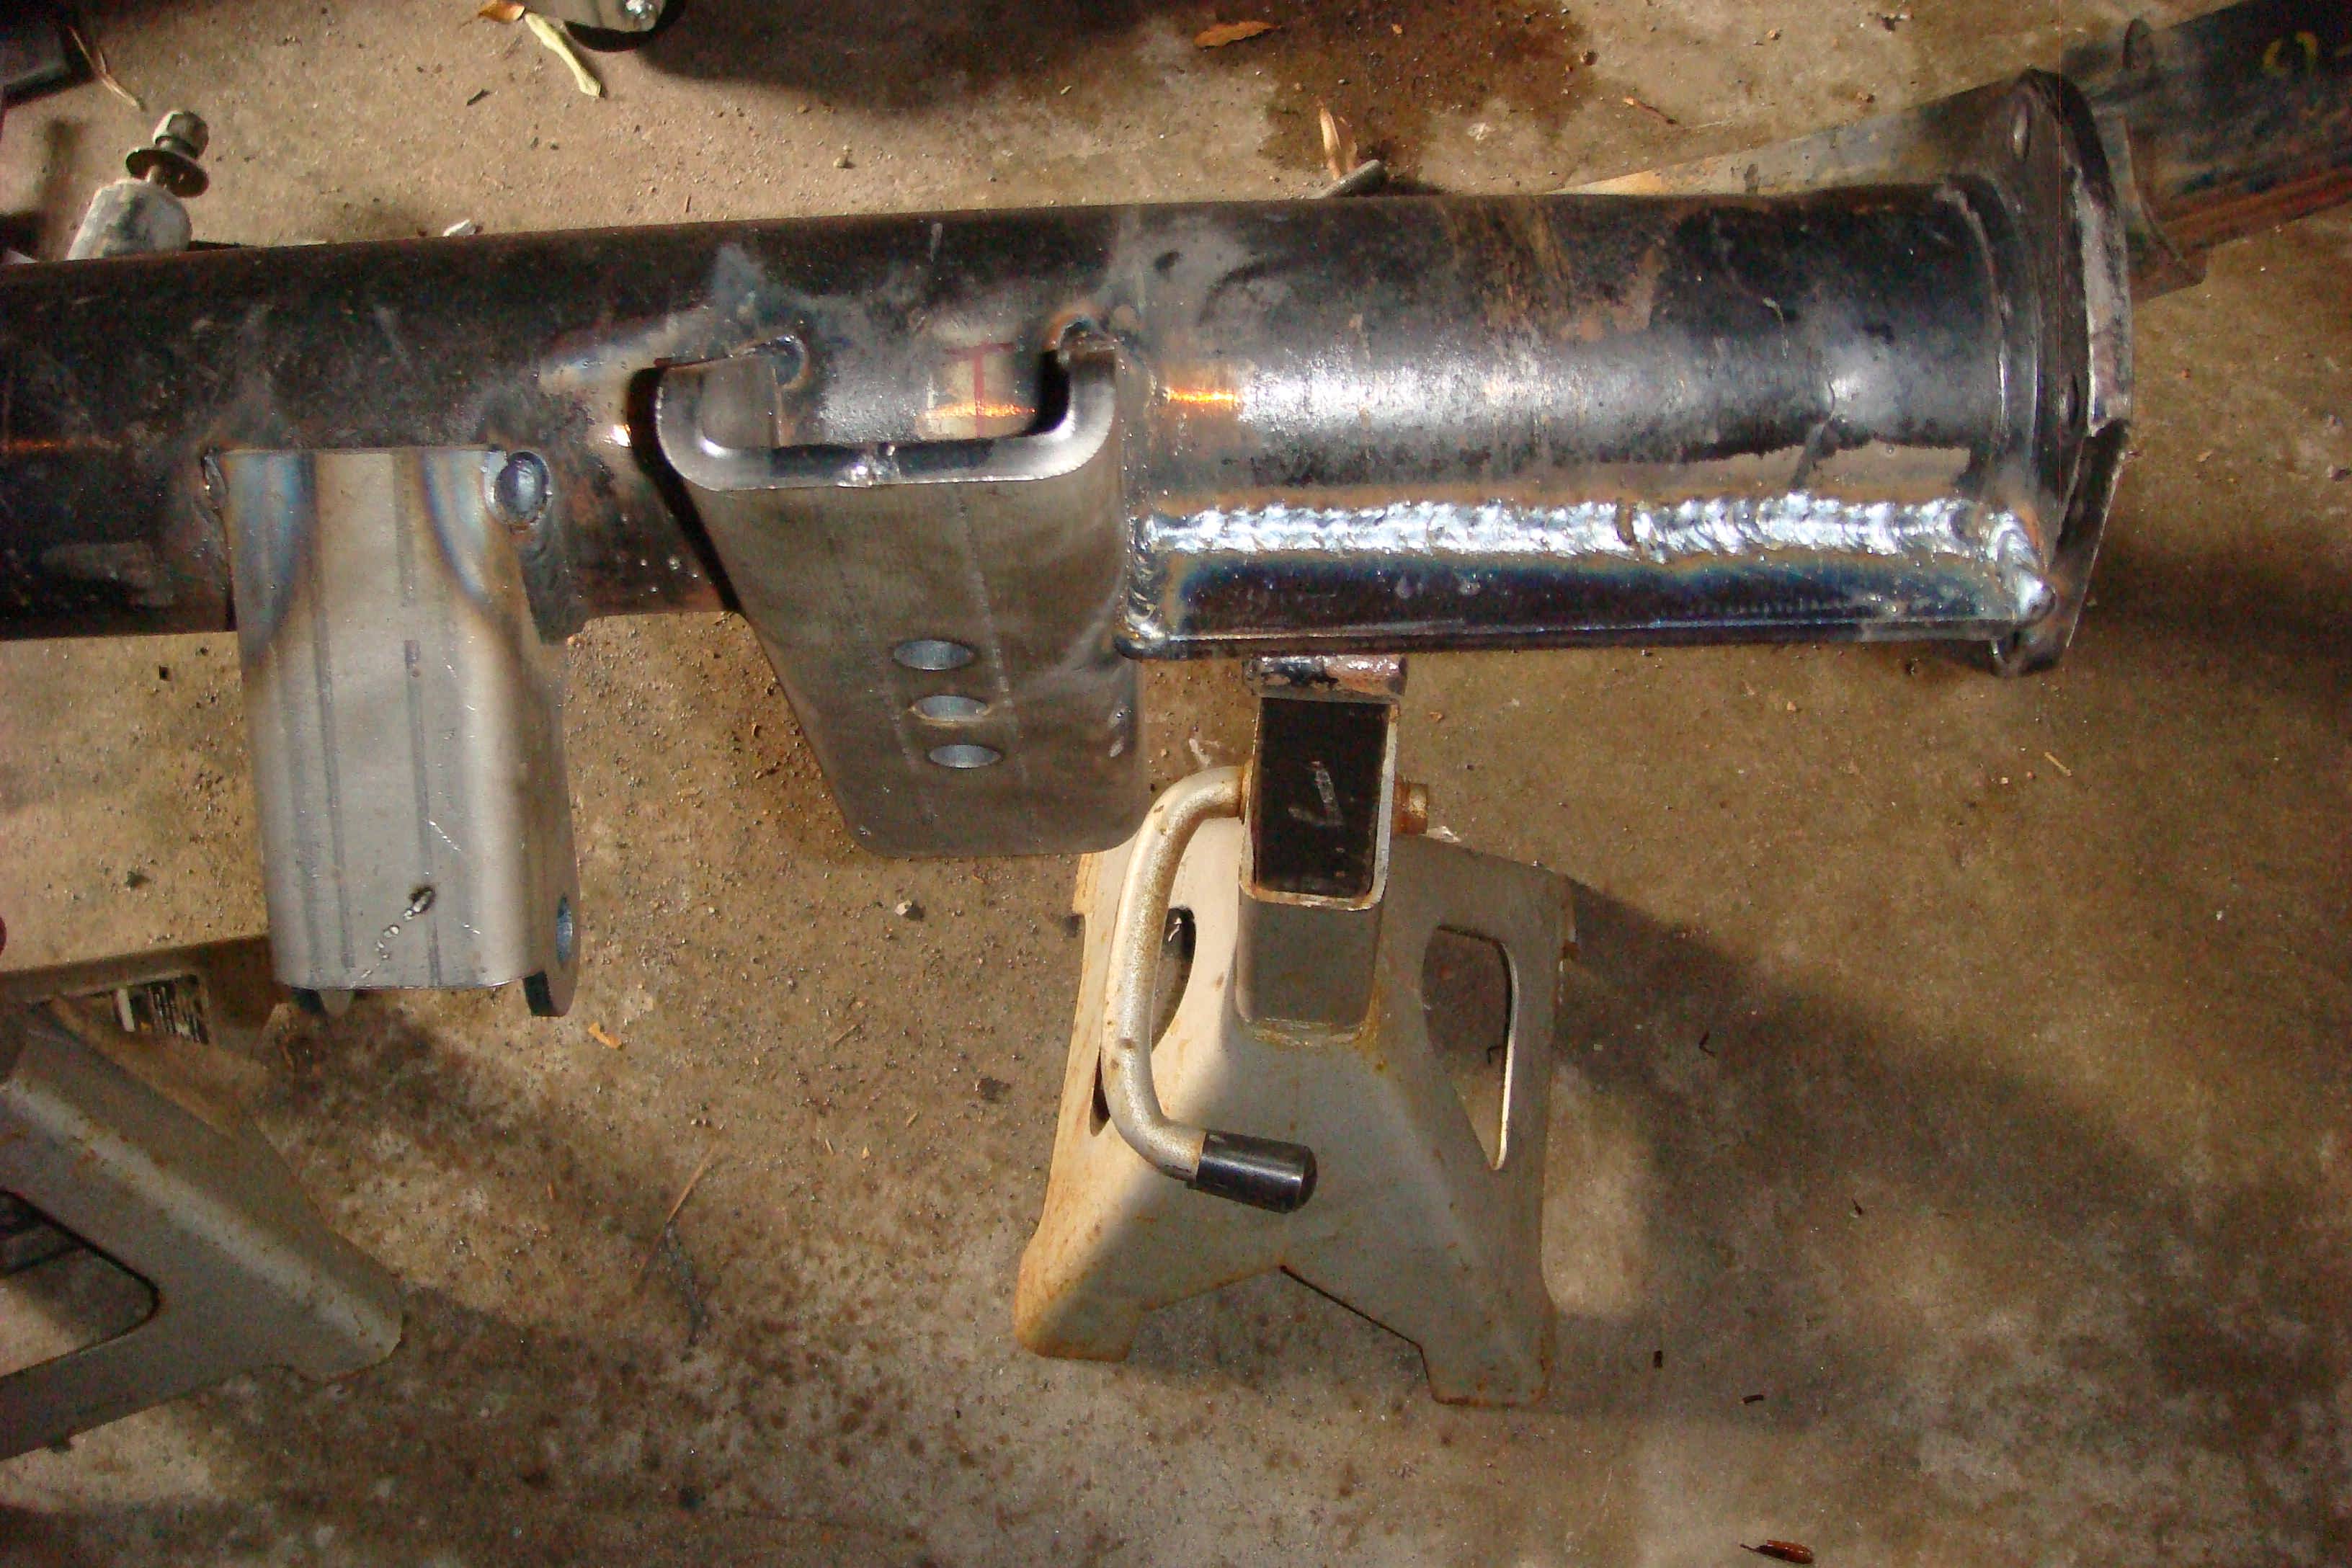 Shock, spring and mini-truss welded on. The truss got a little
close to one of the bolt holes ... should have been paying attention!
Shock, spring and mini-truss welded on. The truss got a little
close to one of the bolt holes ... should have been paying attention! |
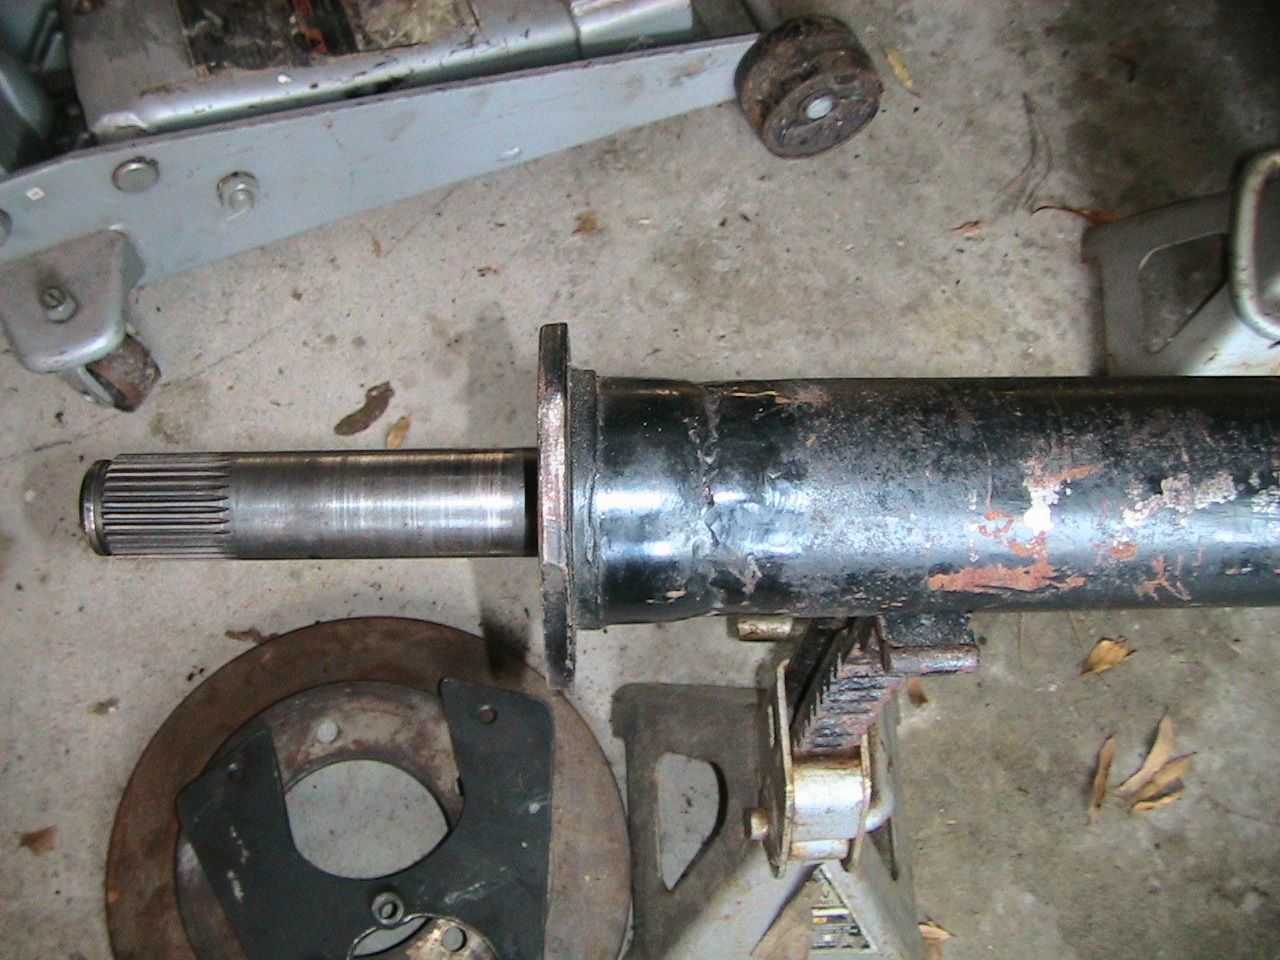 Checking the depth of the axle inside the diff to make sure I'm not
going to have any clearance issues with the locker. Disc brake
caliper bracket on the ground below.
Checking the depth of the axle inside the diff to make sure I'm not
going to have any clearance issues with the locker. Disc brake
caliper bracket on the ground below. |
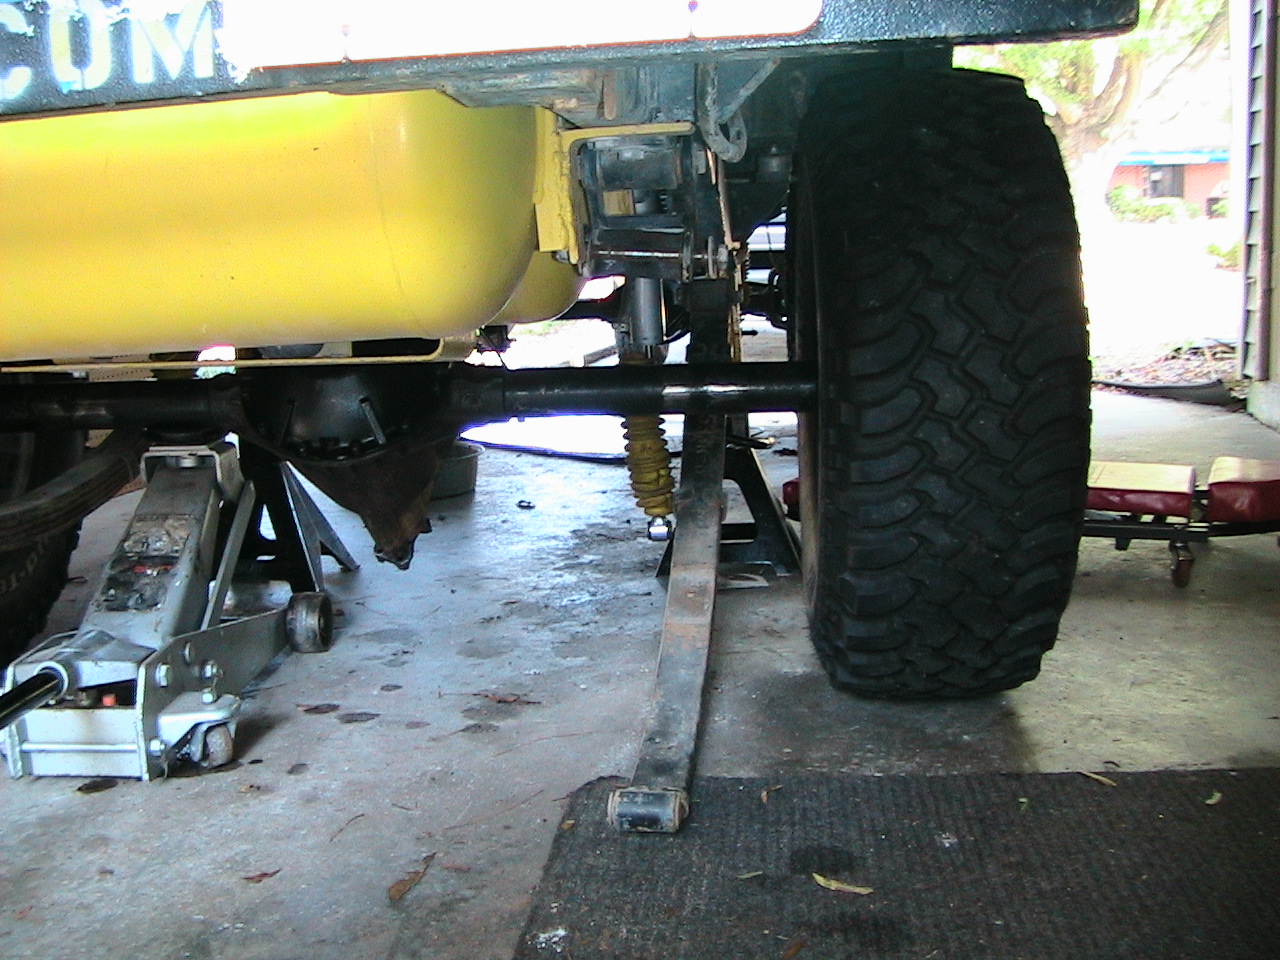
 Mock up of the u-bolt flip. If I'd used the CJ axle, I could have
pulled this off with no welding! I still would have made the
spring-side sliders though. As it is, my J-10 axle is 2 3/4" OD
instead of the stock 2 1/2" OD, so the u-bolts spread too much like
this.
Mock up of the u-bolt flip. If I'd used the CJ axle, I could have
pulled this off with no welding! I still would have made the
spring-side sliders though. As it is, my J-10 axle is 2 3/4" OD
instead of the stock 2 1/2" OD, so the u-bolts spread too much like
this. |
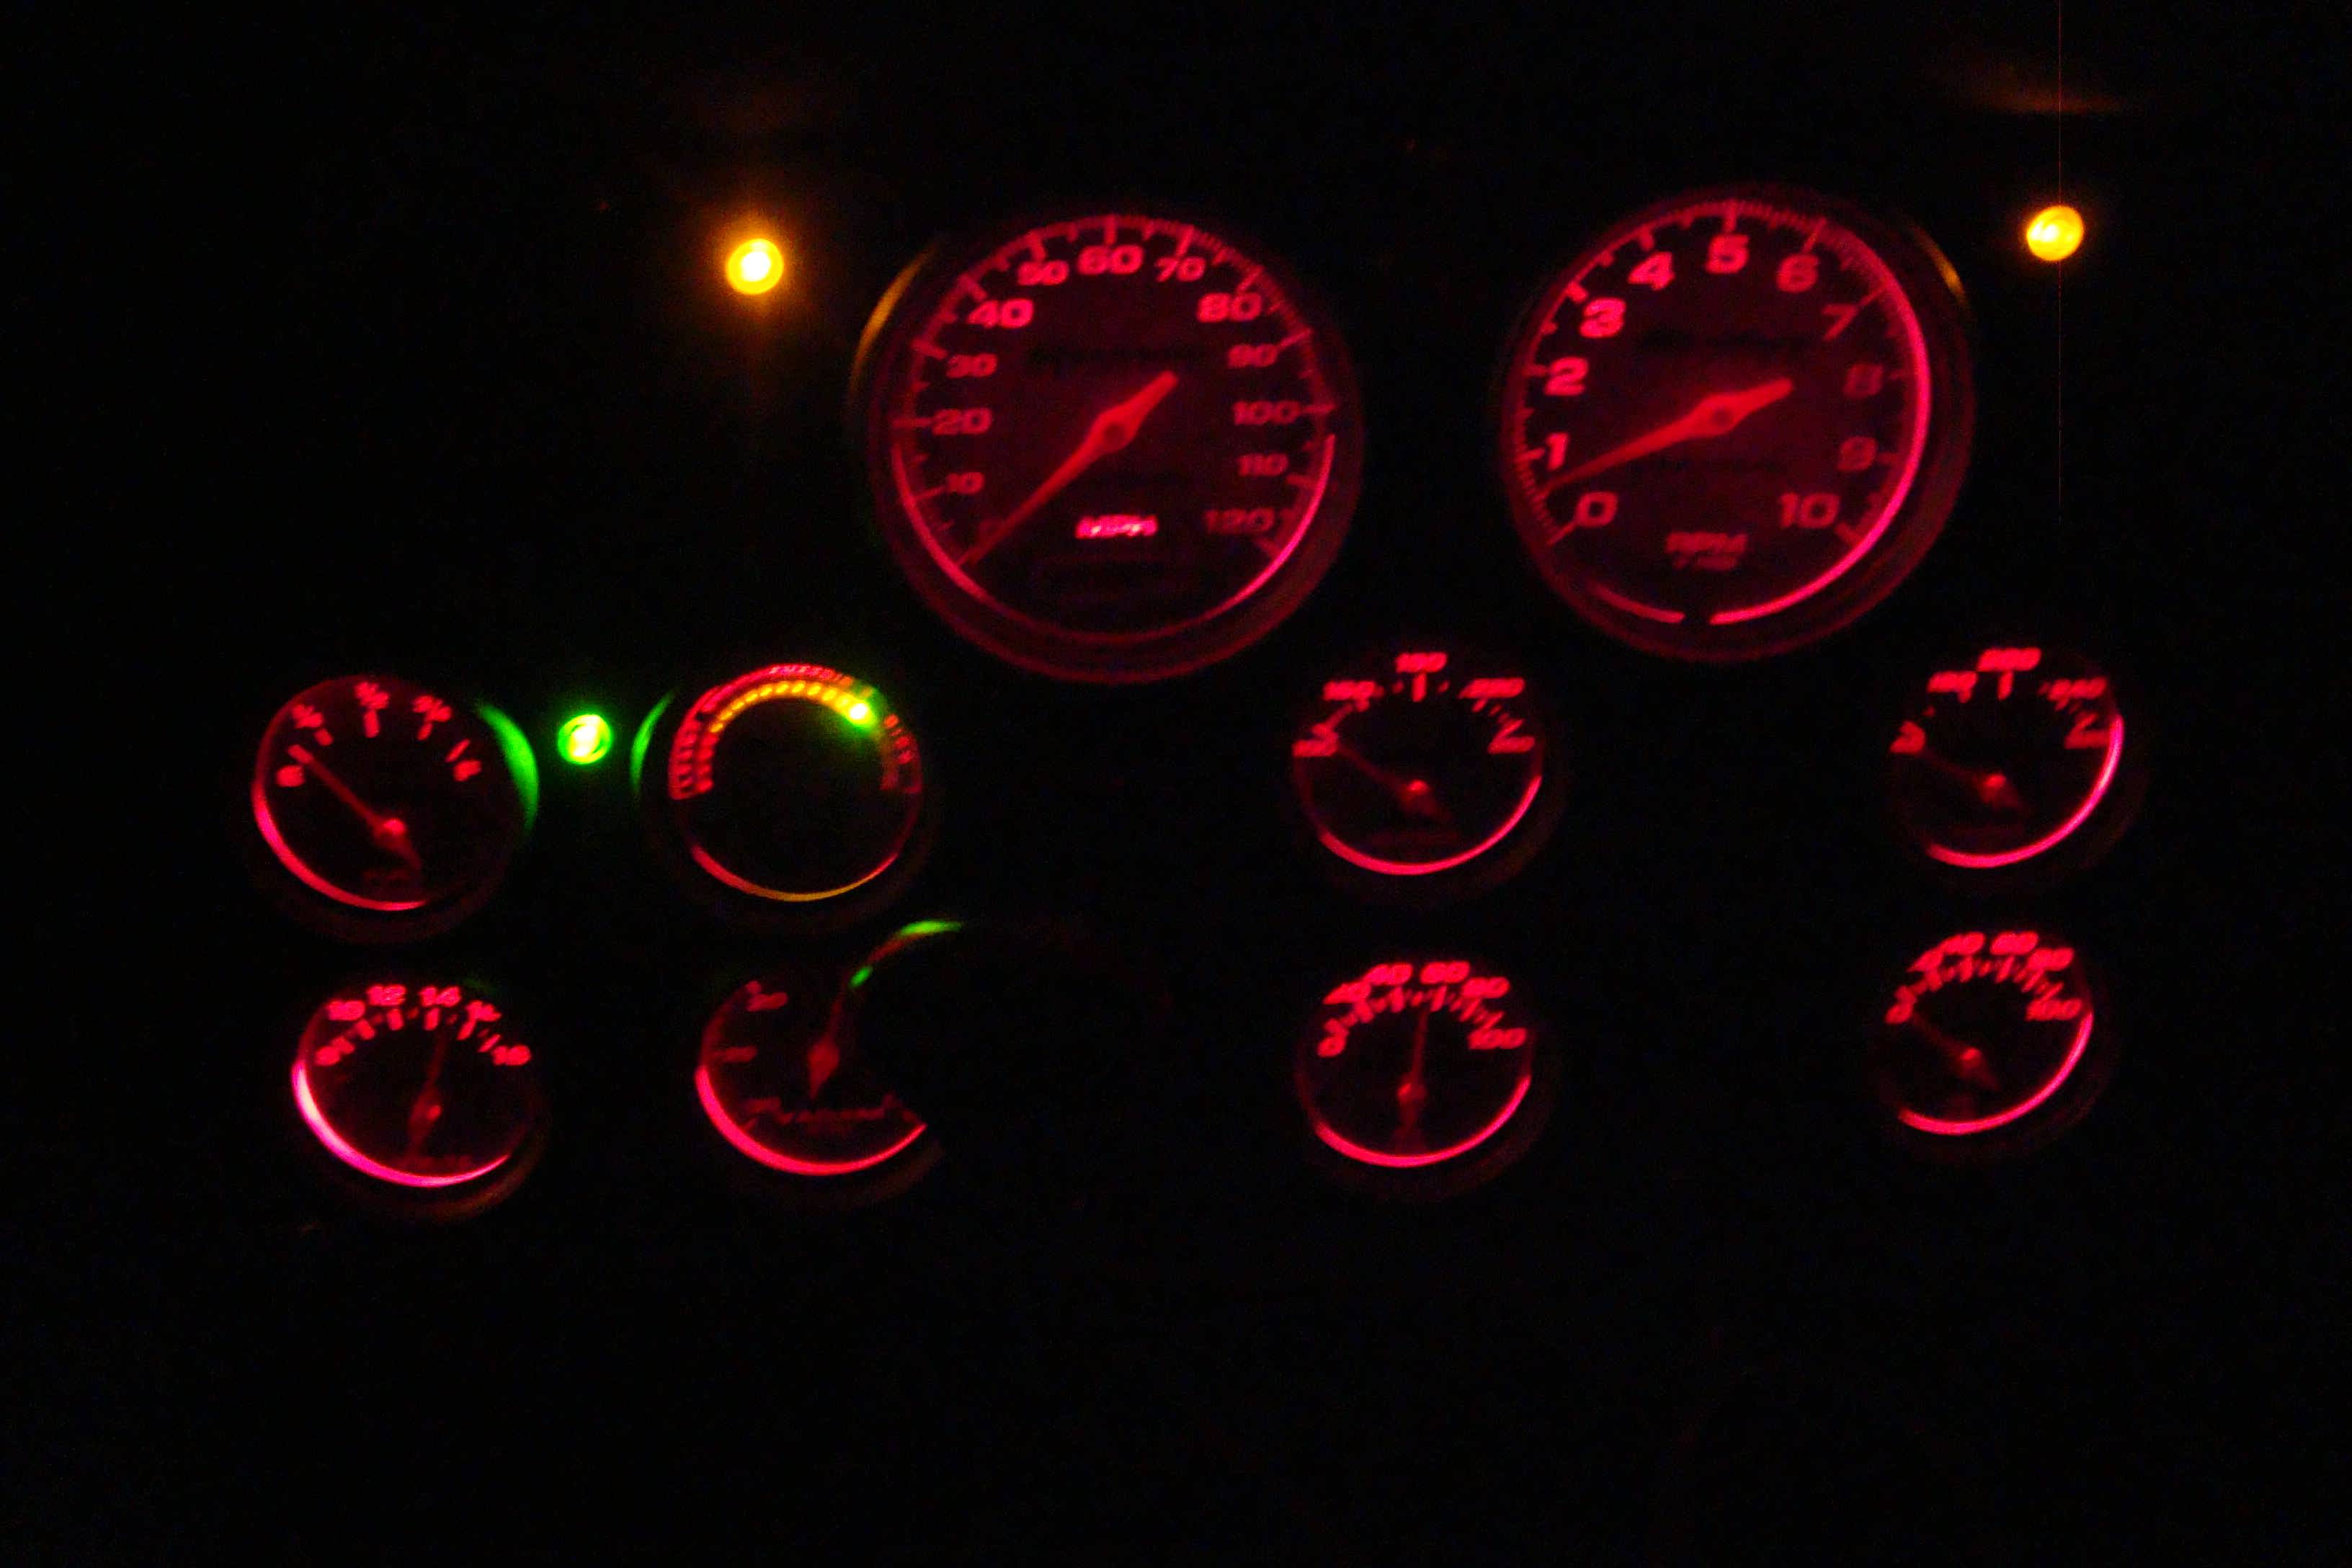 Dash panel at night. Got the purple light covers at a Flying J.
Green light is Propane solenoid on, ambers mean I need to fix my marker
light wiring - they're not supposed to be on! LOL
Dash panel at night. Got the purple light covers at a Flying J.
Green light is Propane solenoid on, ambers mean I need to fix my marker
light wiring - they're not supposed to be on! LOL |
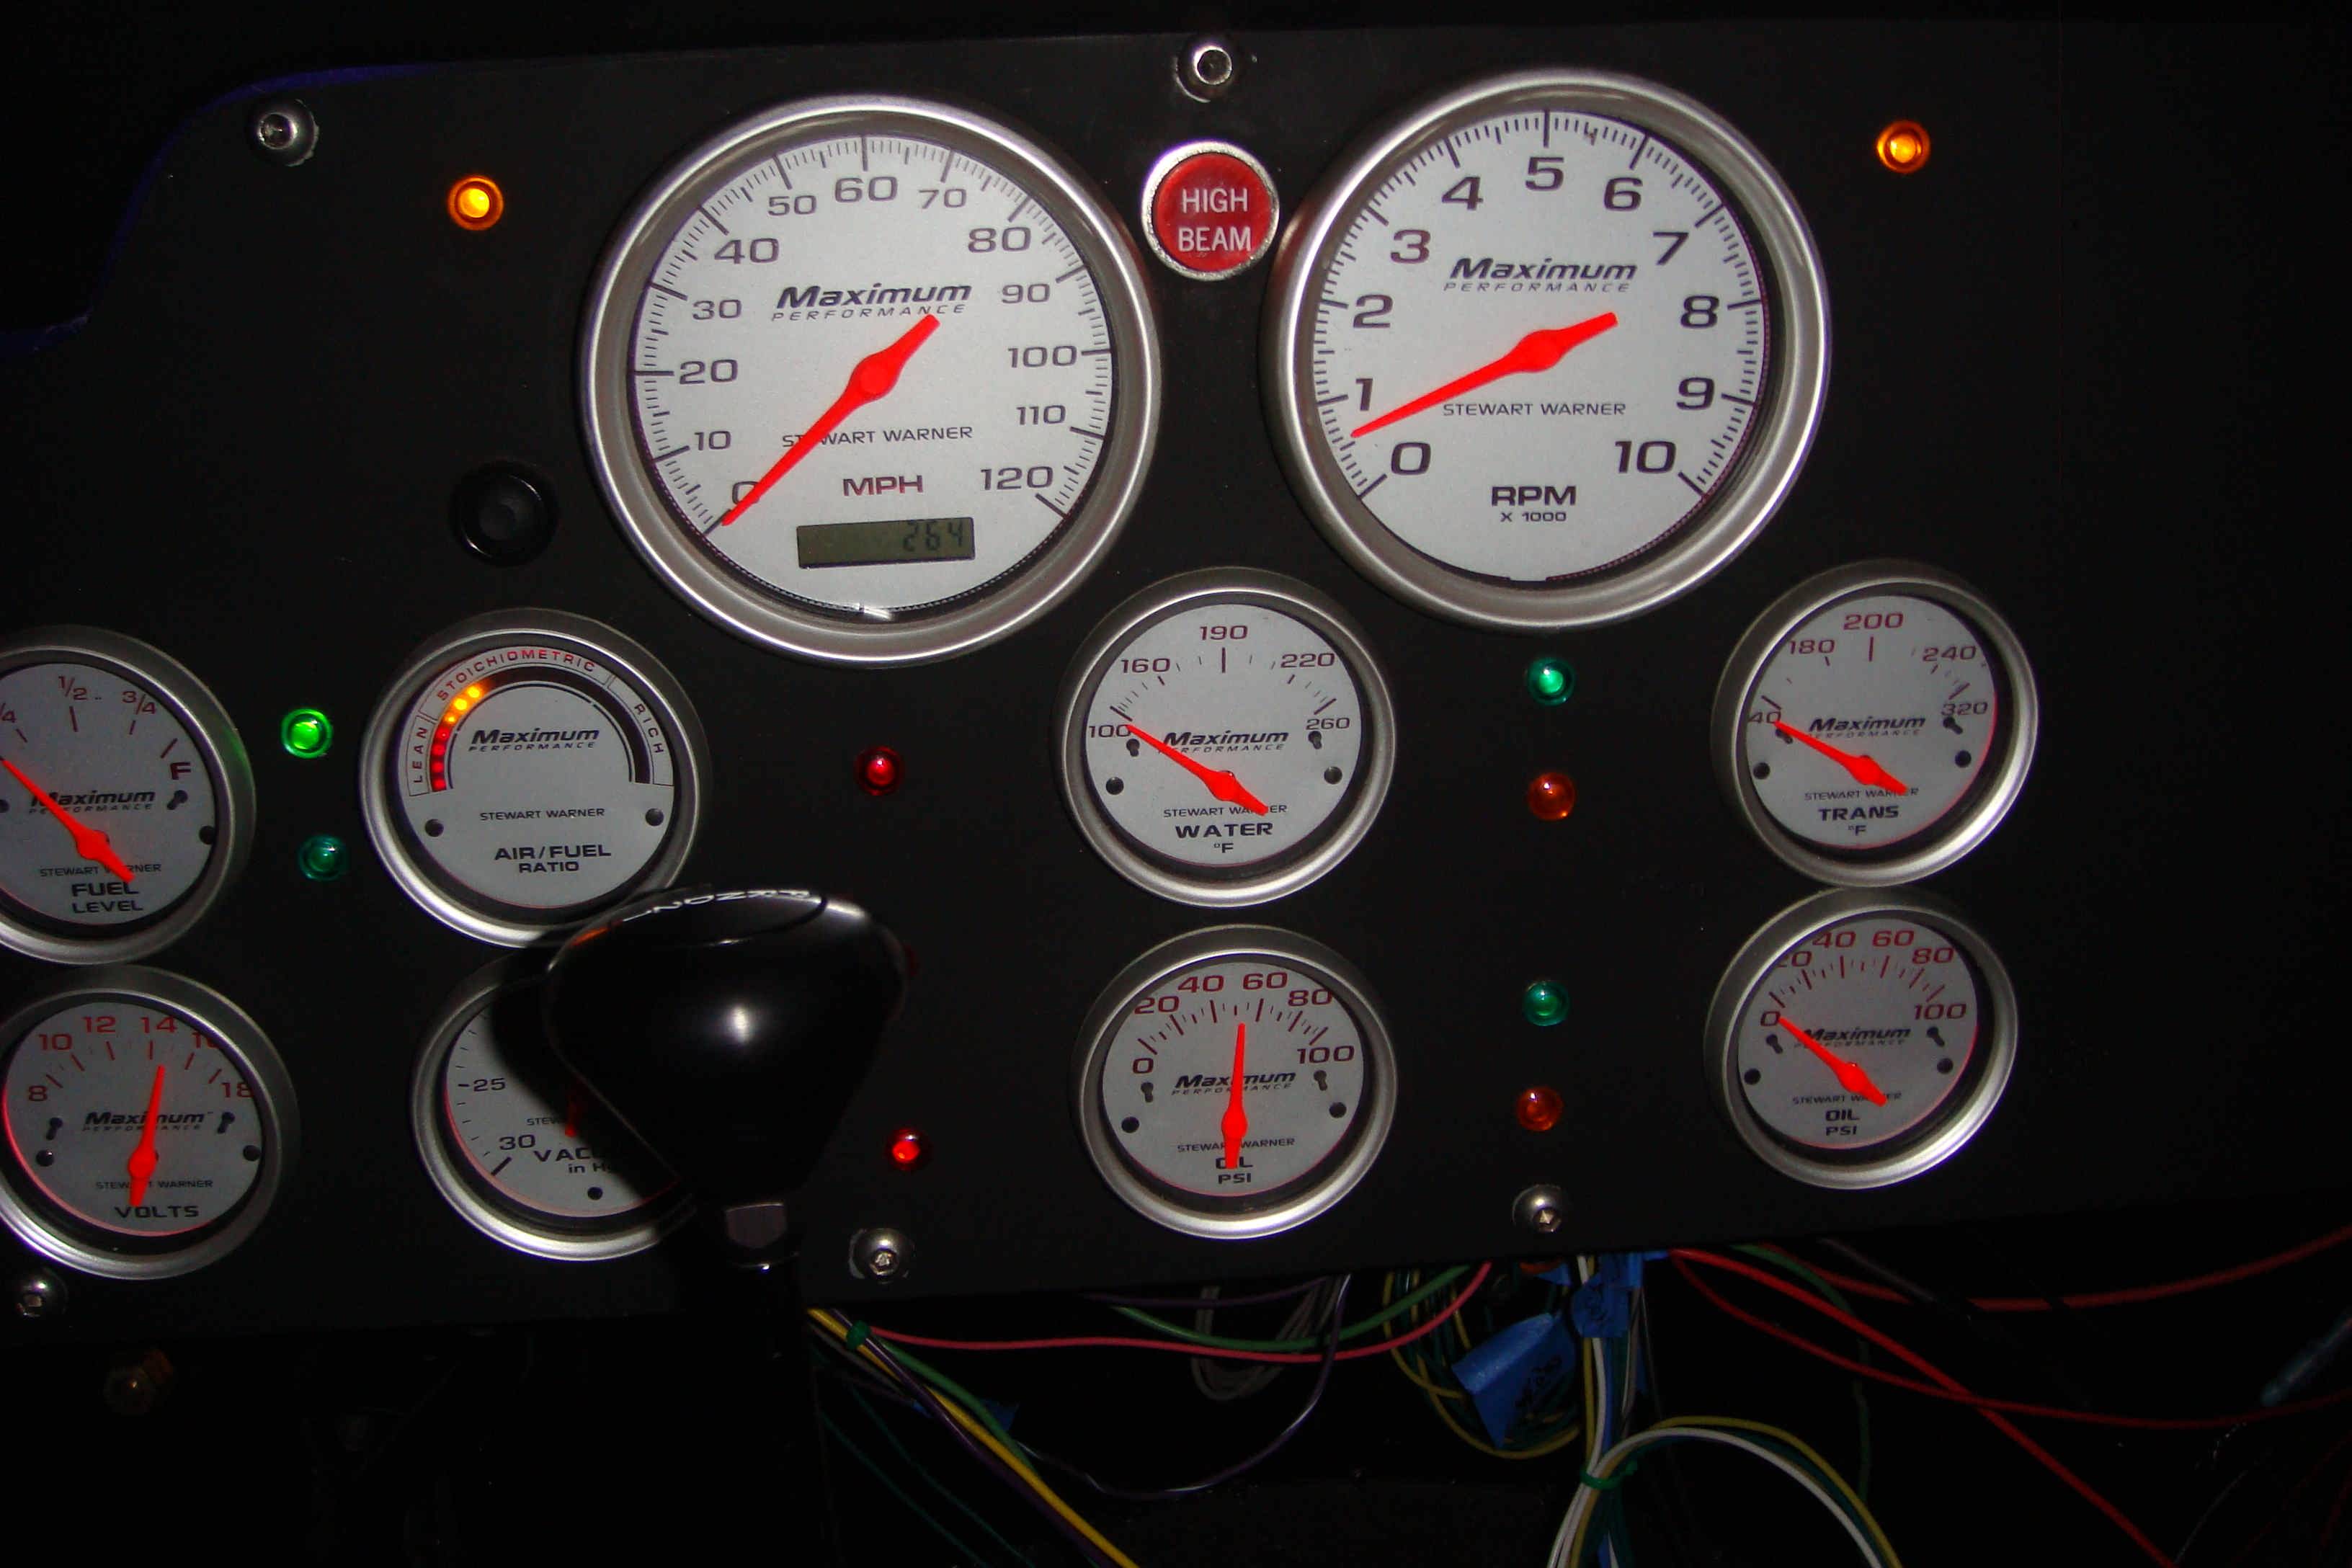 Here's what a grand worth of gauges looks like. I like the Harley
Davidson high-beam indicator. Wiring still needs to be tidied up.
Lokar shifter also visible, need to turn the handle on that one of these
days.
Here's what a grand worth of gauges looks like. I like the Harley
Davidson high-beam indicator. Wiring still needs to be tidied up.
Lokar shifter also visible, need to turn the handle on that one of these
days. |
 My first attempt at a u-bolt flip. I'll take it back down and weld
a piece front and back to keep it from spreading laterally like it did.
This thing cost me a day and about $50, $25 in u-bolts.
My first attempt at a u-bolt flip. I'll take it back down and weld
a piece front and back to keep it from spreading laterally like it did.
This thing cost me a day and about $50, $25 in u-bolts. |
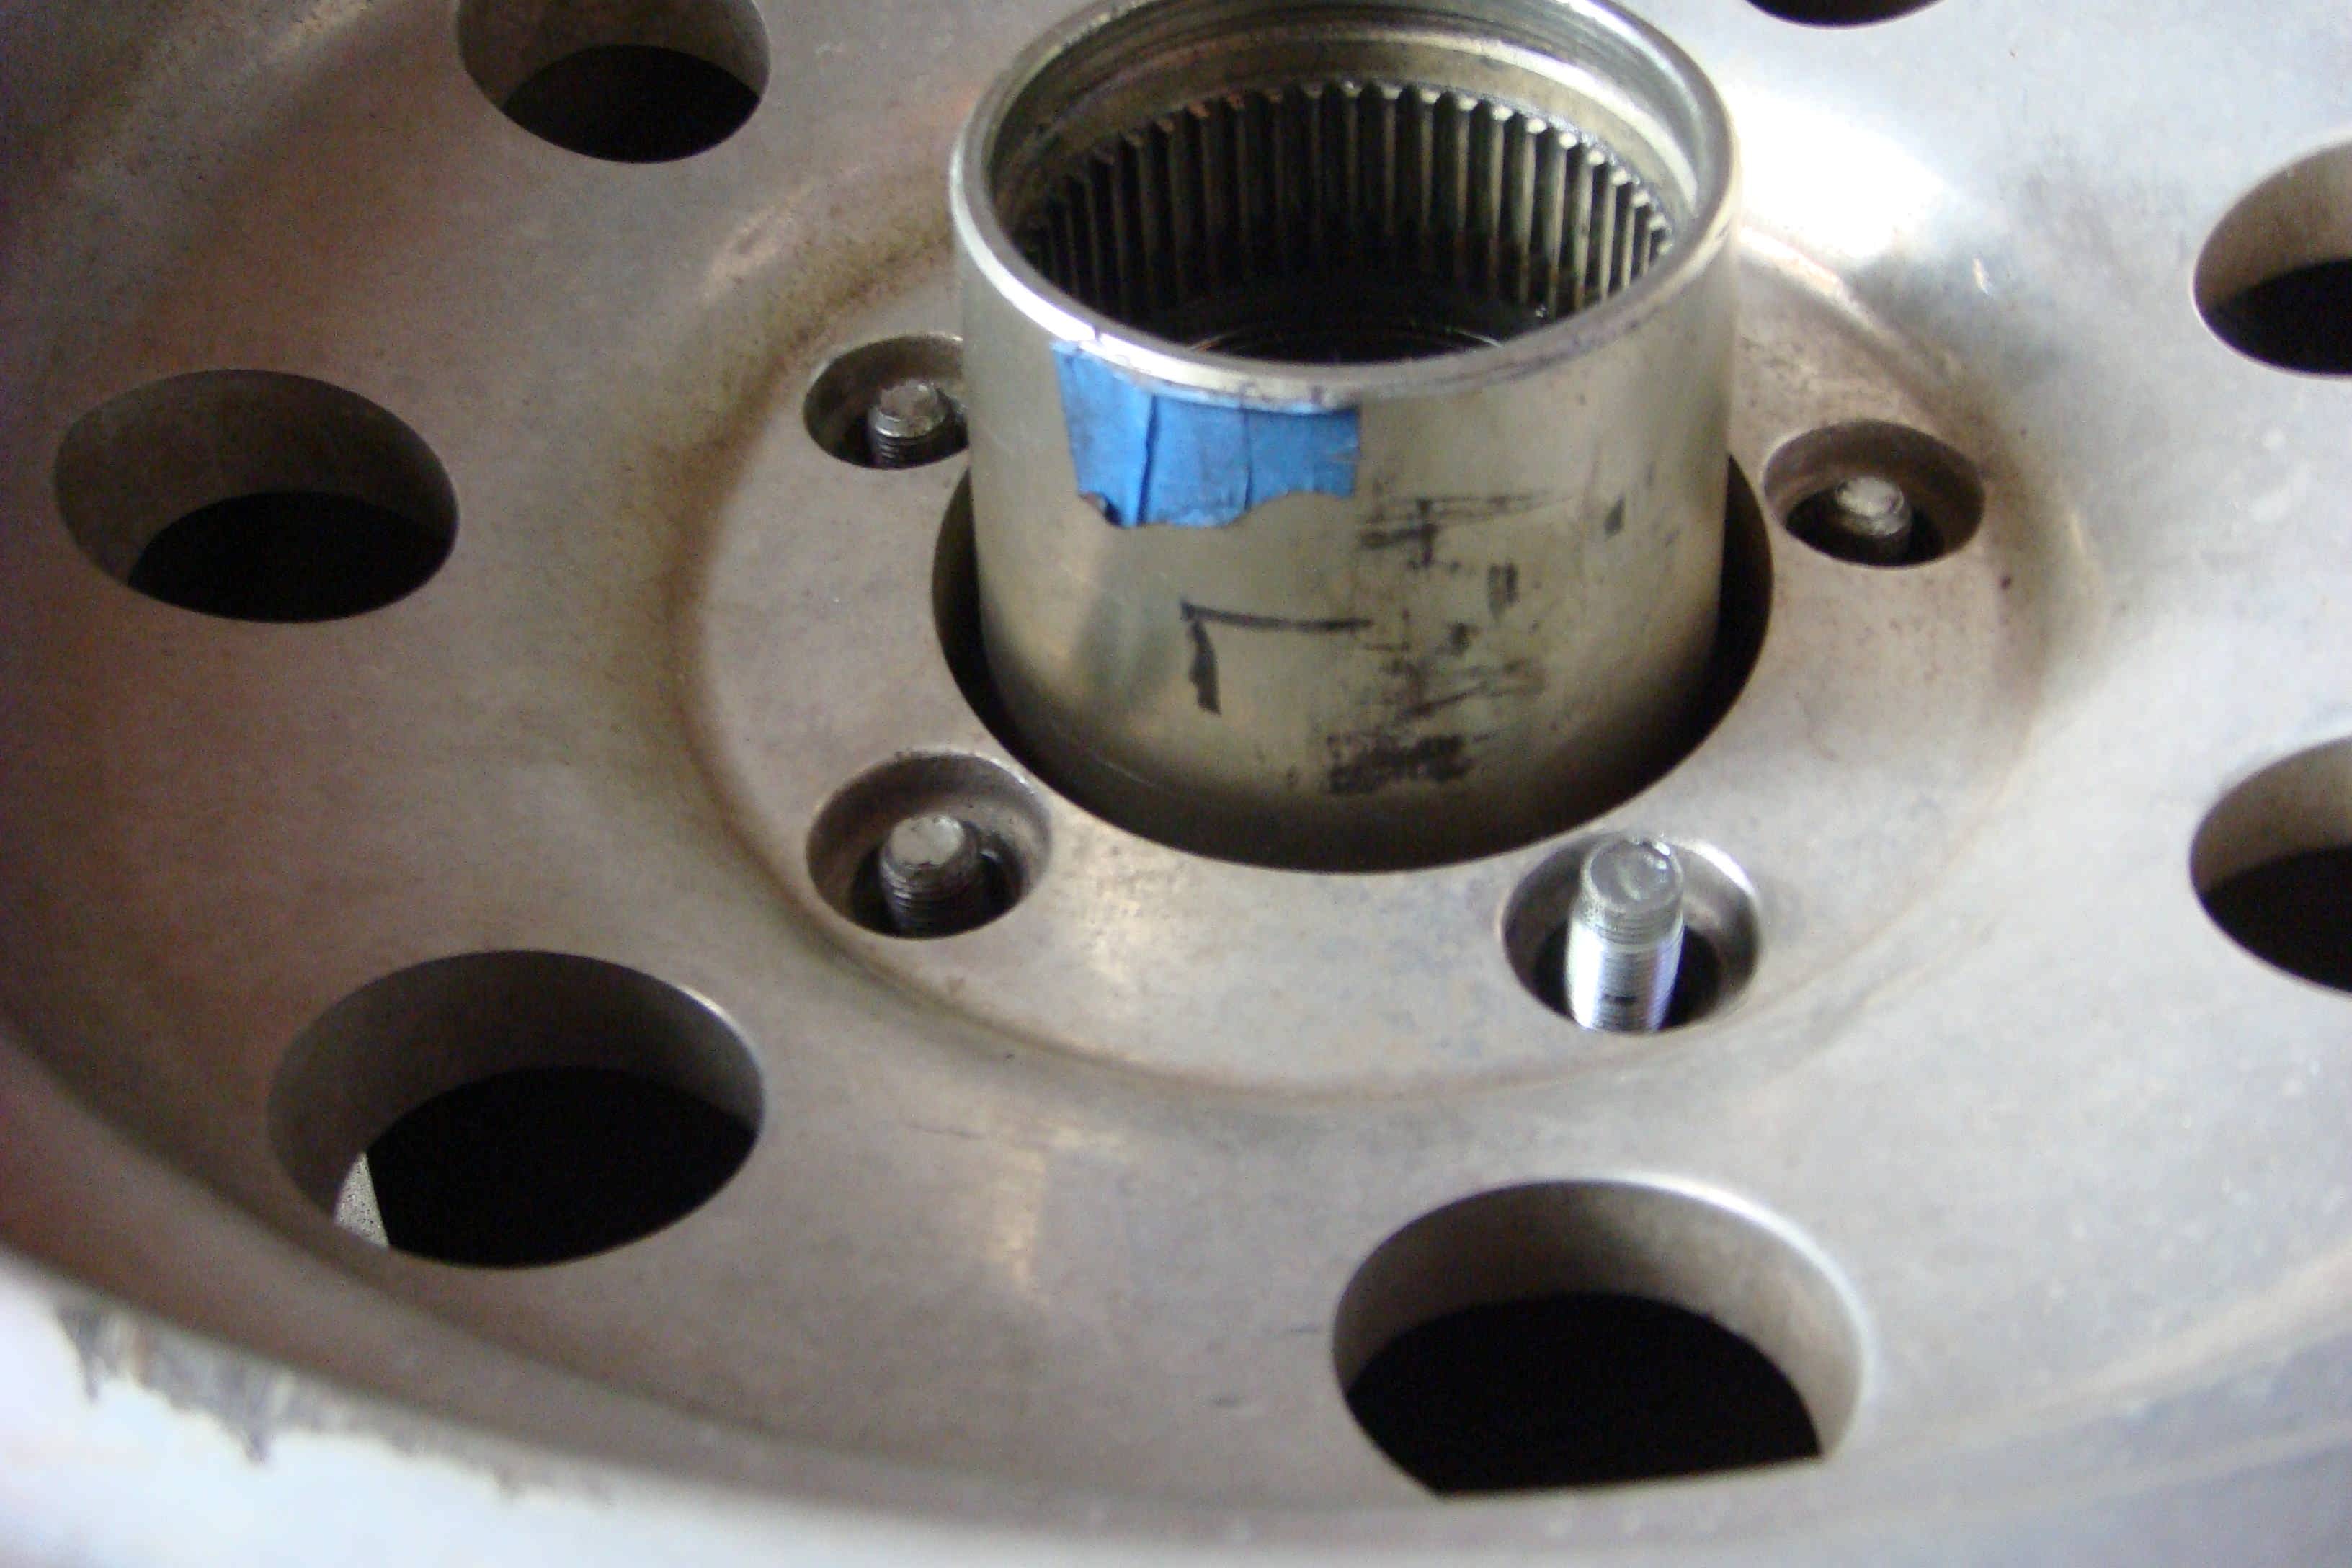 Trying to figure out which stud to use.
 |
 Left side wings, pumpkin-to-tube welded too.
 |
 Decided to go with the one on the left, it's got the shoulder I talked
about earlier.
Decided to go with the one on the left, it's got the shoulder I talked
about earlier. |
 At the height of the car -er- Jeepnage.
 |
11 Jan 08: Axle is in, it moved under it's own power today. That said, all I did was turn it around in the driveway. New master cylinder from an '82 Corvette. Proportioning valve to match, but it needs an adapter for the rear line. New Powermaster alternator, 140 amp Chrylser version. Working on finding the right length belt. The ubolt flip went pretty good, but it bent a little bit under the load - I may modify the design slightly, but she'll hold for now.
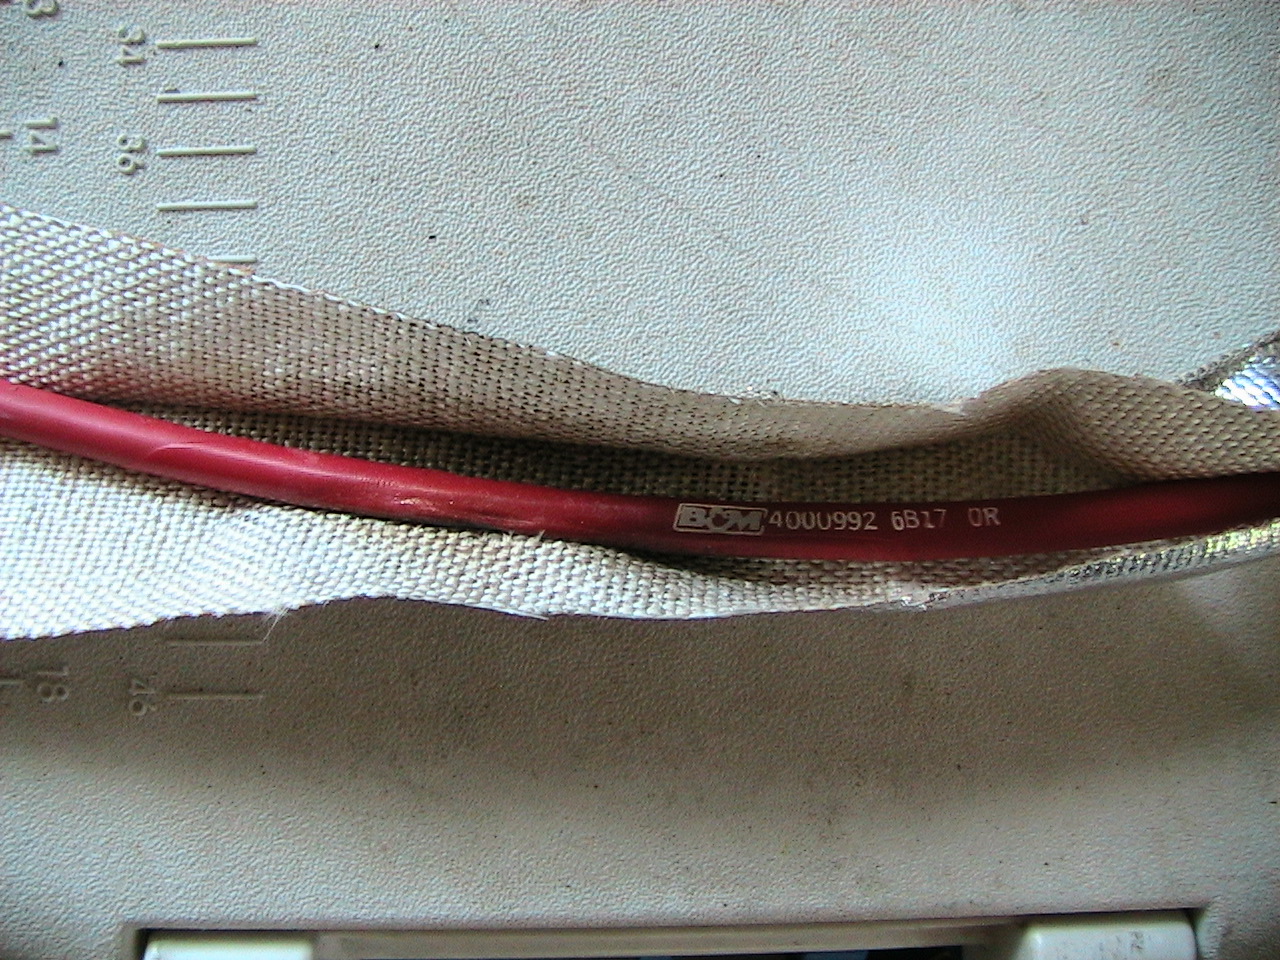
15 Jan 08: Found the right belt, had to cut down the adjuster buckle. If you try this before I update with the exact lengths, please note: cut a little of EACH END, not all off one end like I did and almost ended up botching the job. It was a stupid mistake so please learn from me <grin>. I'll put more in there about that, BLUF is I used a Powermaster alternator #8-57529, and a March pulley #112. I went with that one because it's the smallest diameter, therefore spins the alternator the fastest - charges better. Then I needed Dayco belt # 5060430 instead of the '450. The only drawback with this idea is that the one wire terminal is really close to the head, so you have to make sure you insulate it or it'll arc for sure.
Here are some more pics of the work in progress
 Working on a new alternator. Note oil leak and area where I ground down the head but forgot to paint it. Guess this Jeep is determined to leak and rust no matter what! LOL |
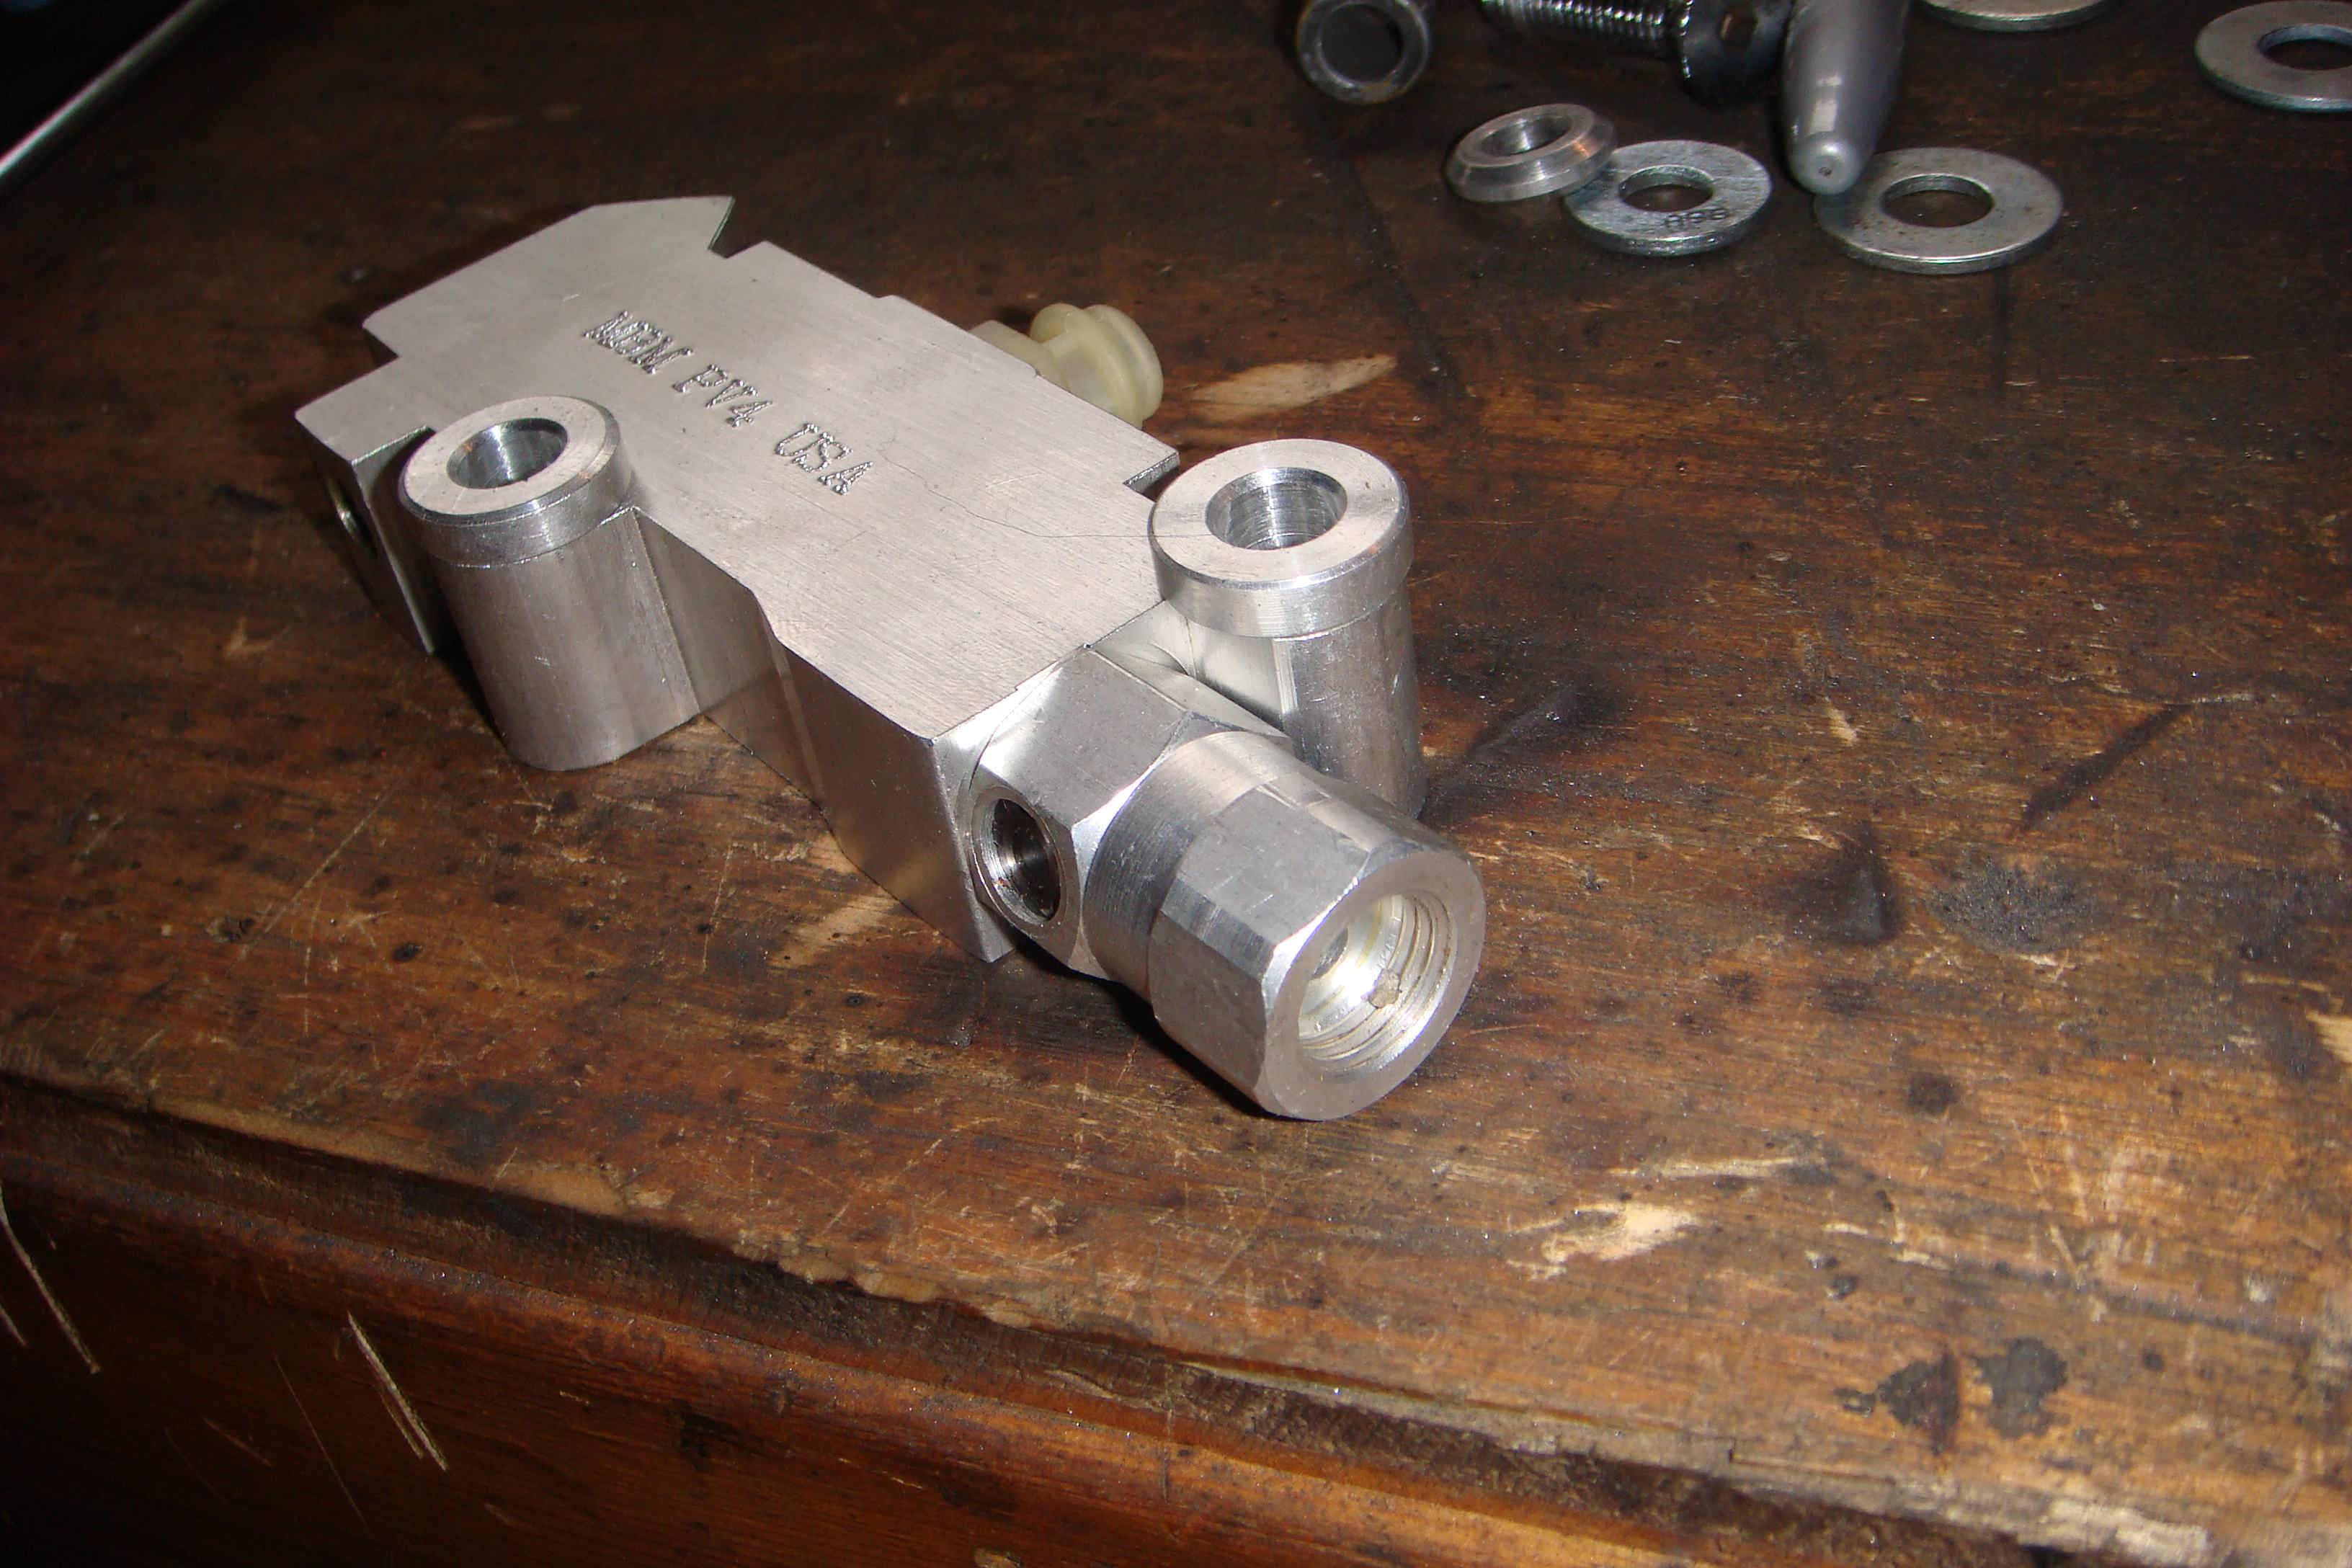 Corvette proportioning valve seemed like a good idea, goes with the master cylinder. Except it's got a 9/16x18 rear output, and the line has a 7/16x24. Stainless line so I can't put a new end on and re-flare it. This is going to wait until I have more time to finger this out. |
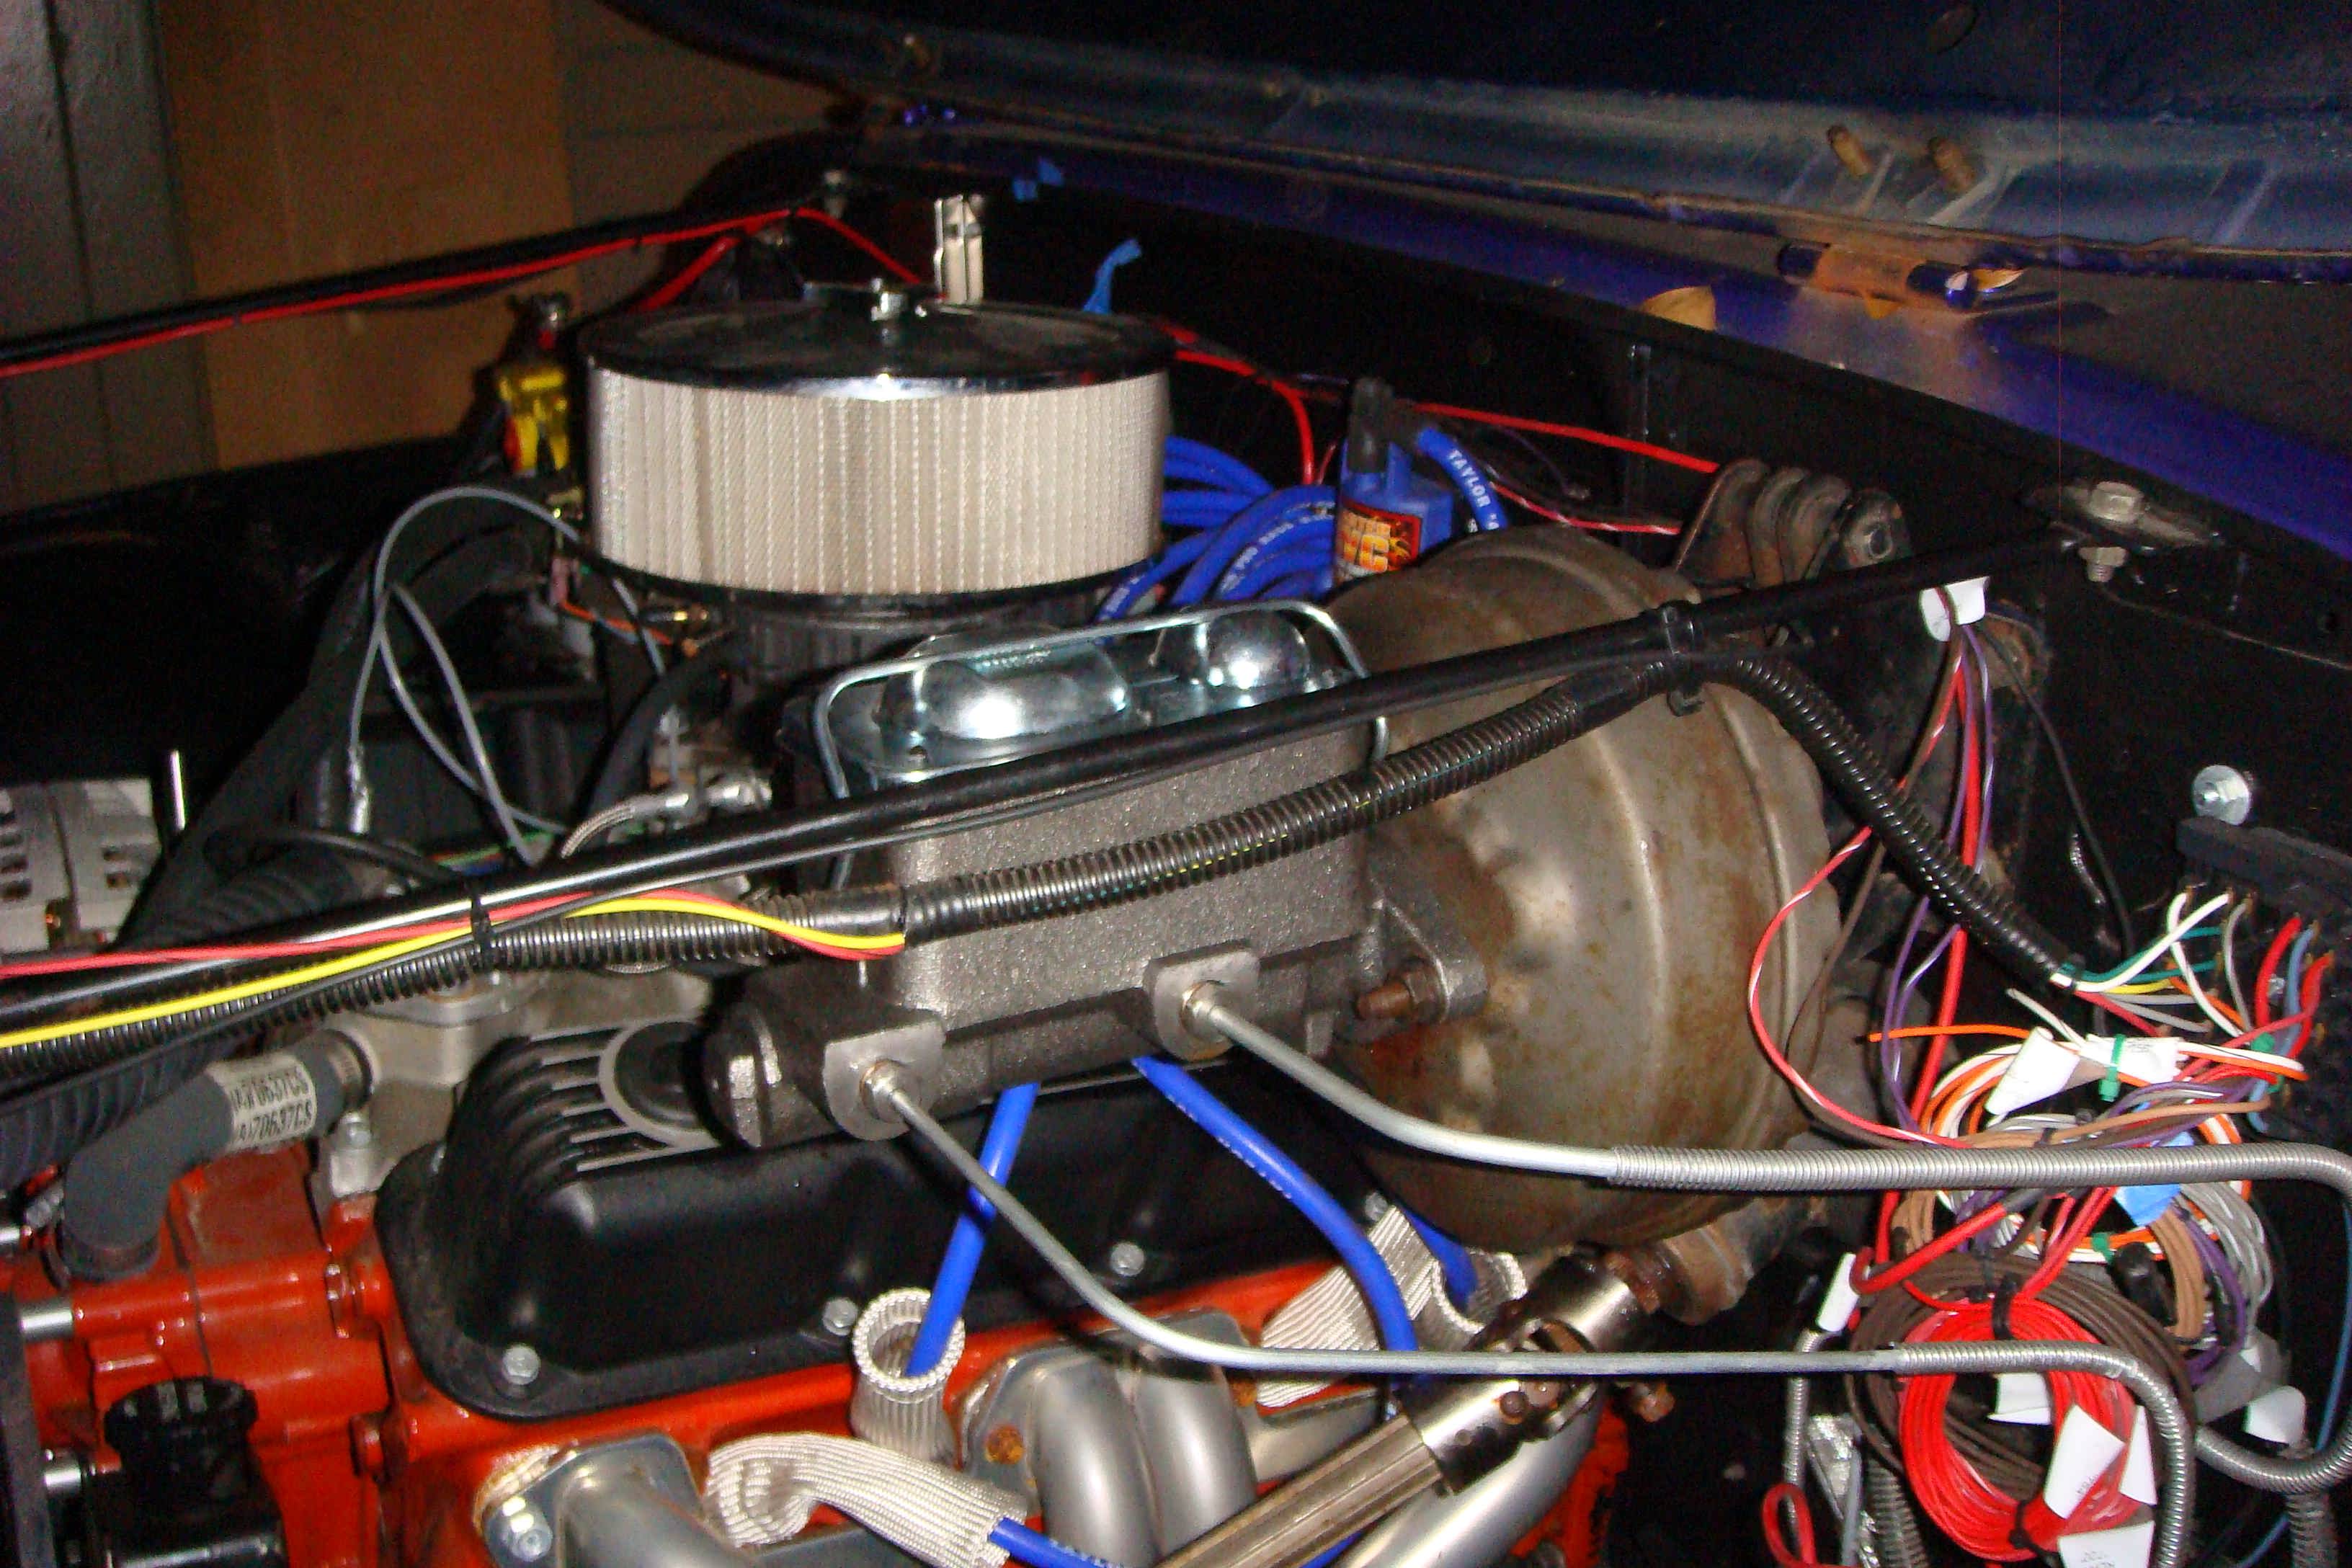 '77 Pontiac Firebird master cylinder. Didn't work, wasted $30. If I could remember where I saw that online I'd ... have somebody else to be mad at besides myself. |
 Axle's in, looks like it's going to work. Hook up the shocks, bleed the brakes (double-check that there's oil in the diff) and we're on the street! |
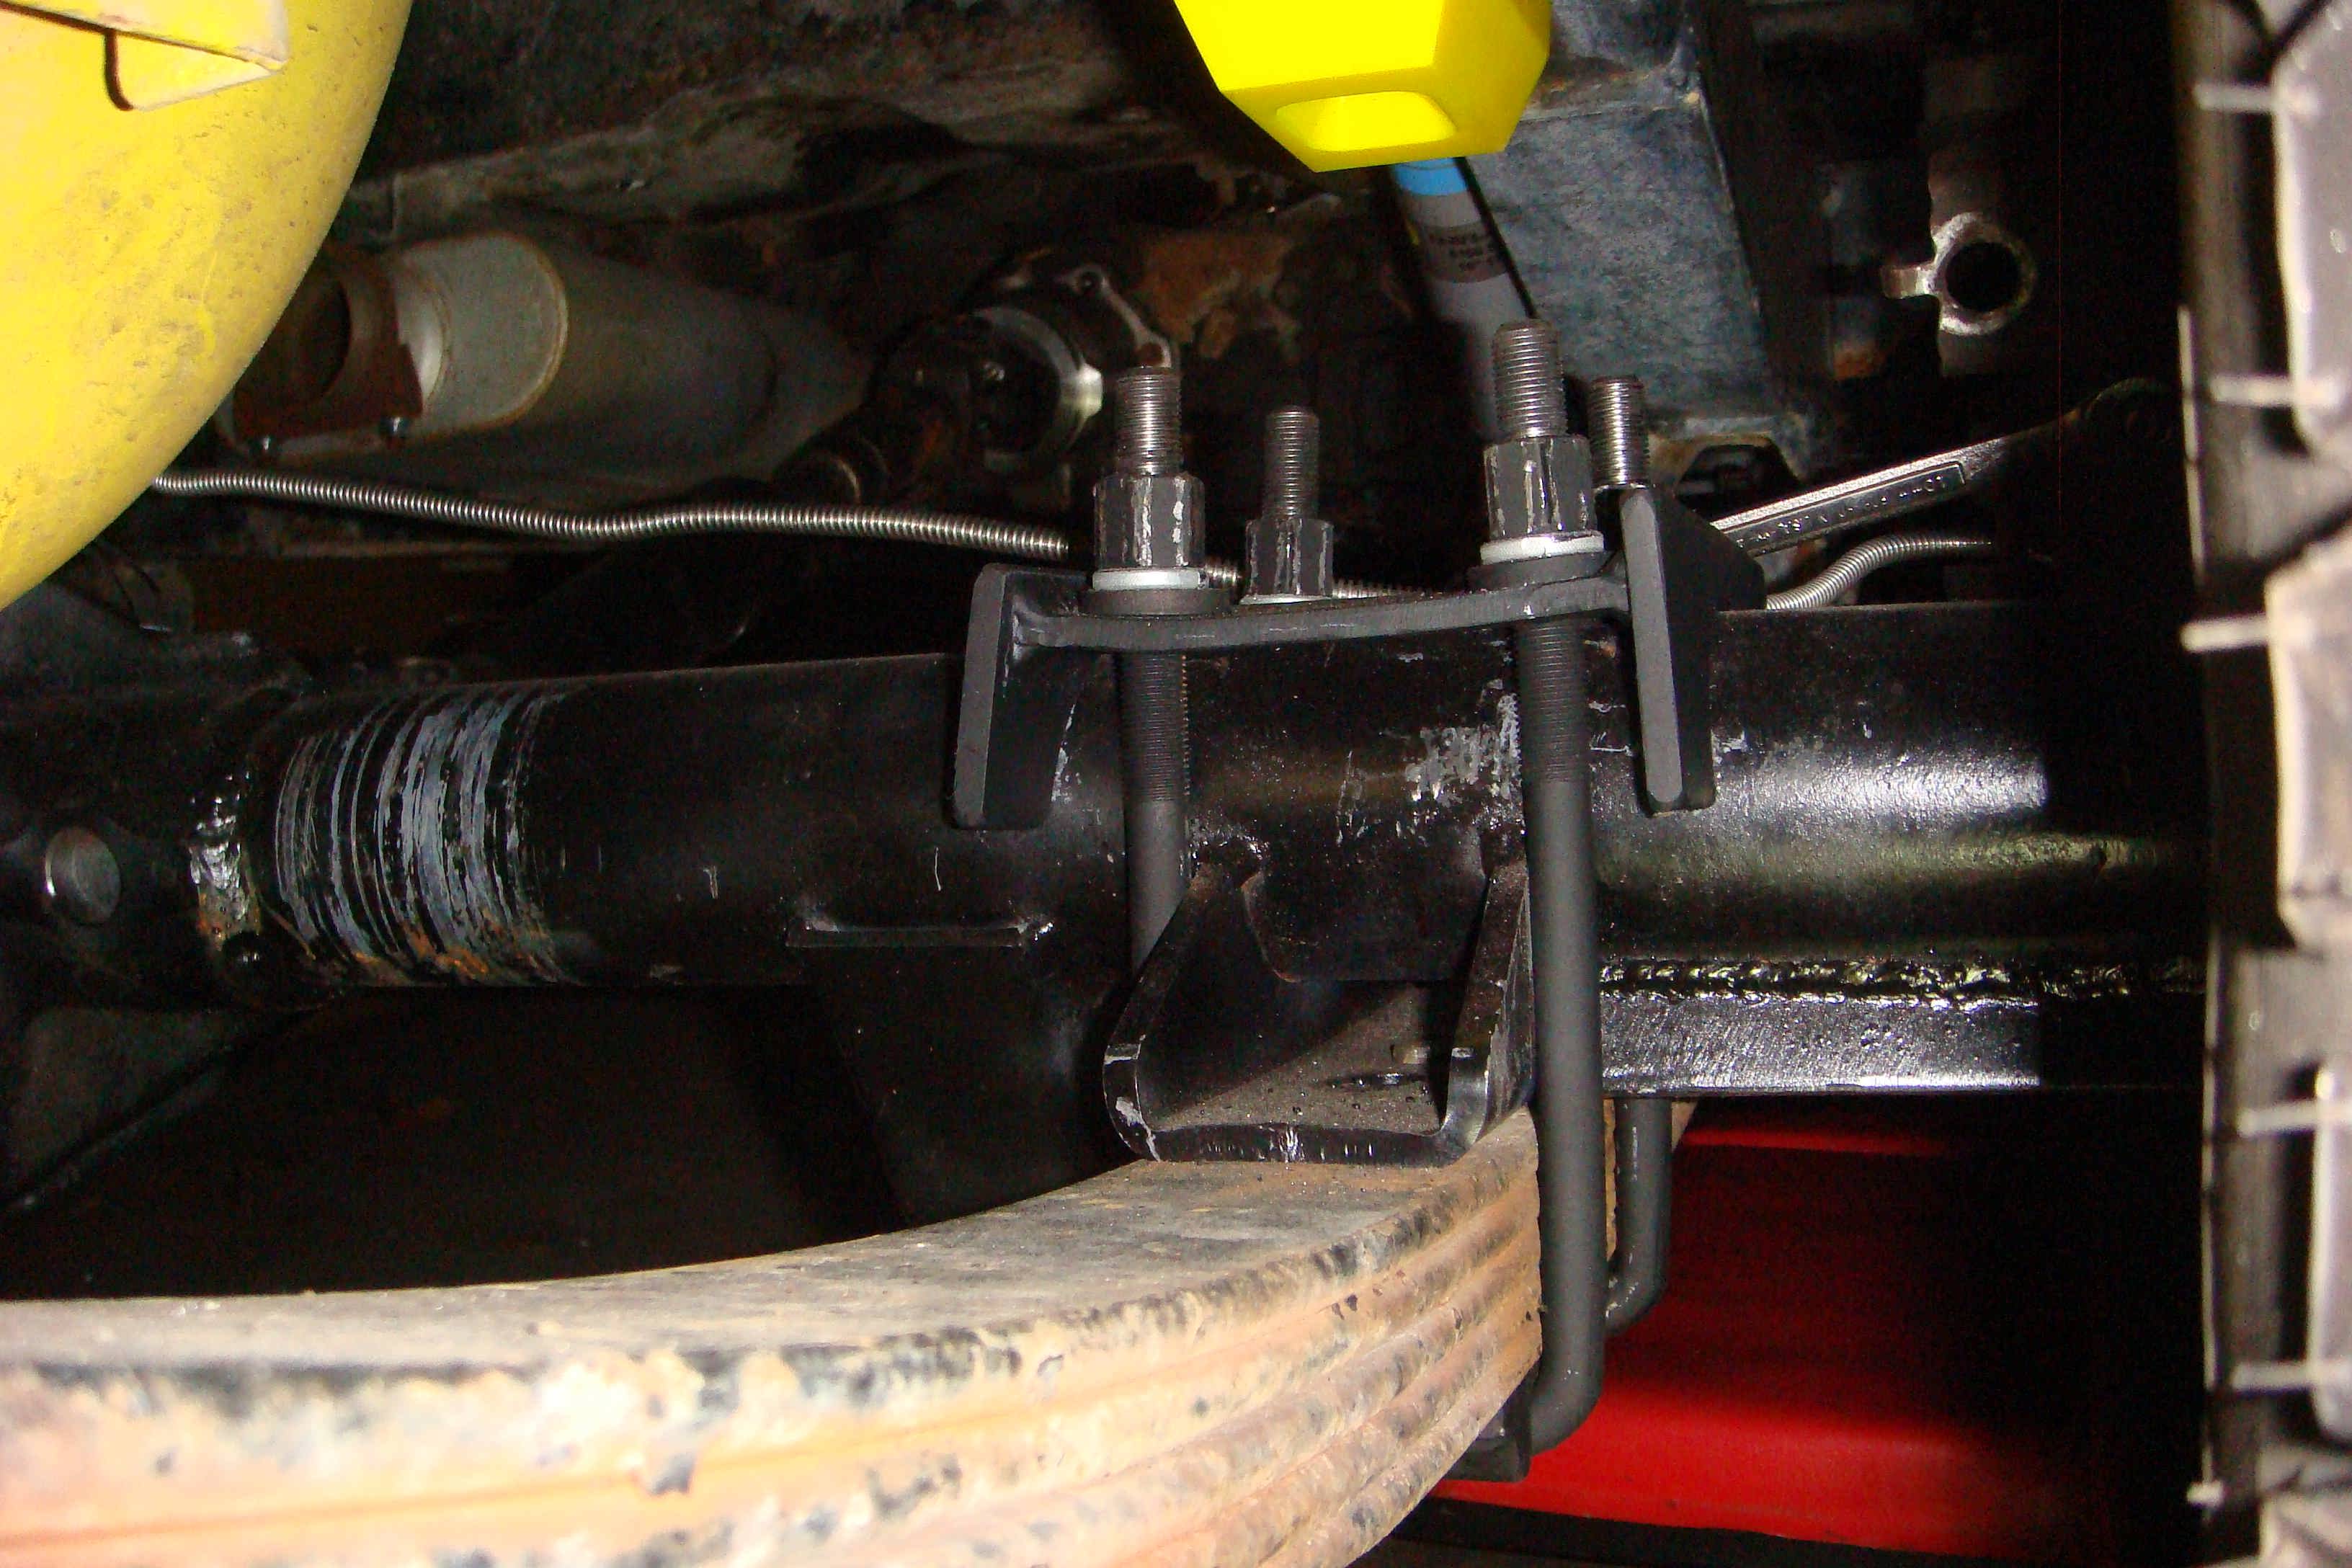 Right side spreading slightly as well. I'll get that fixed. I'll have to put something for the eventual bumpstop hit too. |
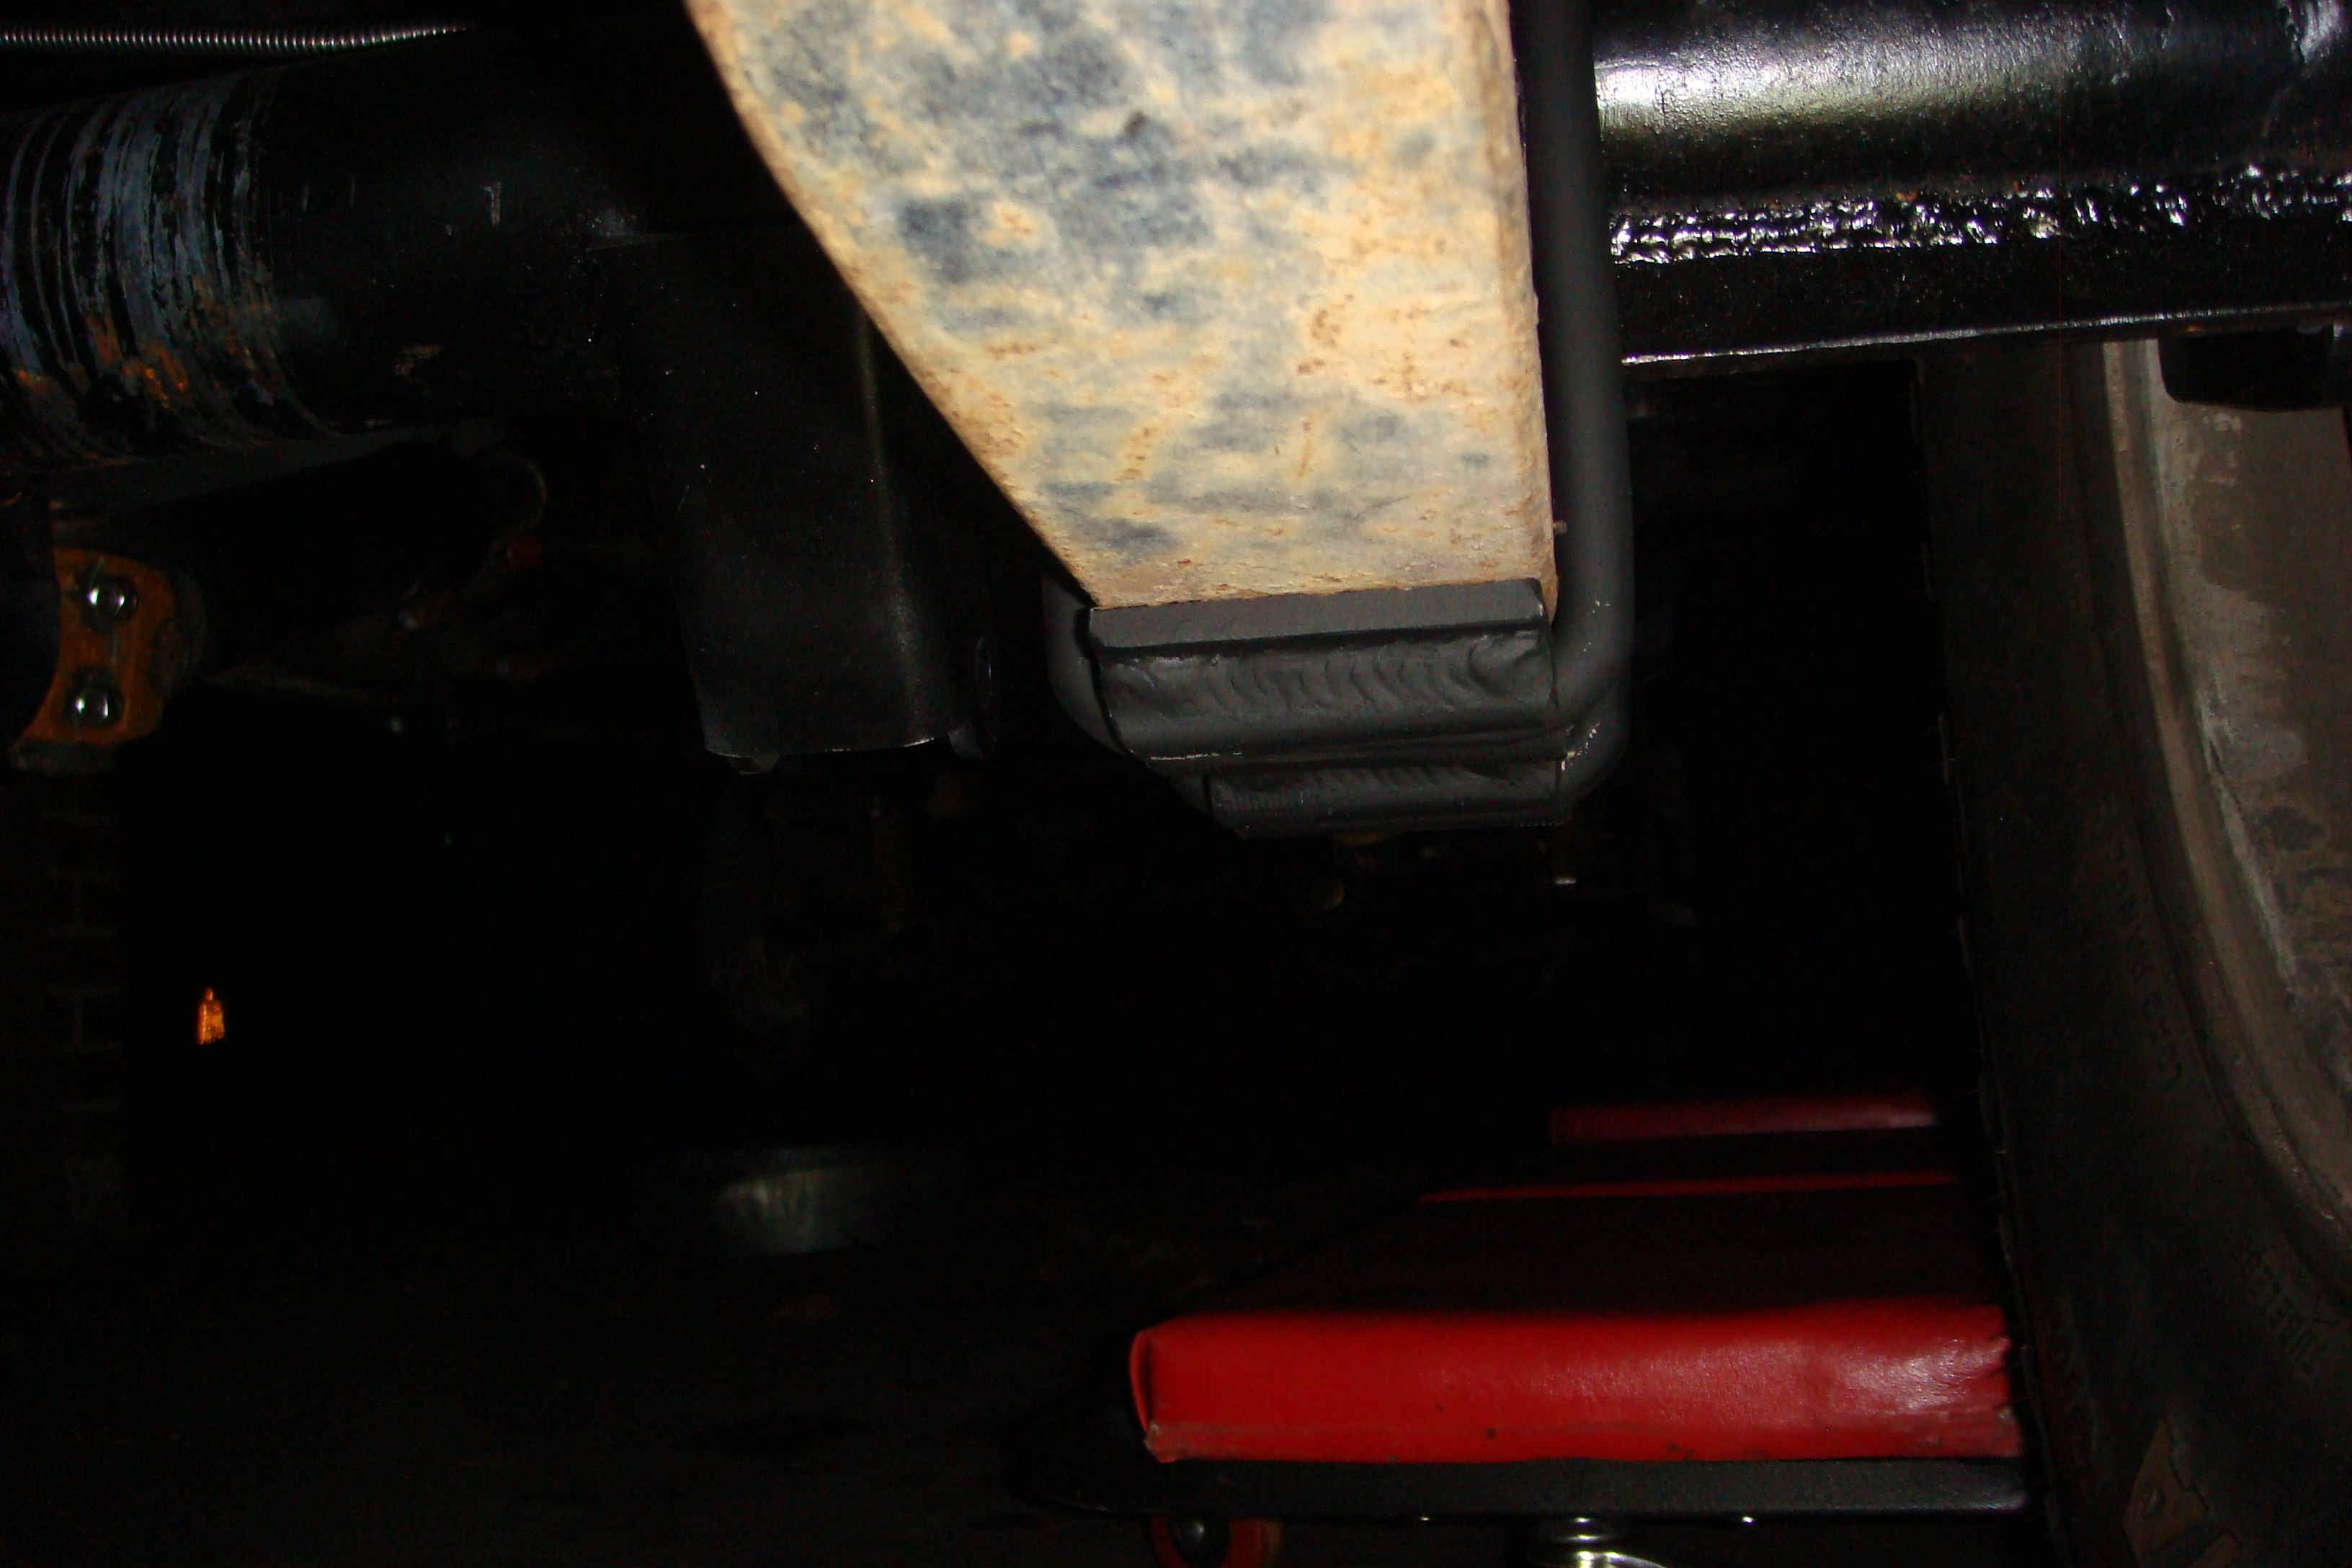 Rock-view of the underside of my u-bolt flip. |
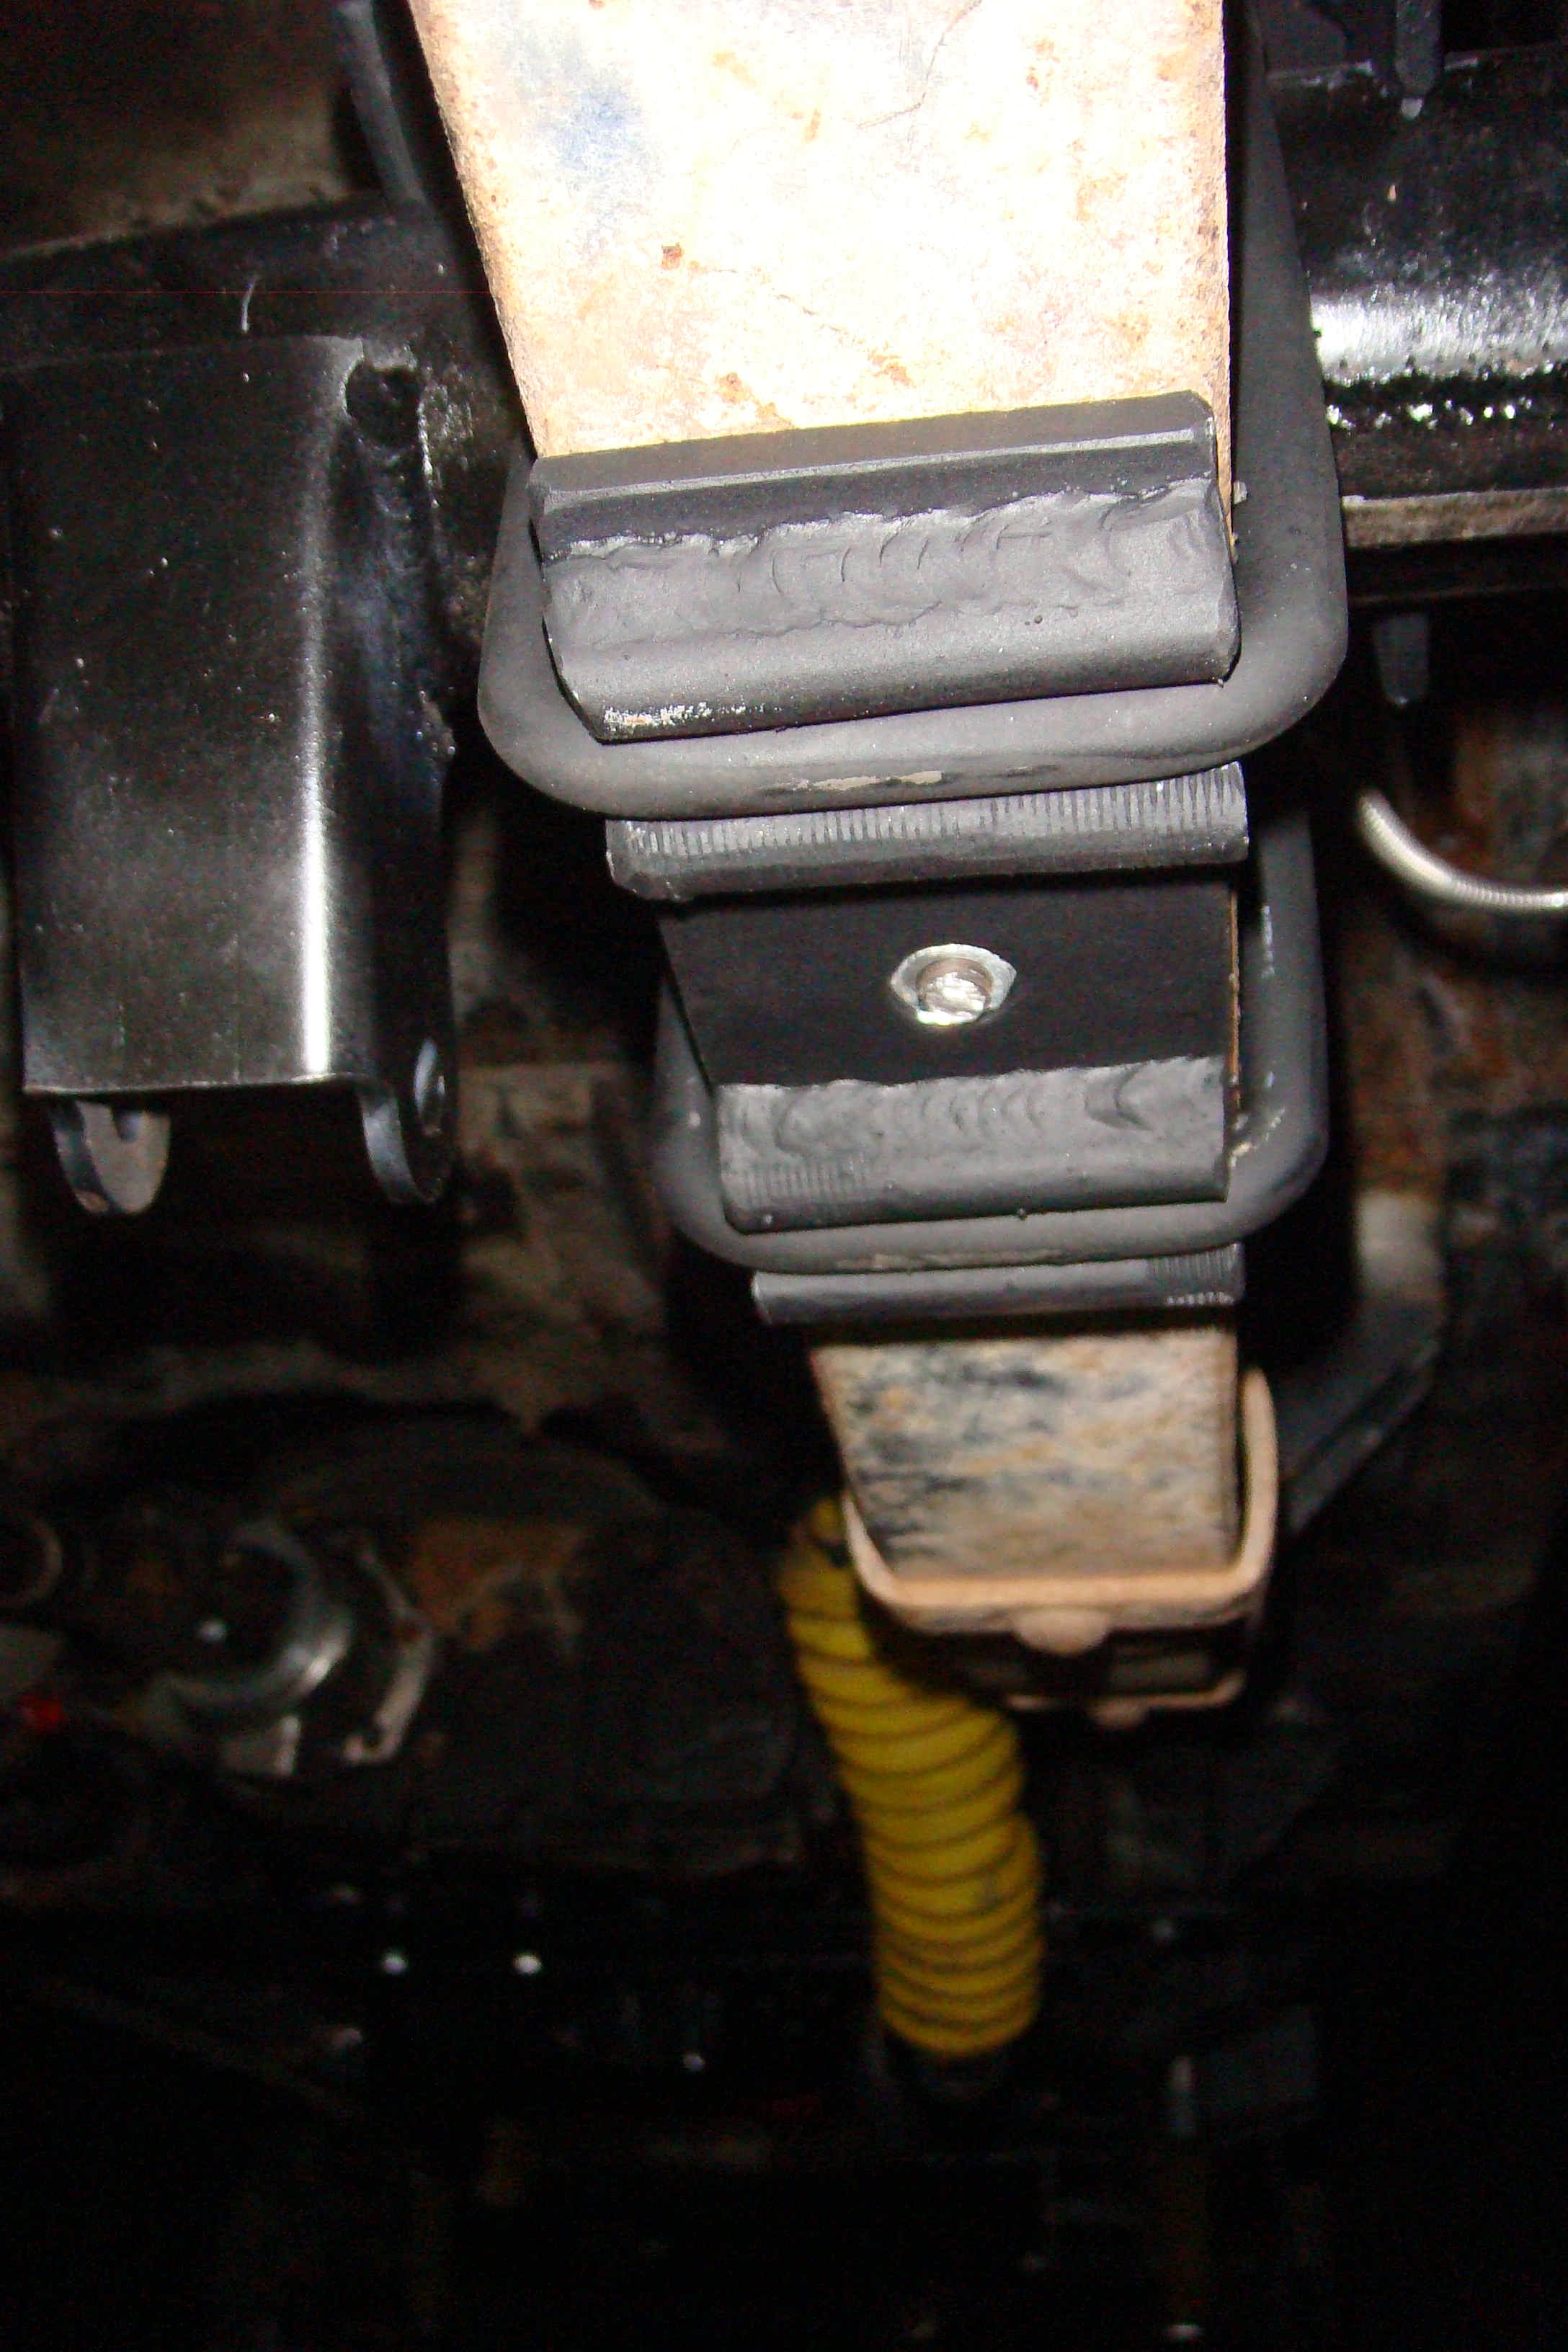 This will come back off and I'll weld a bridge between the two bolts. Note how -er- inexpensively this is done: those are the old u-bolts I used as guards. |
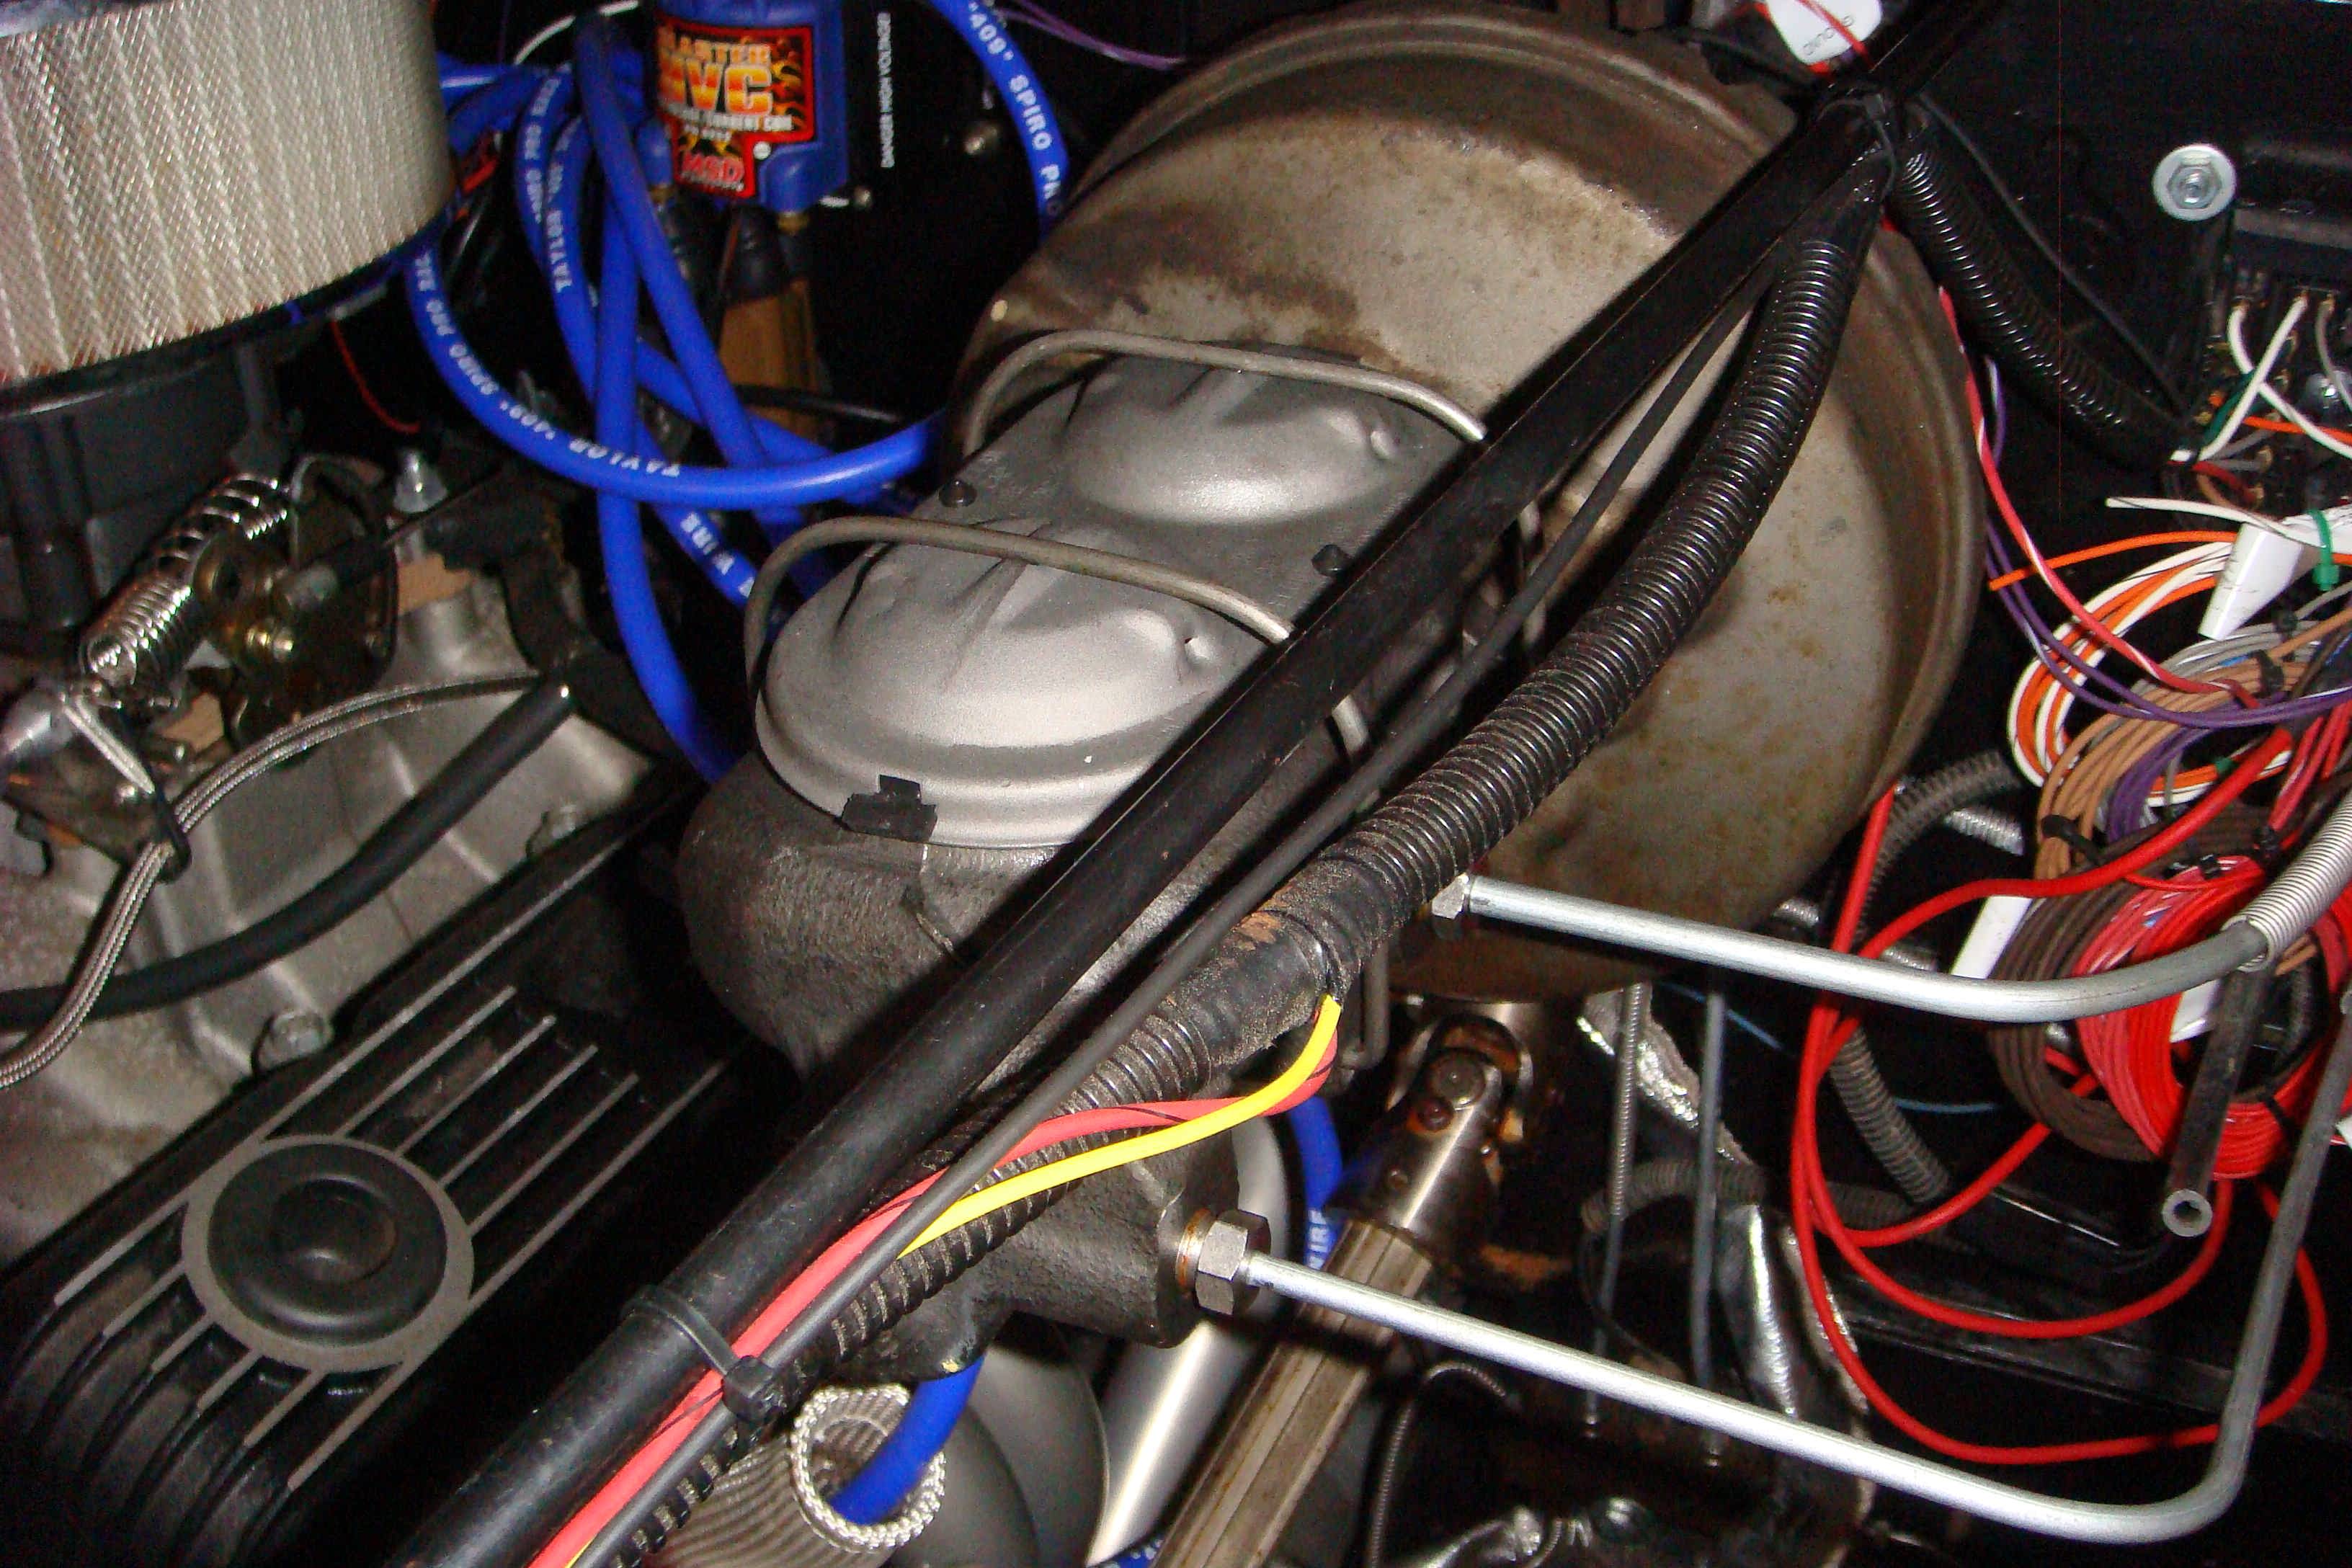 Ah, finally. The proper master cylinder. This is from an '82 Corvette. I am told that the '77 thing is an Eldorado. I was close. Anyway, this one bolts up too. Prop valve is another telethon but I'll get that figured out eventually. |
25 Feb 08: I'm trying to get the brakes and the propane system to behave properly. The master cylinder is puking fluid out from under the cap. The propane system won't work when the converter is connected to vacuum like it's supposed to be. Which means I either messed something up or something broke on it's own. I'll get it figured out one of these days.
4 March 08: Brakes are working better now that I figured out you're supposed to bleed CJ brakes front then rear ... I was doing it backwards for nearly 10 years. Duh. Anyway, I have figured out the riddle of the disc-disc conversion, pending the arrival of the 9/16 male to 7/16 female adapter from www.inlinetube.com. I got the adapter, it fits and just need to replace my power booster and bleed the brakes.
Propane system is working a little better, I think I had a restrictive solenoid, but I still need to get it running like it should then mess with the solenoid. I put a second one right at the converter so when I kill the fuel the engine is off immediately, rather than burning off the 10 minutes of fuel in the line after the rear solenoid/lockout.
I pulled the solenoid and there was no change. Then I discovered the air valve was sticking. So I freed that up and adjusted the fuel rod pins per Franz' book specs. It still runs lean off idle, but let me tell you - I don't think there's more than 5 cars in town that can keep up with this thing now. I'm going to run some 0-60 passes once I get the brakes dialed in, that's how quick this thing is! The crate motor was definitely a good choice, it spins up to 4 grand in a split second. I'll put the second solenoid back on as well as add the Y pipes in the heater line. Long story but bottom line is it's required to operate propane systems properly. It won't last without them.
27 Mar 08 - Y pipes are in. I discovered that the posts that the fuel rods sit on are .849" tall rather than the .826 spec. So they're currently at .817 to see if I get a rich condition. I'll update the writing later, here are the latest pics. I braced the Shackle Reversal because the buggy springs were squirming around making steering kind of an adventure. These angled pieces will let the buggies droop and flex but lock them in when on the street.
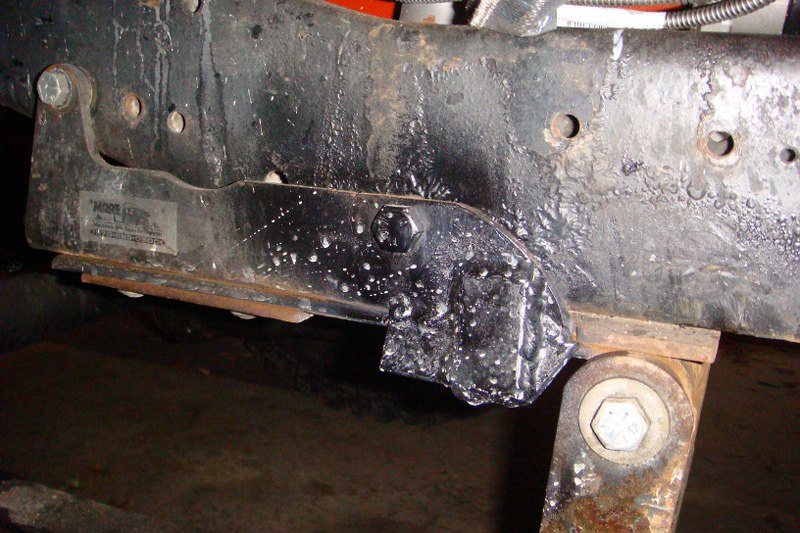
Still has a lean spot in it but it's better than it was. I think the limiting factor now is the converter - if I connect the vacuum to the top it kills the engine. Very confusing.
4 May 08 - I replaced the front calipers with new stock units, because I figured out they both were frozen. The right one immediately puked all the fluid out on the ground. I've never had a copper seal leak before. I'm going to check it out, but right now I'm thinking Autozone has crappy brake parts. If it proves different I'll modify this post. Fair enough? LOL I've done some other work on it but not frame-up related, so that all went on a different page.
17 Aug 08 - Summer has been taken up by family and work, not a lot of time for Grape 8. BUT I did, I think, get the brake situation figured out. I now have:
'82 Corvette master cylinder; '82 Corvette proportioning valve; '82 CJ front calipers, '82 Buick Riviera back calipers. It doesn't throw me through the windshield like I want but at least I can drive it.
20 Sep 08 - Brakes are good, moved on to fixing the oil leak. Had to cut away part of the firewall to get to it. It was either that or pull the engine, since I didn't leave enough room back there to get a wrench on the thing. Oh well, now I can set my timing easily!
I've clocked the transfer case, clearanced the skid plate, reinforcing the back so it can support the transmission. Fixed the shackle inversion while braking situation. Wired up the ECTED locker. I'm about to take it off-road for its first shakedown, but need to put in the emergency brakes first - hate to find out that downhill in low range is too much for the brake system, and end up testing my roll cage.
I figured out the "lean spot" in the propane system was actually the fuel cones sticking. Got it cleaned up and it's within reason now, but still needs adjustment to be in the green. My vacuum lines were run incorrectly, so once again, Franz Hoffman to the rescue. What a guy!
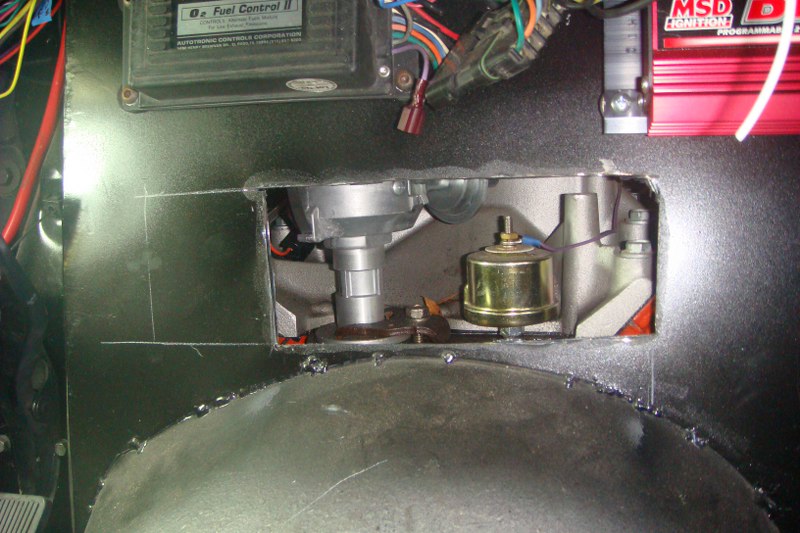
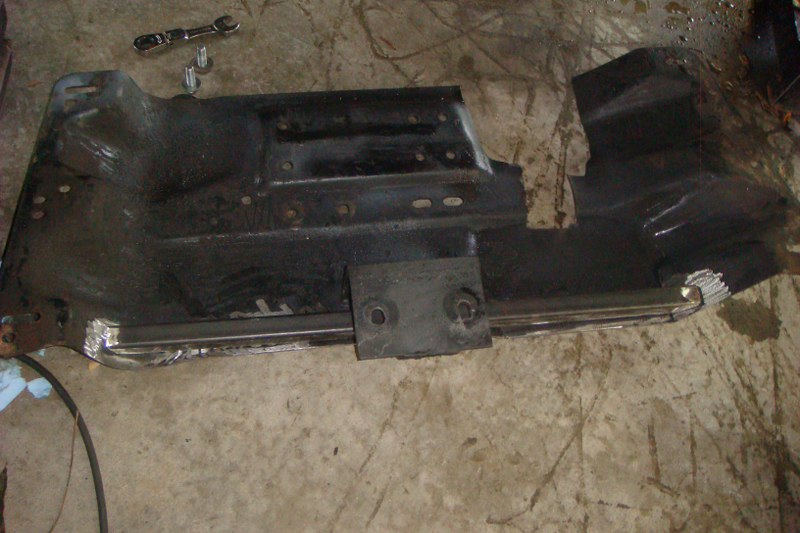
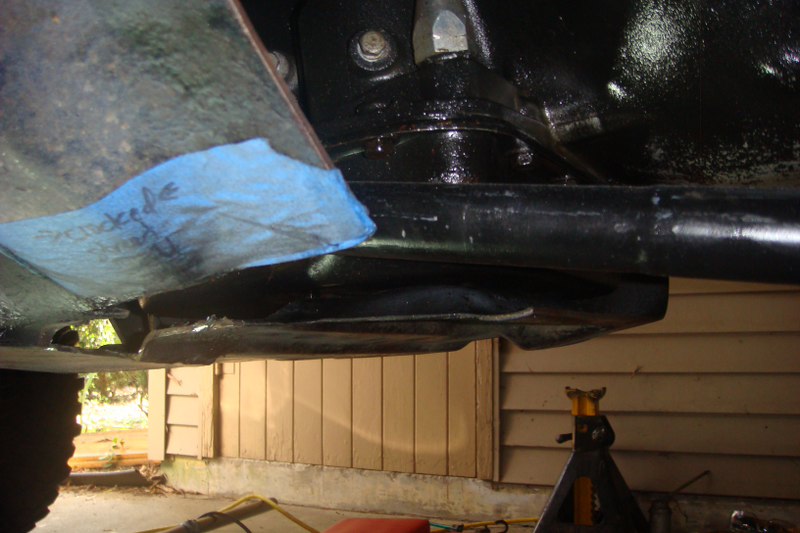


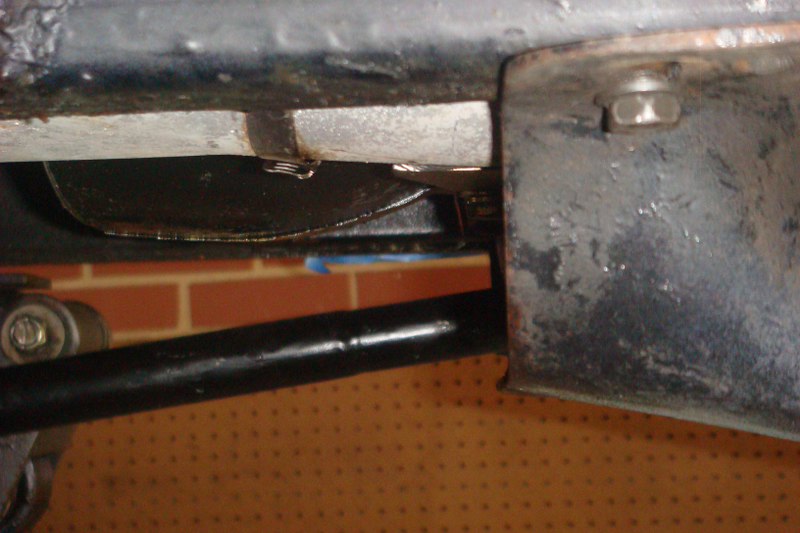

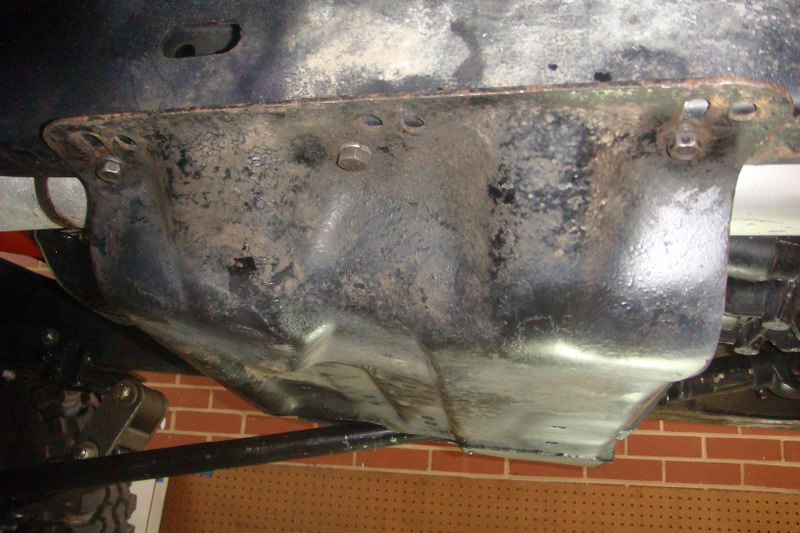


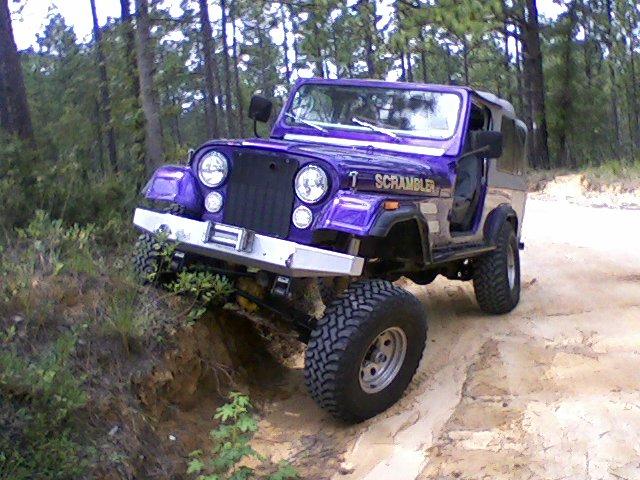
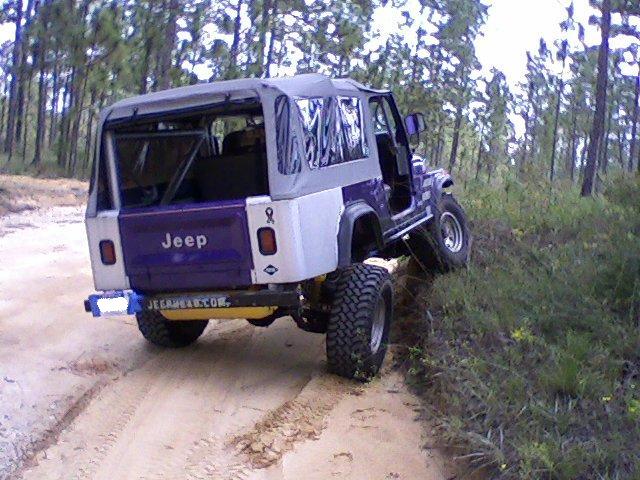
9 OCT 08 - I've managed to get the propane fuel rod rests punched down so it runs rich ... now I can connect the tuning computer. But that'll be on the propane page. I got thh emergency brakes figured out too, pictures to follow. I used two TJ handles, grafted onto one TJ mid-bracket. Lokar GM universal cables into the parking brake on the calipers. Sounds easy, took a while, looks pretty good, might even work <gasp> So with that, my friends, I'm ready to go off-road for real. All further updates will be listed under the appropriate heading and thus ending the Great Grape 8 Frame-up, 2006-2008.
Scramblin' on!
| Body | Electrical | Driveline | Propane | Suspension |
Not affiliated with American Motors Corporation, Jeep® or Daimler-Chrysler. ©1999 OffRoad Vehicle Outfitters
![]()